Mailytica’s API#
This guide will provide you with all the information you need to connect and interact with Mailytica’s email classification capabilities through our API. Whether you’re developing custom email processing workflows or conducting email analytics, our API offers a comprehensive and reliable solution for automating email classification and extracting important insights.
Our API documentation covers all available calls, configuration options, and response fields to help you seamlessly integrate Mailytica’s email classification functionalities into your applications.
Connecting to Mailytica’s API#
Generate an API Token#
To access Mailytica’s API, you will need a unique API token. You can obtain this token after signing up for an account on our online platform. After registering, the process goes as follows:
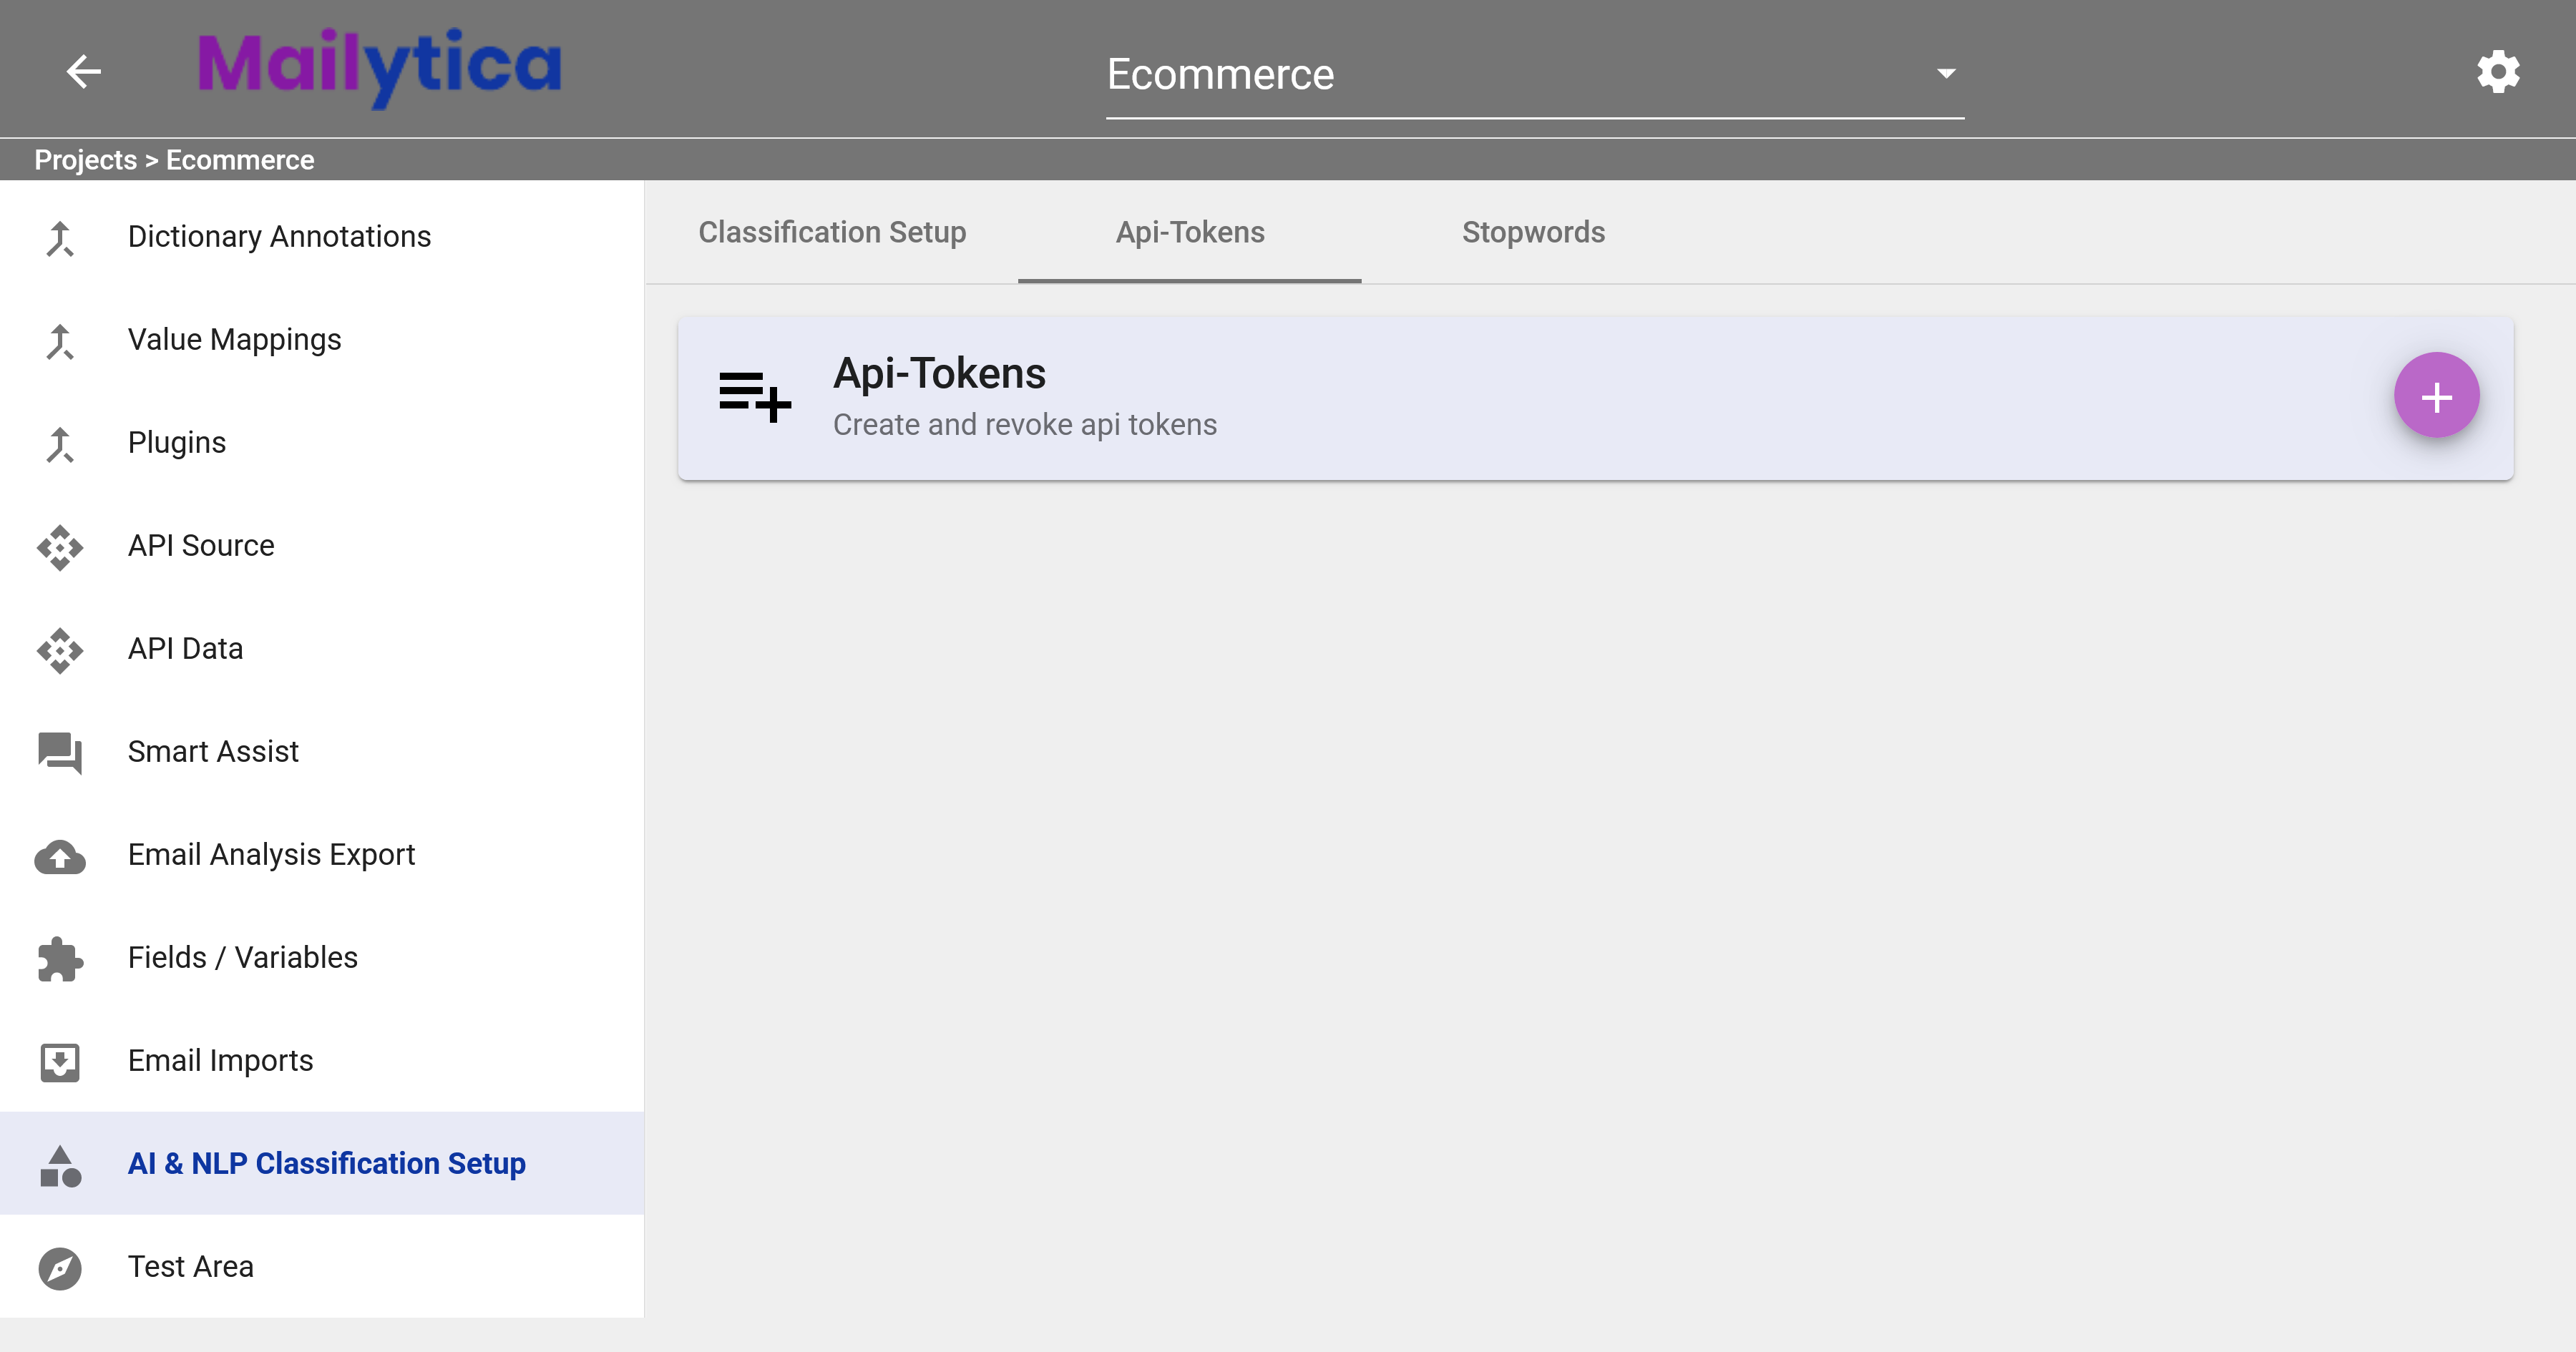
Log into Mailytica’s Online Portal and select the project that you will be using.
On the left menu, scroll down until you find the AI & NLP Classification Setup section.
Within the AI & NLP Classification Setup section, select API-Tokens from the top tab bar.
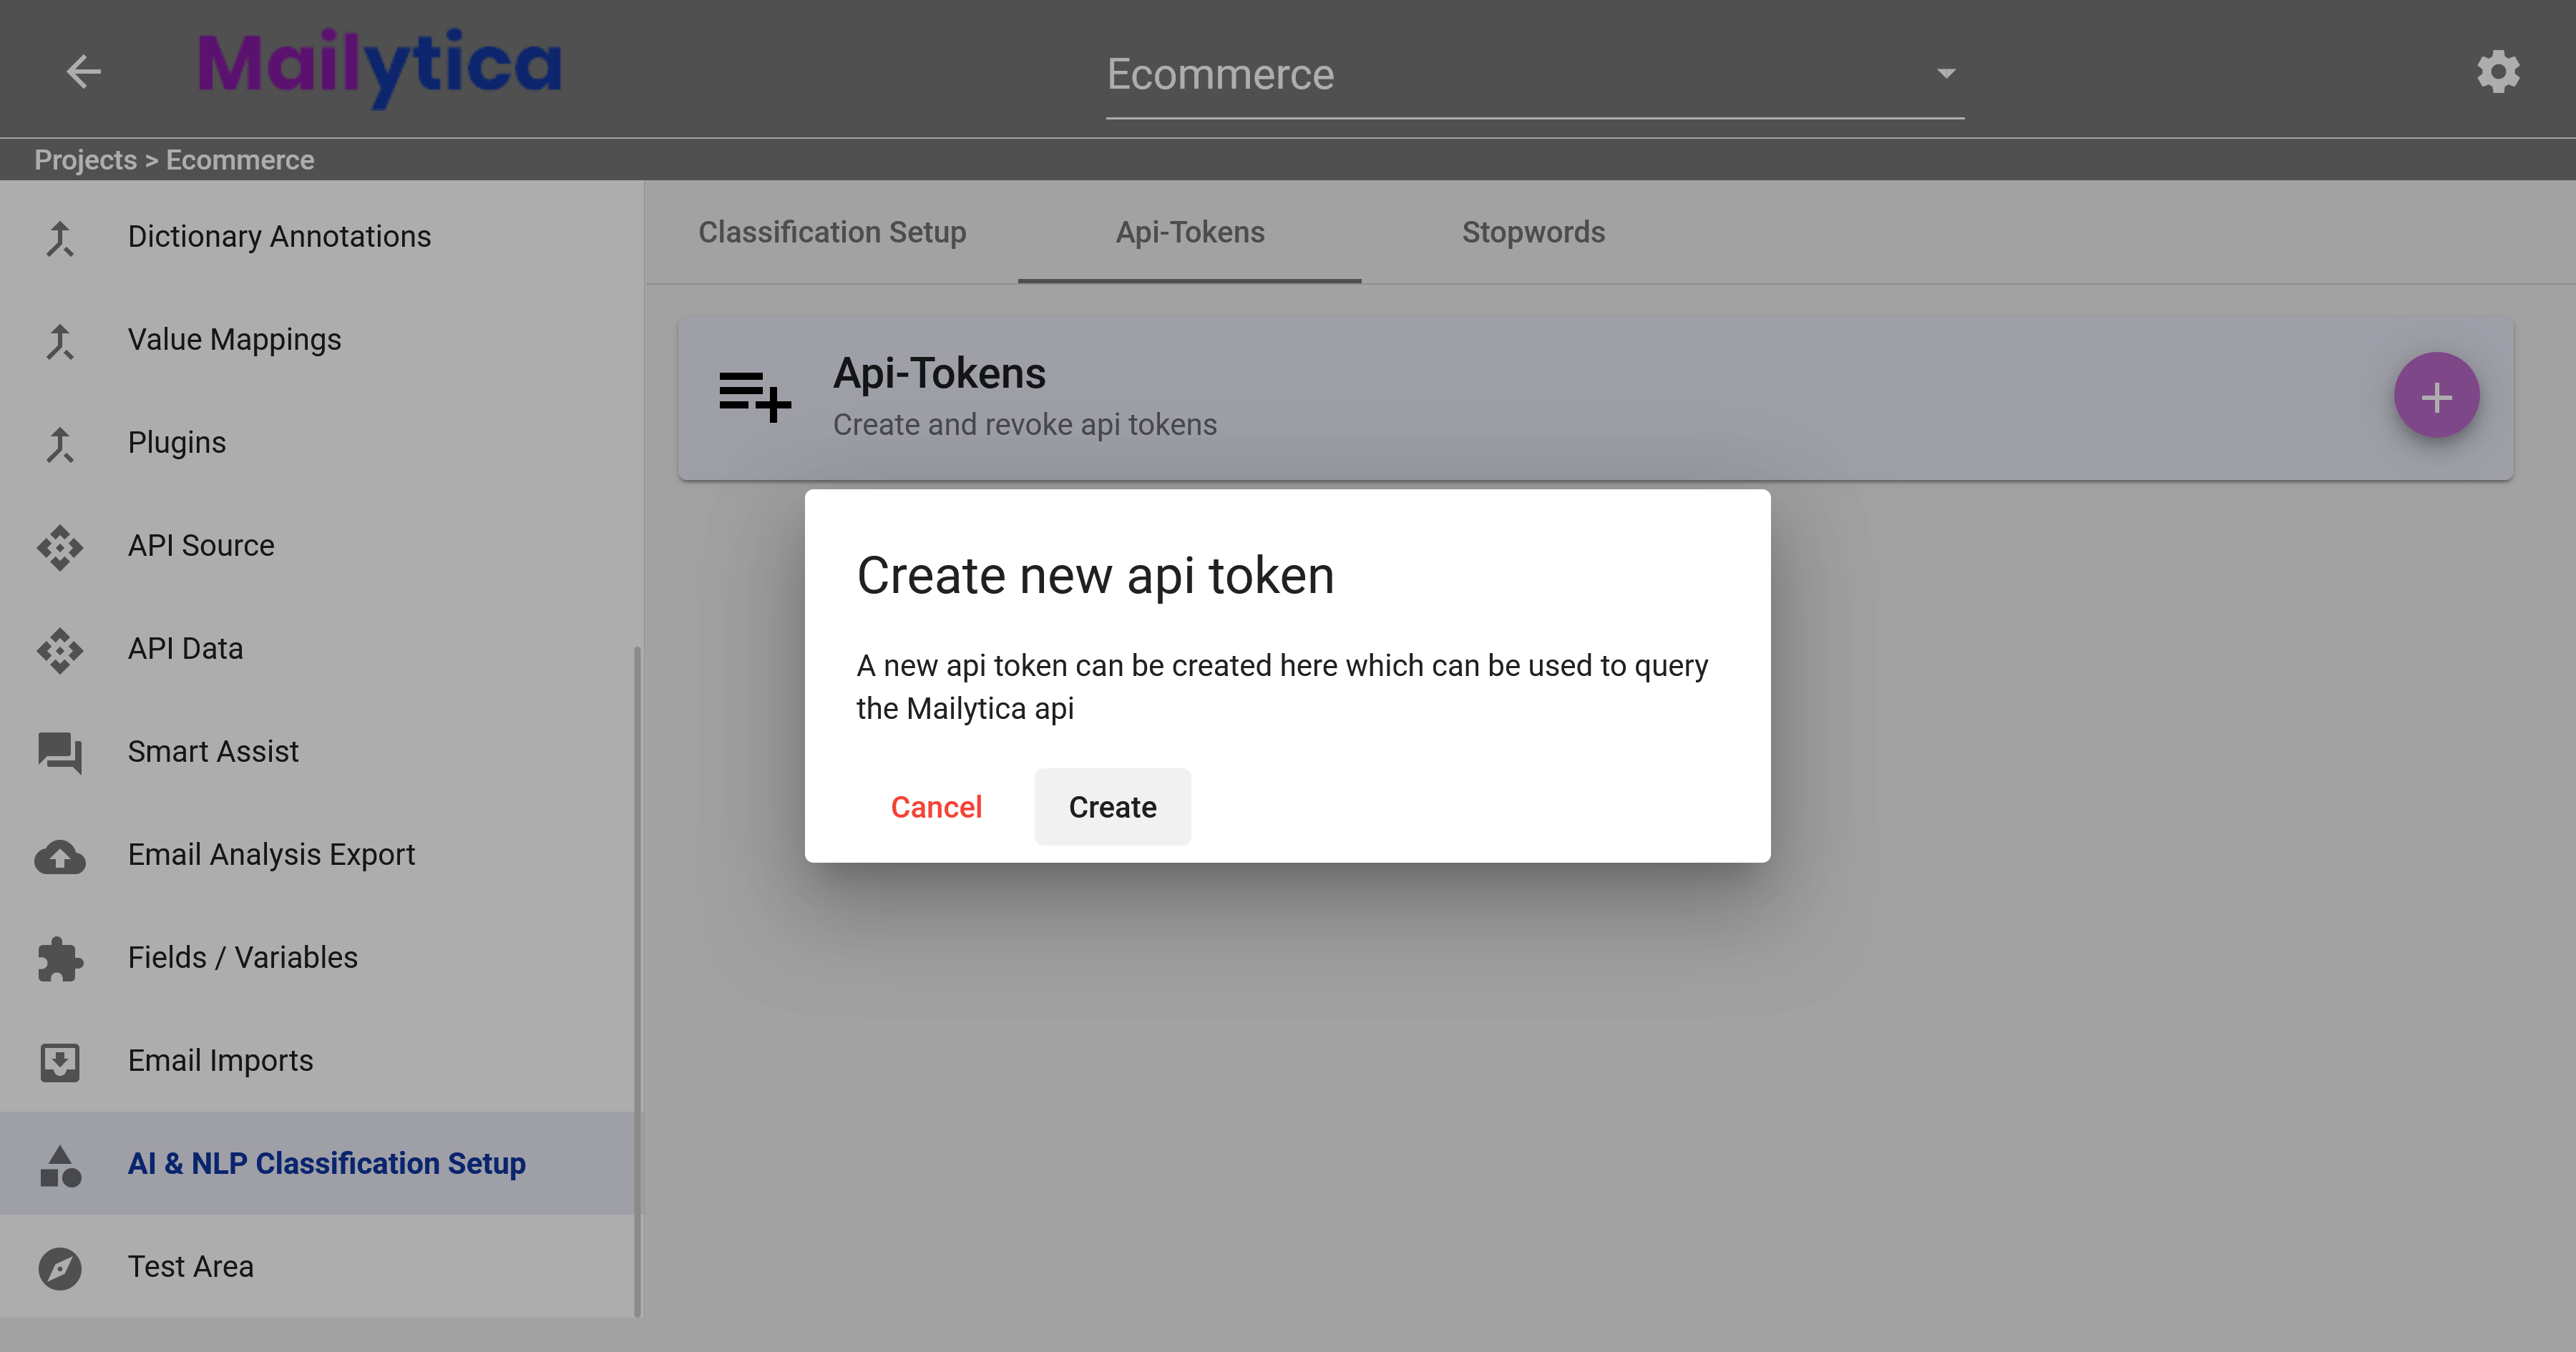
Click the button next to API-Tokens. A dialog box will appear. Click Create to generate your API token.
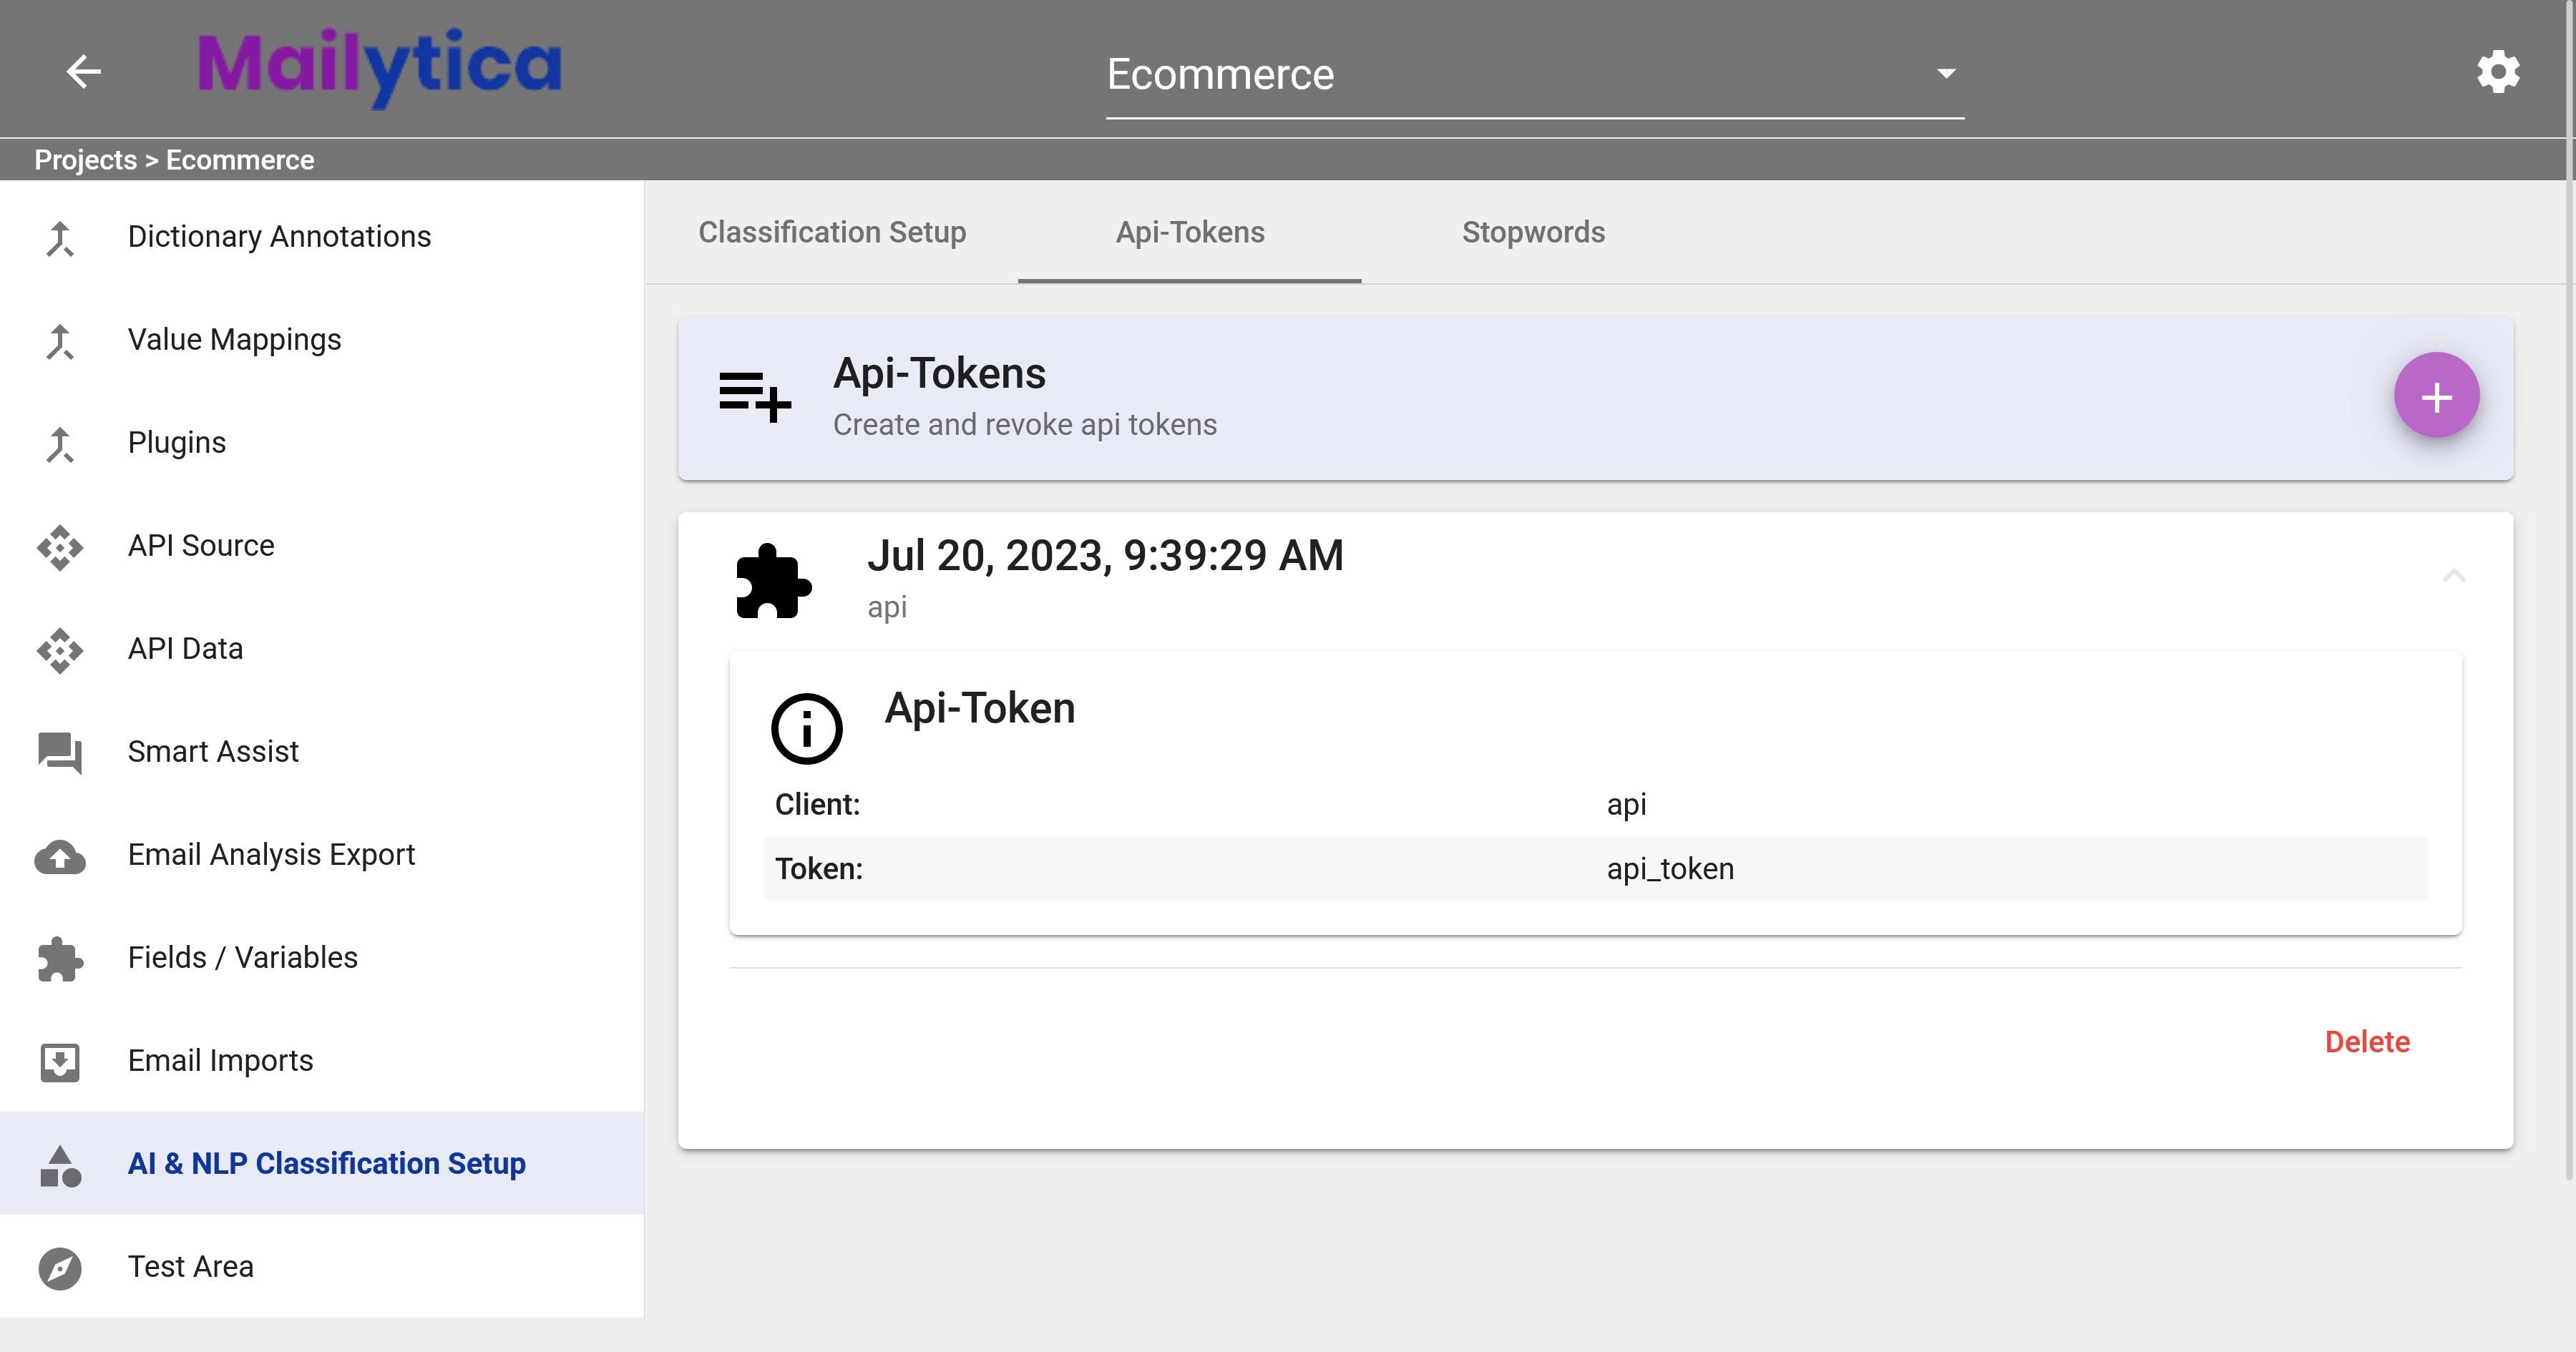
From the list, select the newly created token and simply copy it.
Configure API Base URL#
To use Mailytica’s API, configure your application to send HTTPS requests to the API’s base URL, which is https://api.mailytica.ai. This ensures that all your API requests are correctly routed to the right endpoint.
If you’re using Postman, you can easily configure a variable to store the API base URL.
To do so, simply create a new variable with the key baseUrl and set its value to https://api.mailytica.ai.
Now, whenever you need to use Mailytica’s API base URL in your requests, you can reference the baseUrl variable as {{baseUrl}}.
Variable |
Value |
|---|---|
baseUrl |
Set Up API Authentication#
To ensure secure communication between your application and Mailytica’s API, it’s important to authenticate your requests using bearer token authentication. Set your API token as the bearer token value in the Authorization header of your HTTP requests. This will verify your identity and authorize access to Mailytica’s email classification capabilities.
curl ...
--header 'Authorization: Bearer your-api-token'
API Calls#
classifyMessage#
Mailytica’s API allows you to classify messages using two options: manually passing the JSON structure or sending the email message source code. You can choose the option that better suits your needs.
This endpoint can use different types of models to analyze the message content and metadata, and classify messages according to the topics available in Mailytica’s online portal.
Option 1: Manually Pass the JSON Structure#
To manually pass the JSON structure for classifying a message, you have to make a POST request to the following endpoint:
curl -X POST --location 'https://api.mailytica.ai/api/classifyMessage'
--header 'Content-Type: application/json'
--header 'Authorization: Bearer your-api-token'
In the request body, include a JSON file with the following properties:
{
"messageId":"Unique identifier for the email message",
"subject":"Subject line of the email message",
"sender":"Sender's name and email address",
"recipients":"Array of recipient's name and email address (inside square brackets [])",
"message":"Text in the body of the email message",
"send":"Date and time stamp of the email message in machine-readable format (ISO 8601), YYYY-MM-DDThh:mm:ssZ"
}
Replace the placeholder values with the actual values for each property, for example:
{
"messageId":"1234",
"subject":"Order #98237",
"sender":"Ella Rogers <ella.rogers@gmail.com>",
"recipients":["Customer Support <support@company.com>"],
"message":"Hello, I hope you're doing well. I wanted to get a status update on my last order #98237. When can I expect it to ship? Thanks.",
"send":"2023-07-04T08:17:00Z"
}

Important
The message field can accept both plain text and HTML formatted text. If present, Mailytica will automatically take care of parsing the HTML tags.
By sending this JSON file in the POST request, Mailytica will be able to process the message and generate the corresponding classification result.
Option 2: Pass Email Message Source Code#
On the other hand, to classify a message by sending the email message source code, make a POST request to the following endpoint:
curl -X POST --location 'https://api.mailytica.ai/api/classifyMessage'
--header 'Content-Type: message/rfc822'
--header 'Authorization: Bearer your-api-token'
Then, in the request body, simply include the raw email message source code obtained directly from your email client. This source code should be unaltered and provided without any manual data manipulation.
For instance, to view an email message’s source code in Outlook just open the desired email message, click the three dots at the top-right of the panel, choose View and then View message details. The message’s source code format will be displayed in Outlook.
By passing the unmodified source code to Mailytica, you eliminate the need for any manual data manipulation or creation of JSON files.
API Response#
Regardless of the option you choose, the API call classifyMessage will result in the same API response format. Upon successfully submitting the POST request, the API response will include the following details:
Property |
Meaning |
|---|---|
classifications |
An array that represents the topic classification assigned to the message by Mailytica |
classifications[].confidence |
The confidence level of the classification |
classifications[].label |
The label or name of the classification |
classifications[].topicId |
The unique identifier for the topic associated with the classification |
language |
The language code (e.g., EN for English) for the classification |
messageId |
The unique identifier for the email message |
If we make a call using the previous example, the API response would be as follows:
{
  "classifications": [
    {
      "confidence": 0.9532387433907485,
      "label": "Delivery status",
      "topicId": "1234"
    },
    {
      "confidence": 0.6,
      "label": "Standard",
      "topicId": "12345"
    }
  ],
  "language": "EN",
  "messageId": "123456"
}
This response indicates that Mailytica has classified the message with the topic Delivery status as the most prominent classification and with a high confidence level.
Status Codes#
Understanding the status codes returned by Mailytica’s API is critical in determining the success or failure of a request. Each status code conveys information about the result of the API call, which can help identify and fix potential issues that may arise during the development process.
In this sense, some possible status codes include:
200 OK: The API call was successful, and the requested data is returned.
401 Unauthorized: The provided credentials are invalid or unauthorized to access the requested resource. Double-check the authentication details.
429 Too Many Requests: The user has exceeded the rate limit set by the API. You should wait before sending further requests.
400 Bad Request: The API call couldn’t be processed due to issues like invalid parameters, incorrect syntax, or an incorrect JSON file. Review the request payload and ensure it is correctly formatted.