Connectors#
In order to use Mailytica’s features, you will need to connect your email account. Connecting your account to Mailytica is simple, and we have prepared detailed instructions for each type of account.
Exchange Web Services Account#
Exchange Web Services (EWS) is a protocol used by Microsoft Office 365 / Microsoft Outlook to access email, calendar, and contacts.
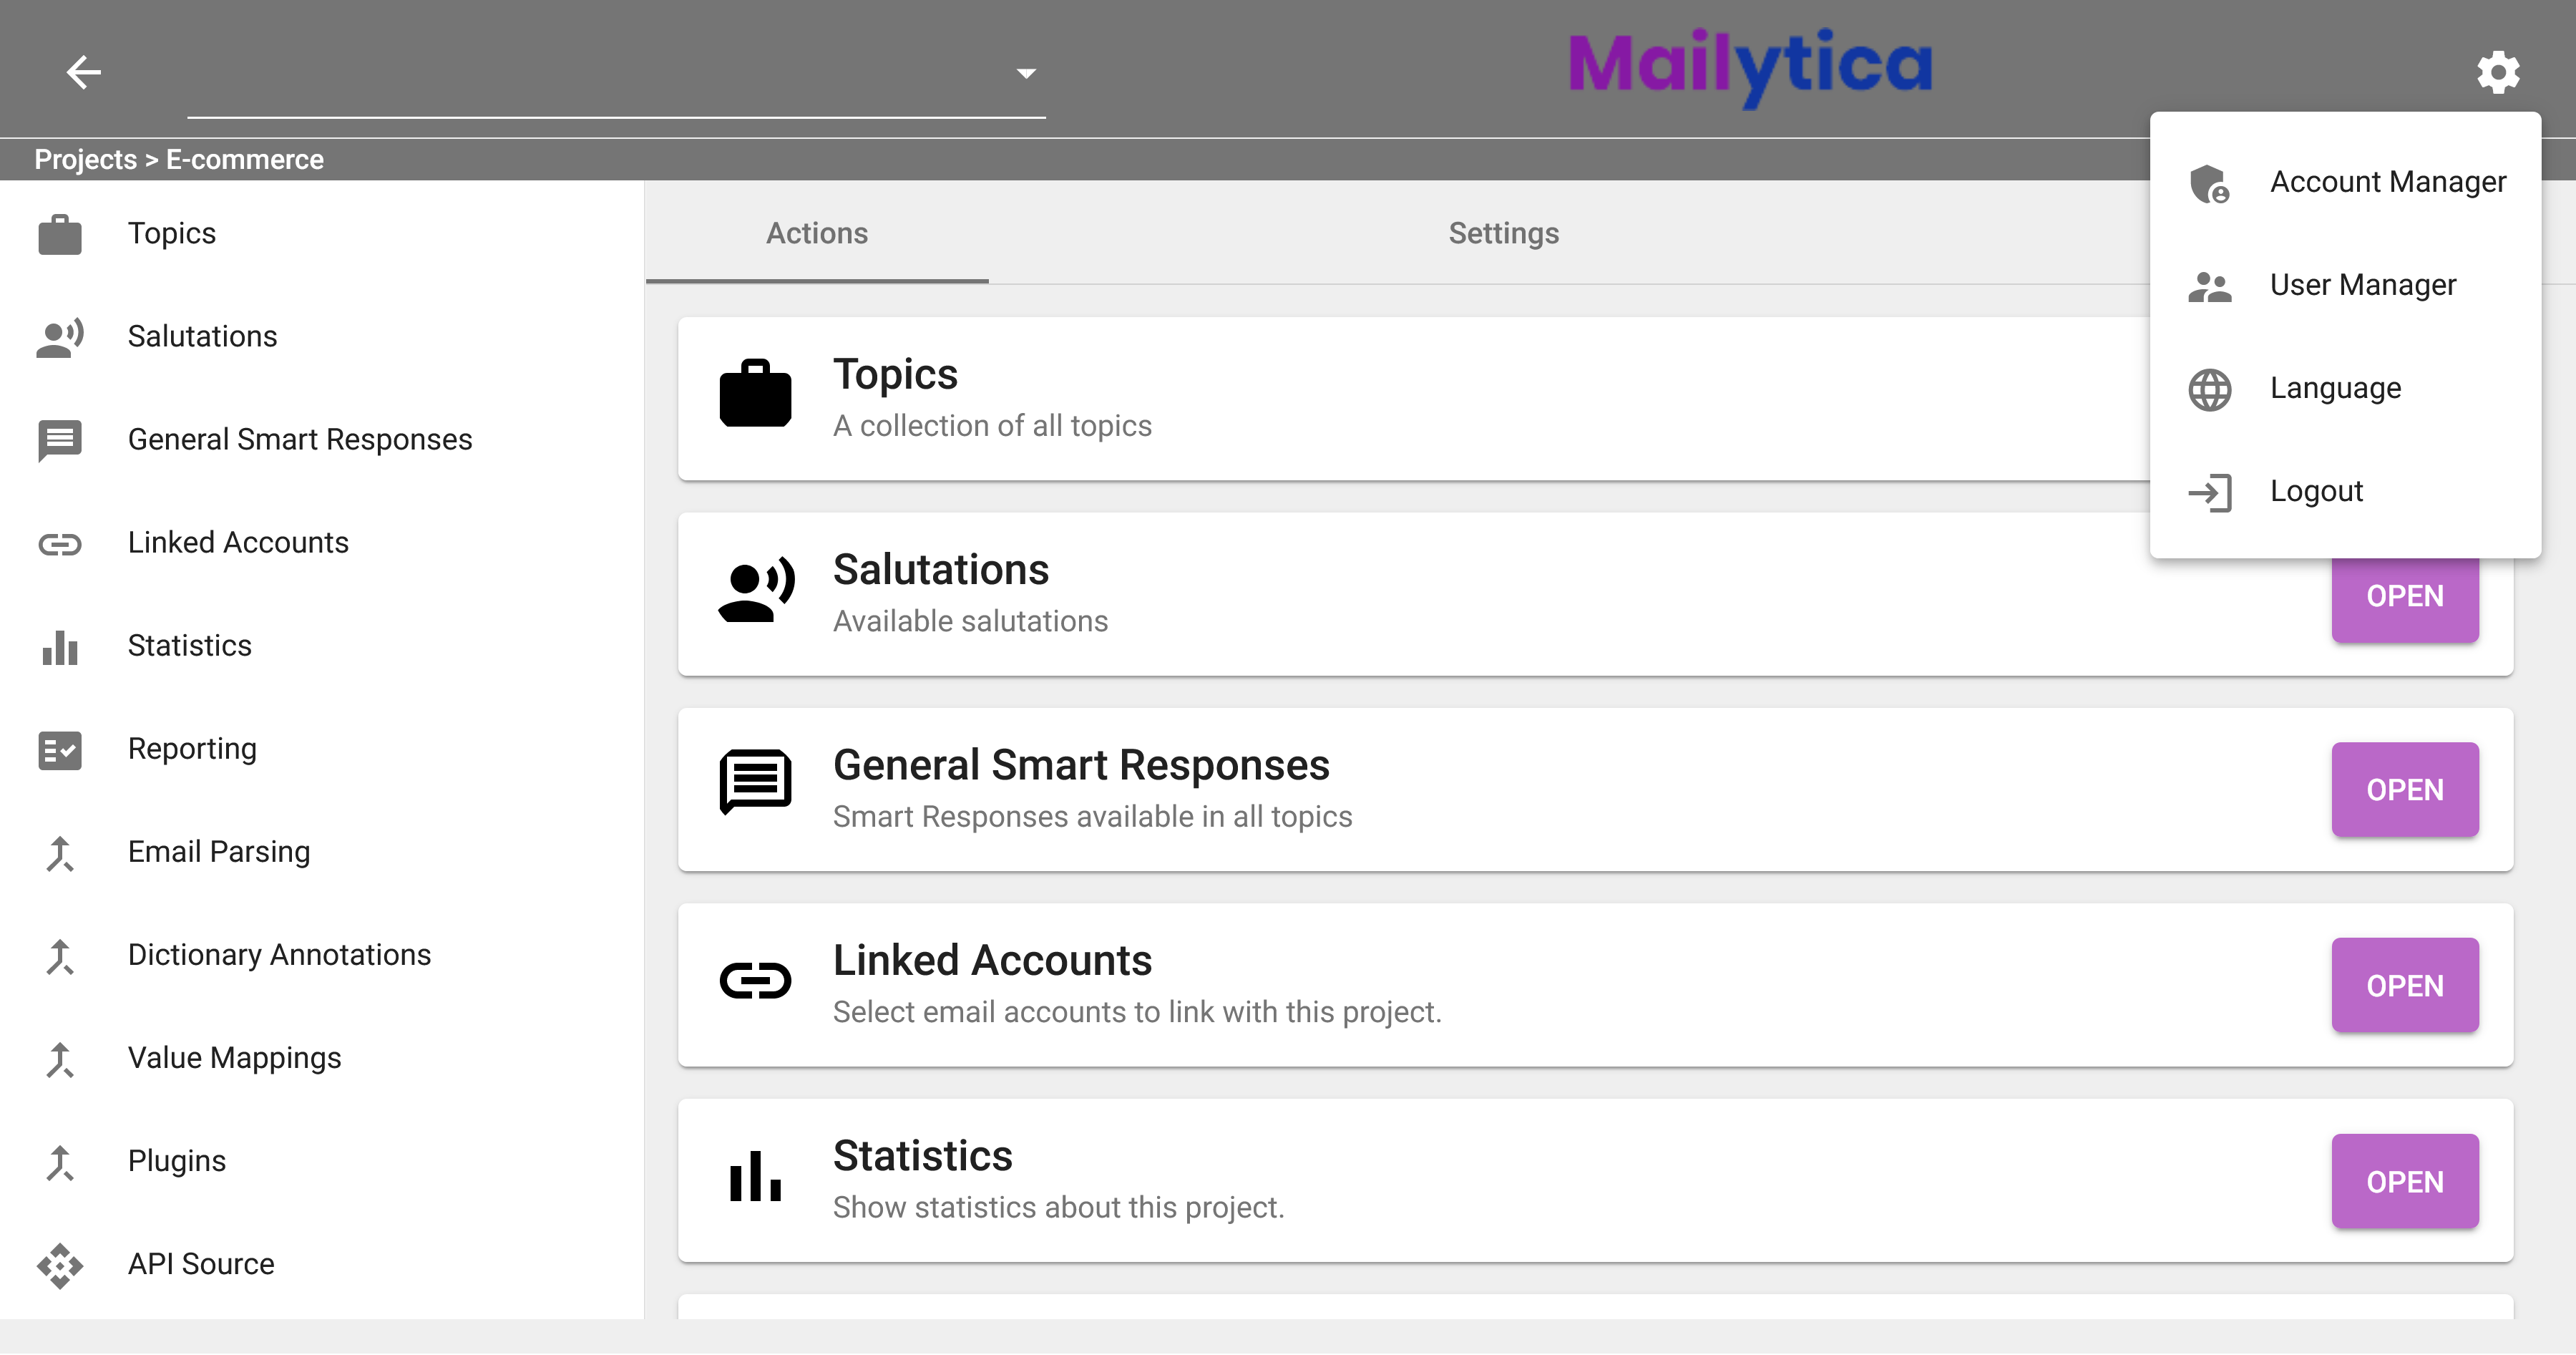
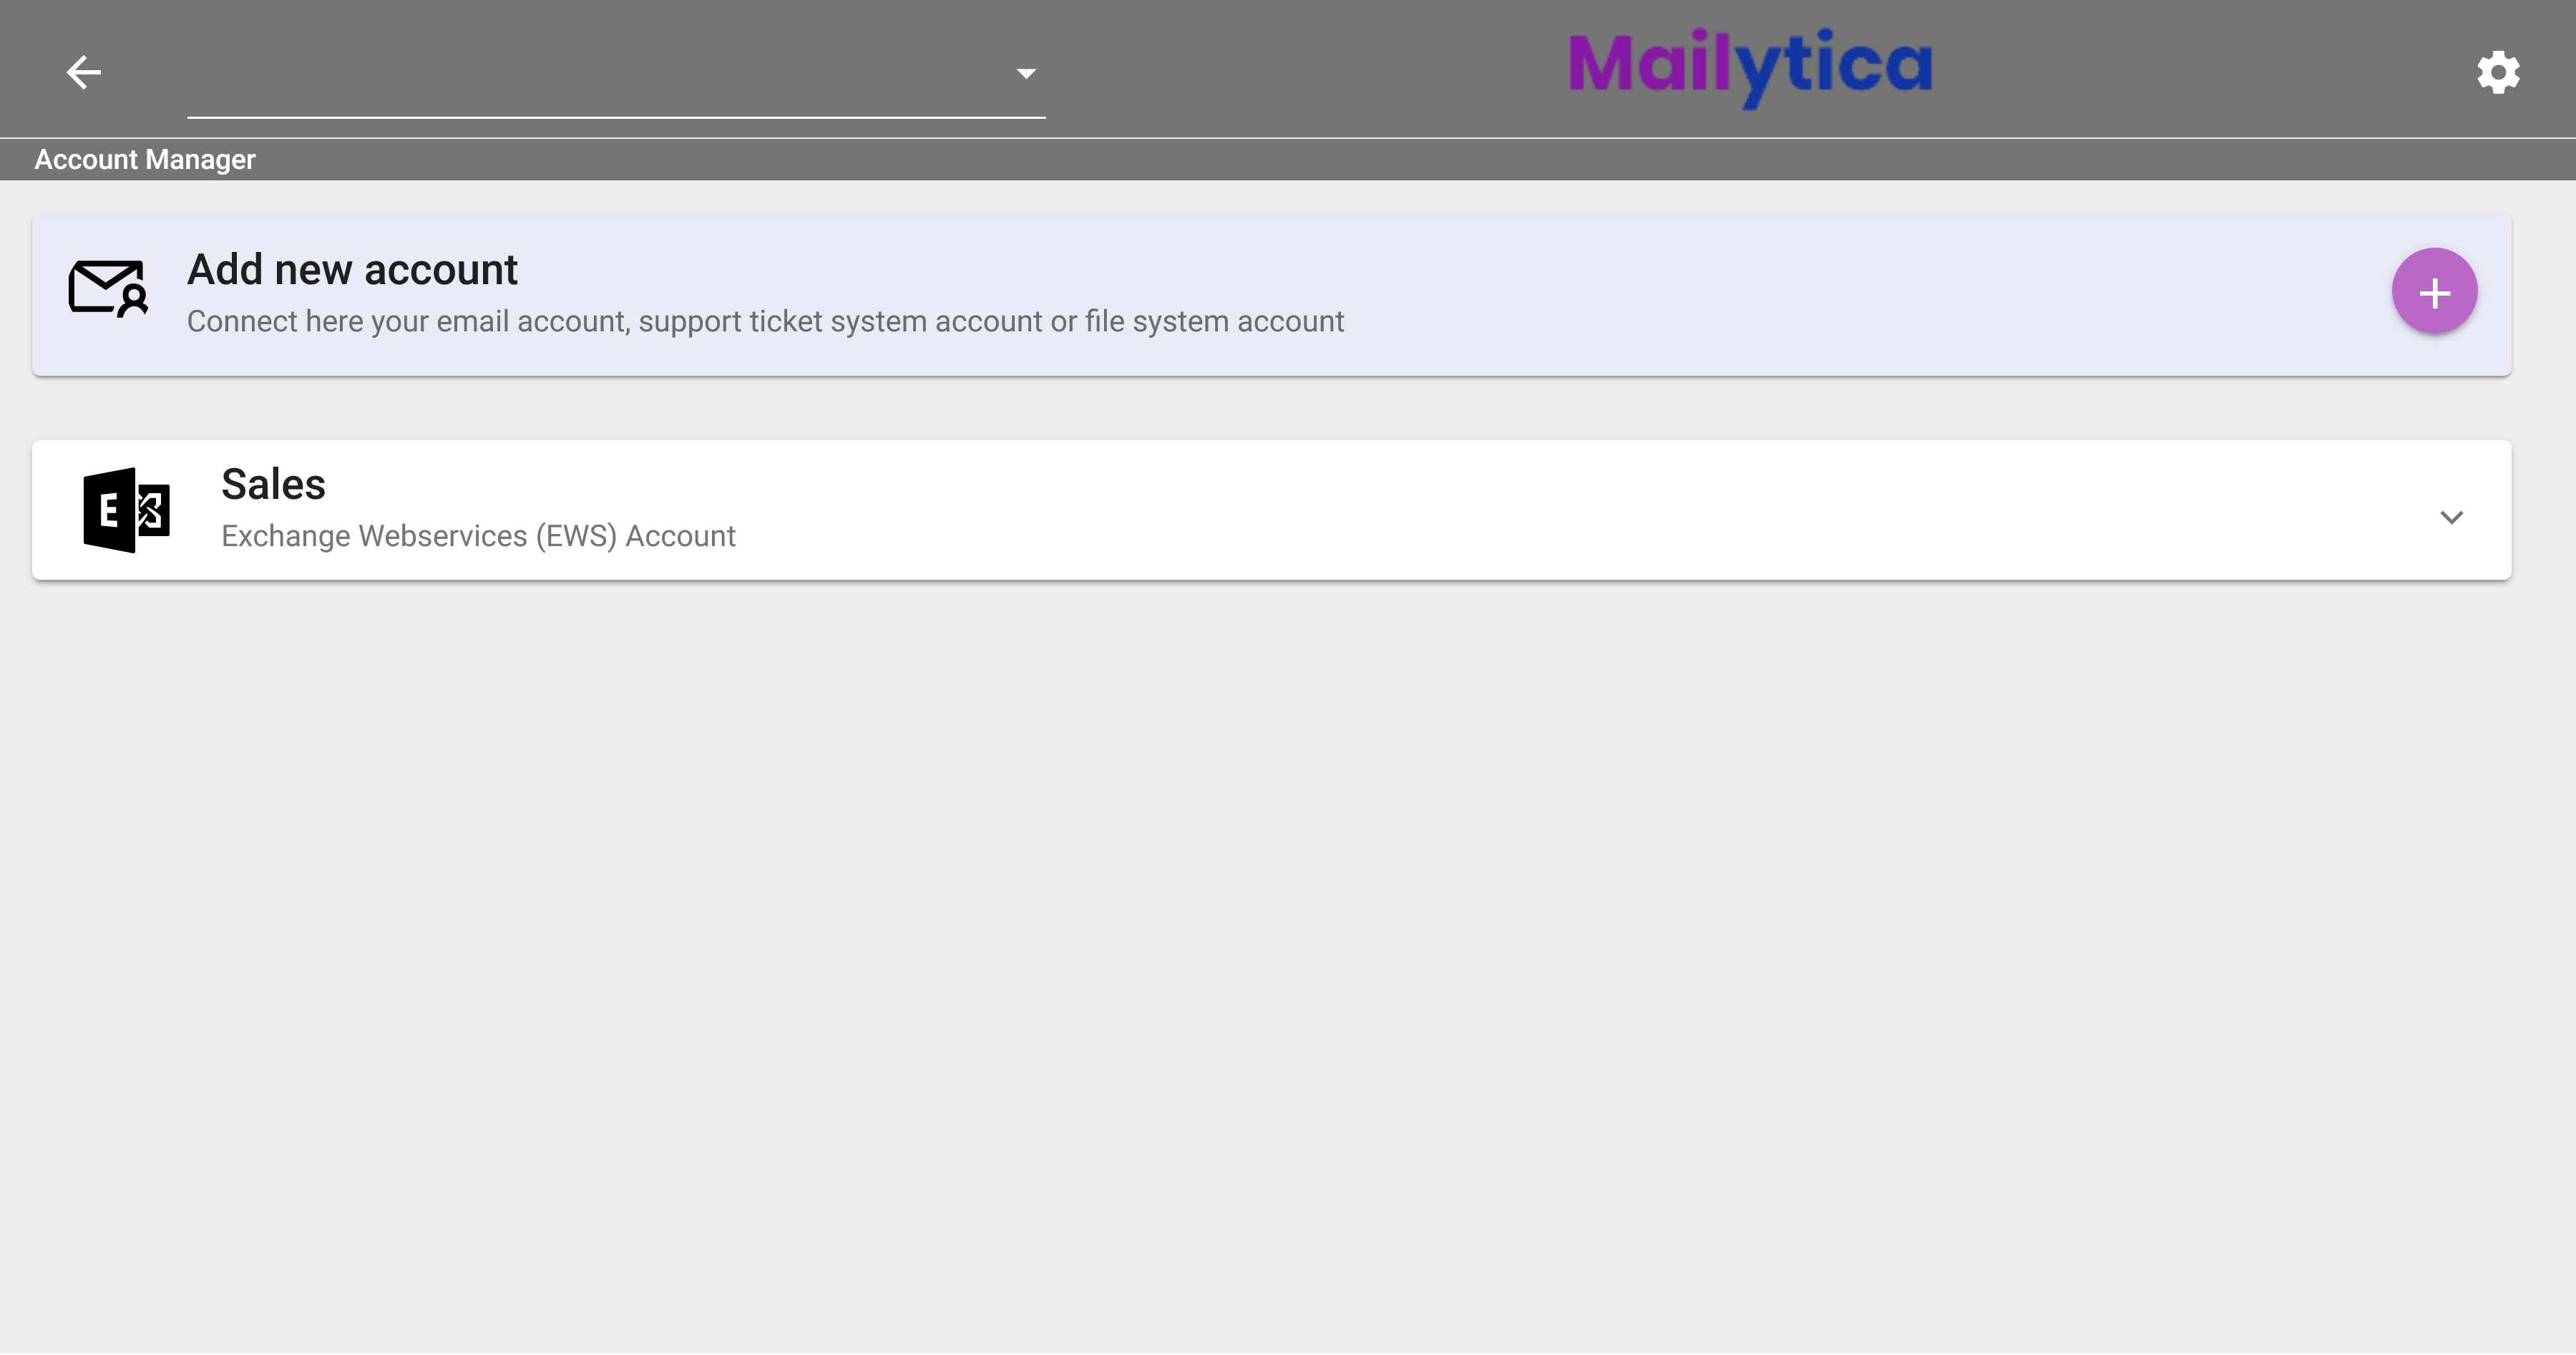
To connect a new EWS account to Mailytica, first log in to the Online Platform at mailytica.ai. Then, in the top right corner, click on the button to access the settings, and select Account Manager.
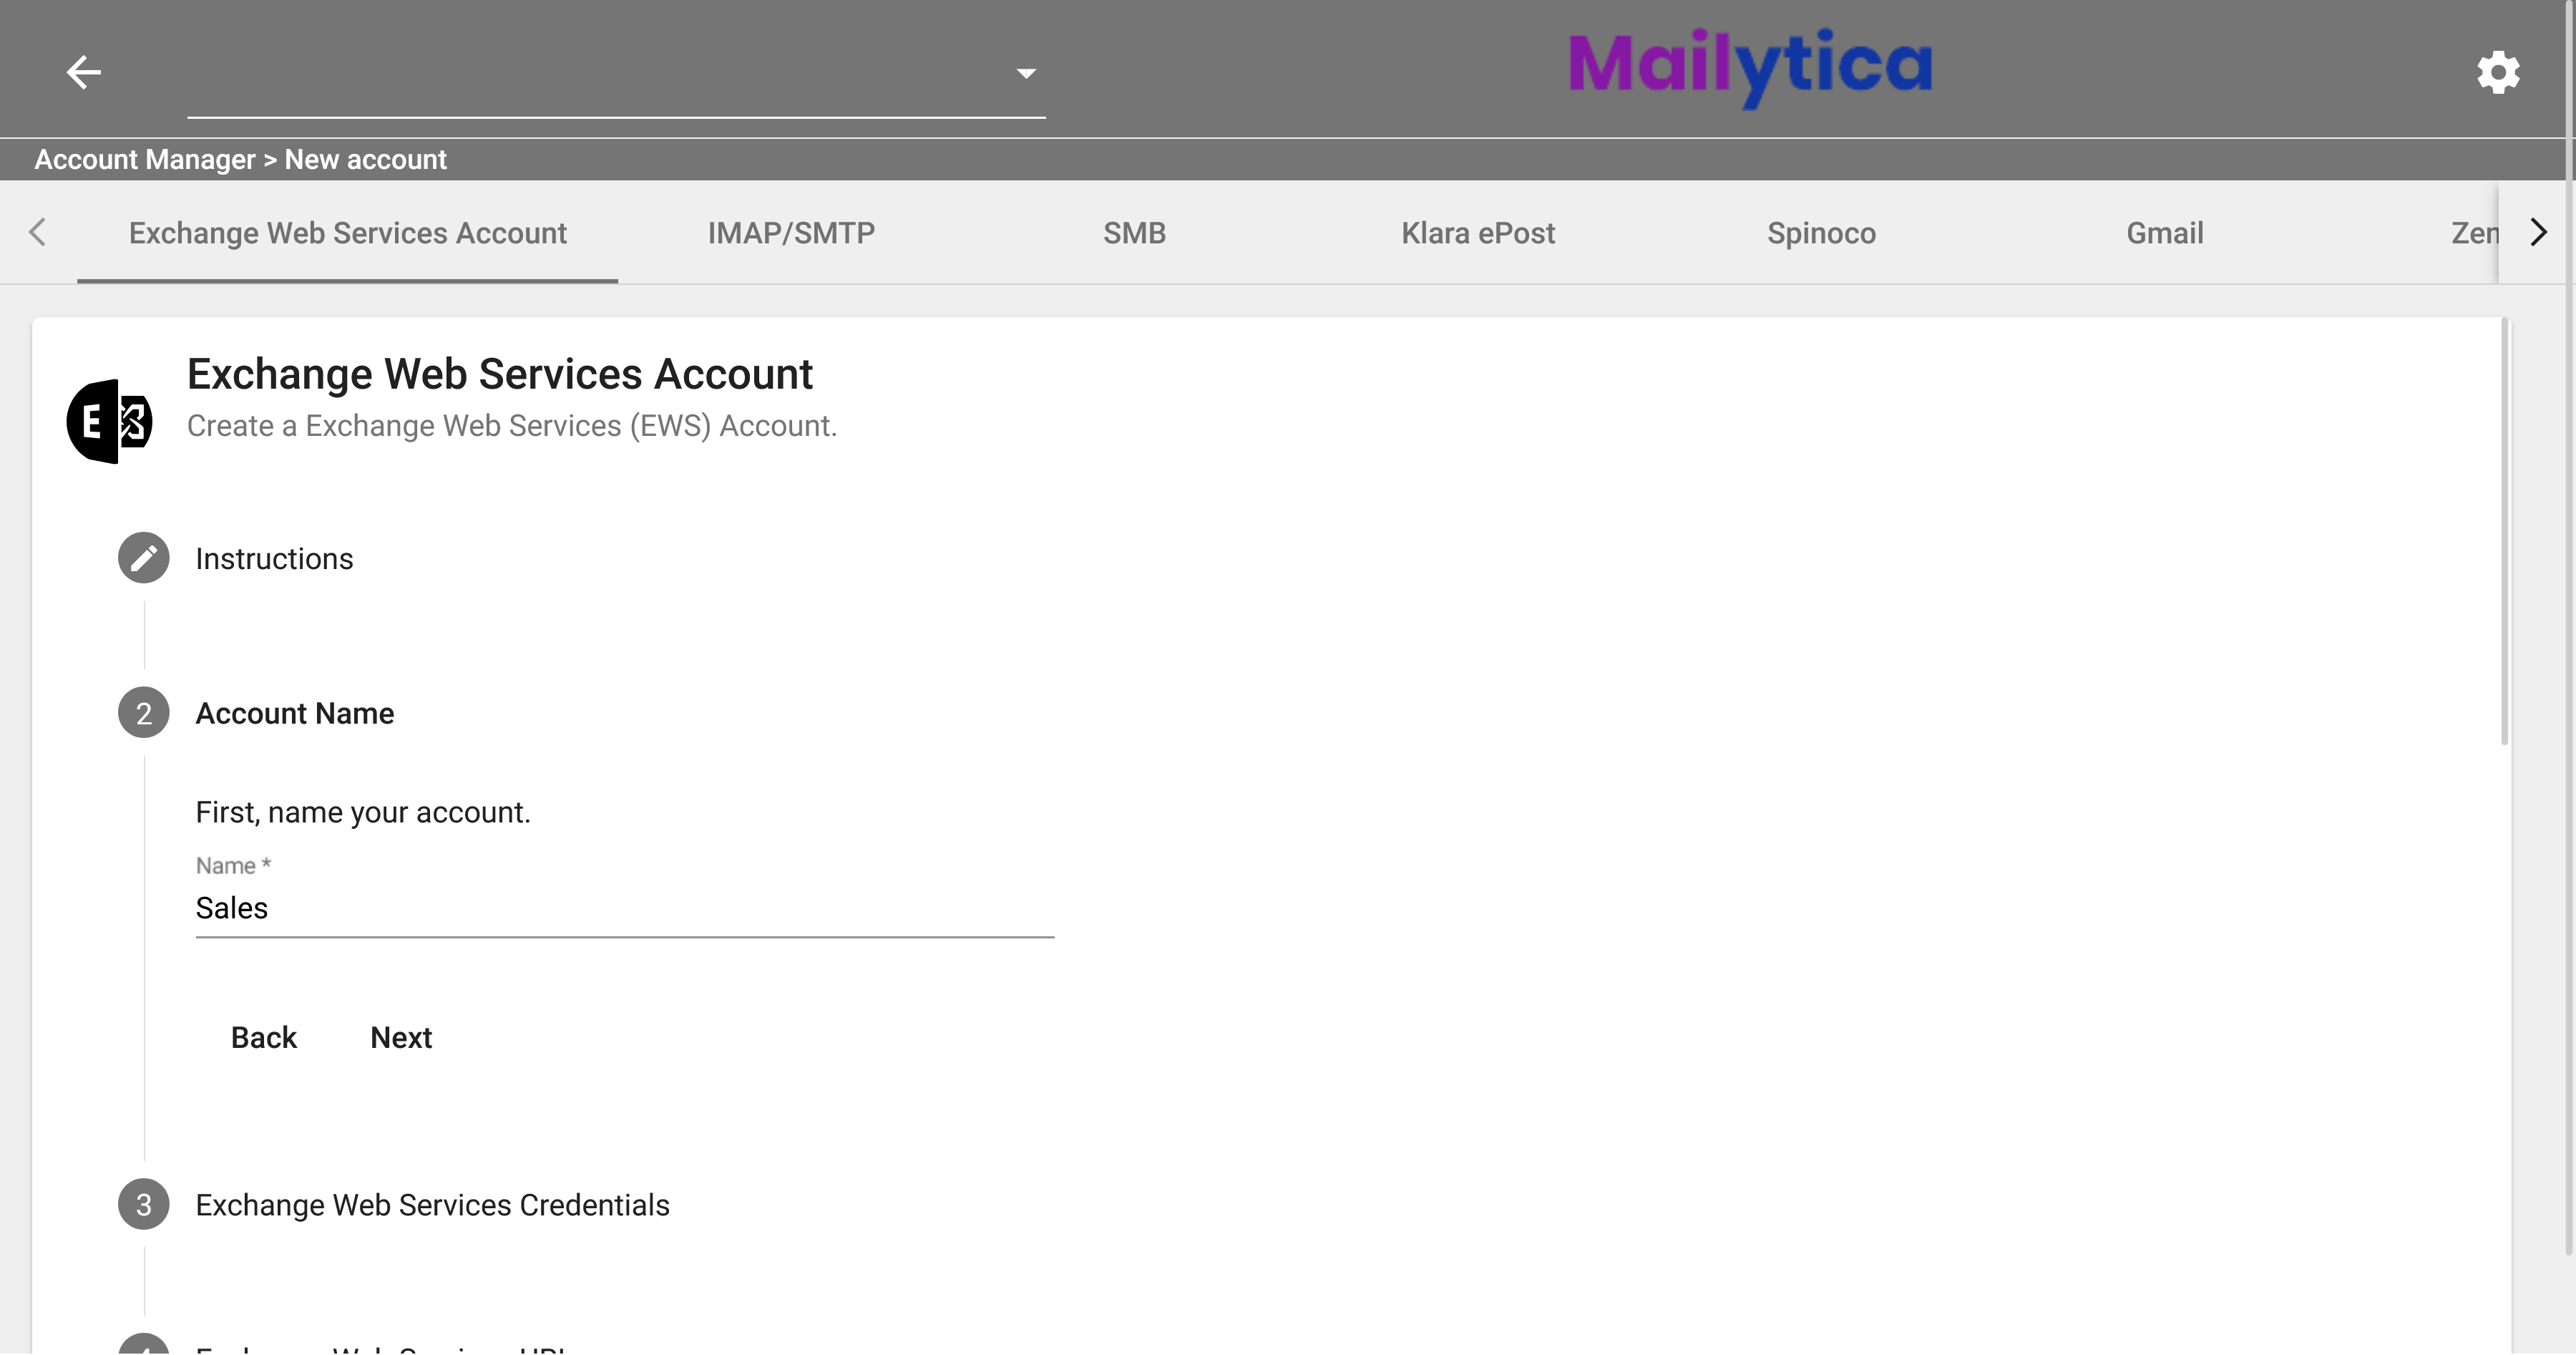
Once you’re in the Account Manager click the button next to Add new account and select Exchange Web Services Account from the top tab bar.
In the Account Name section, you can type a name that will identify your account inside Mailytica’s Online Platform. This is helpful if you have multiple accounts, so that you can easily tell them apart.
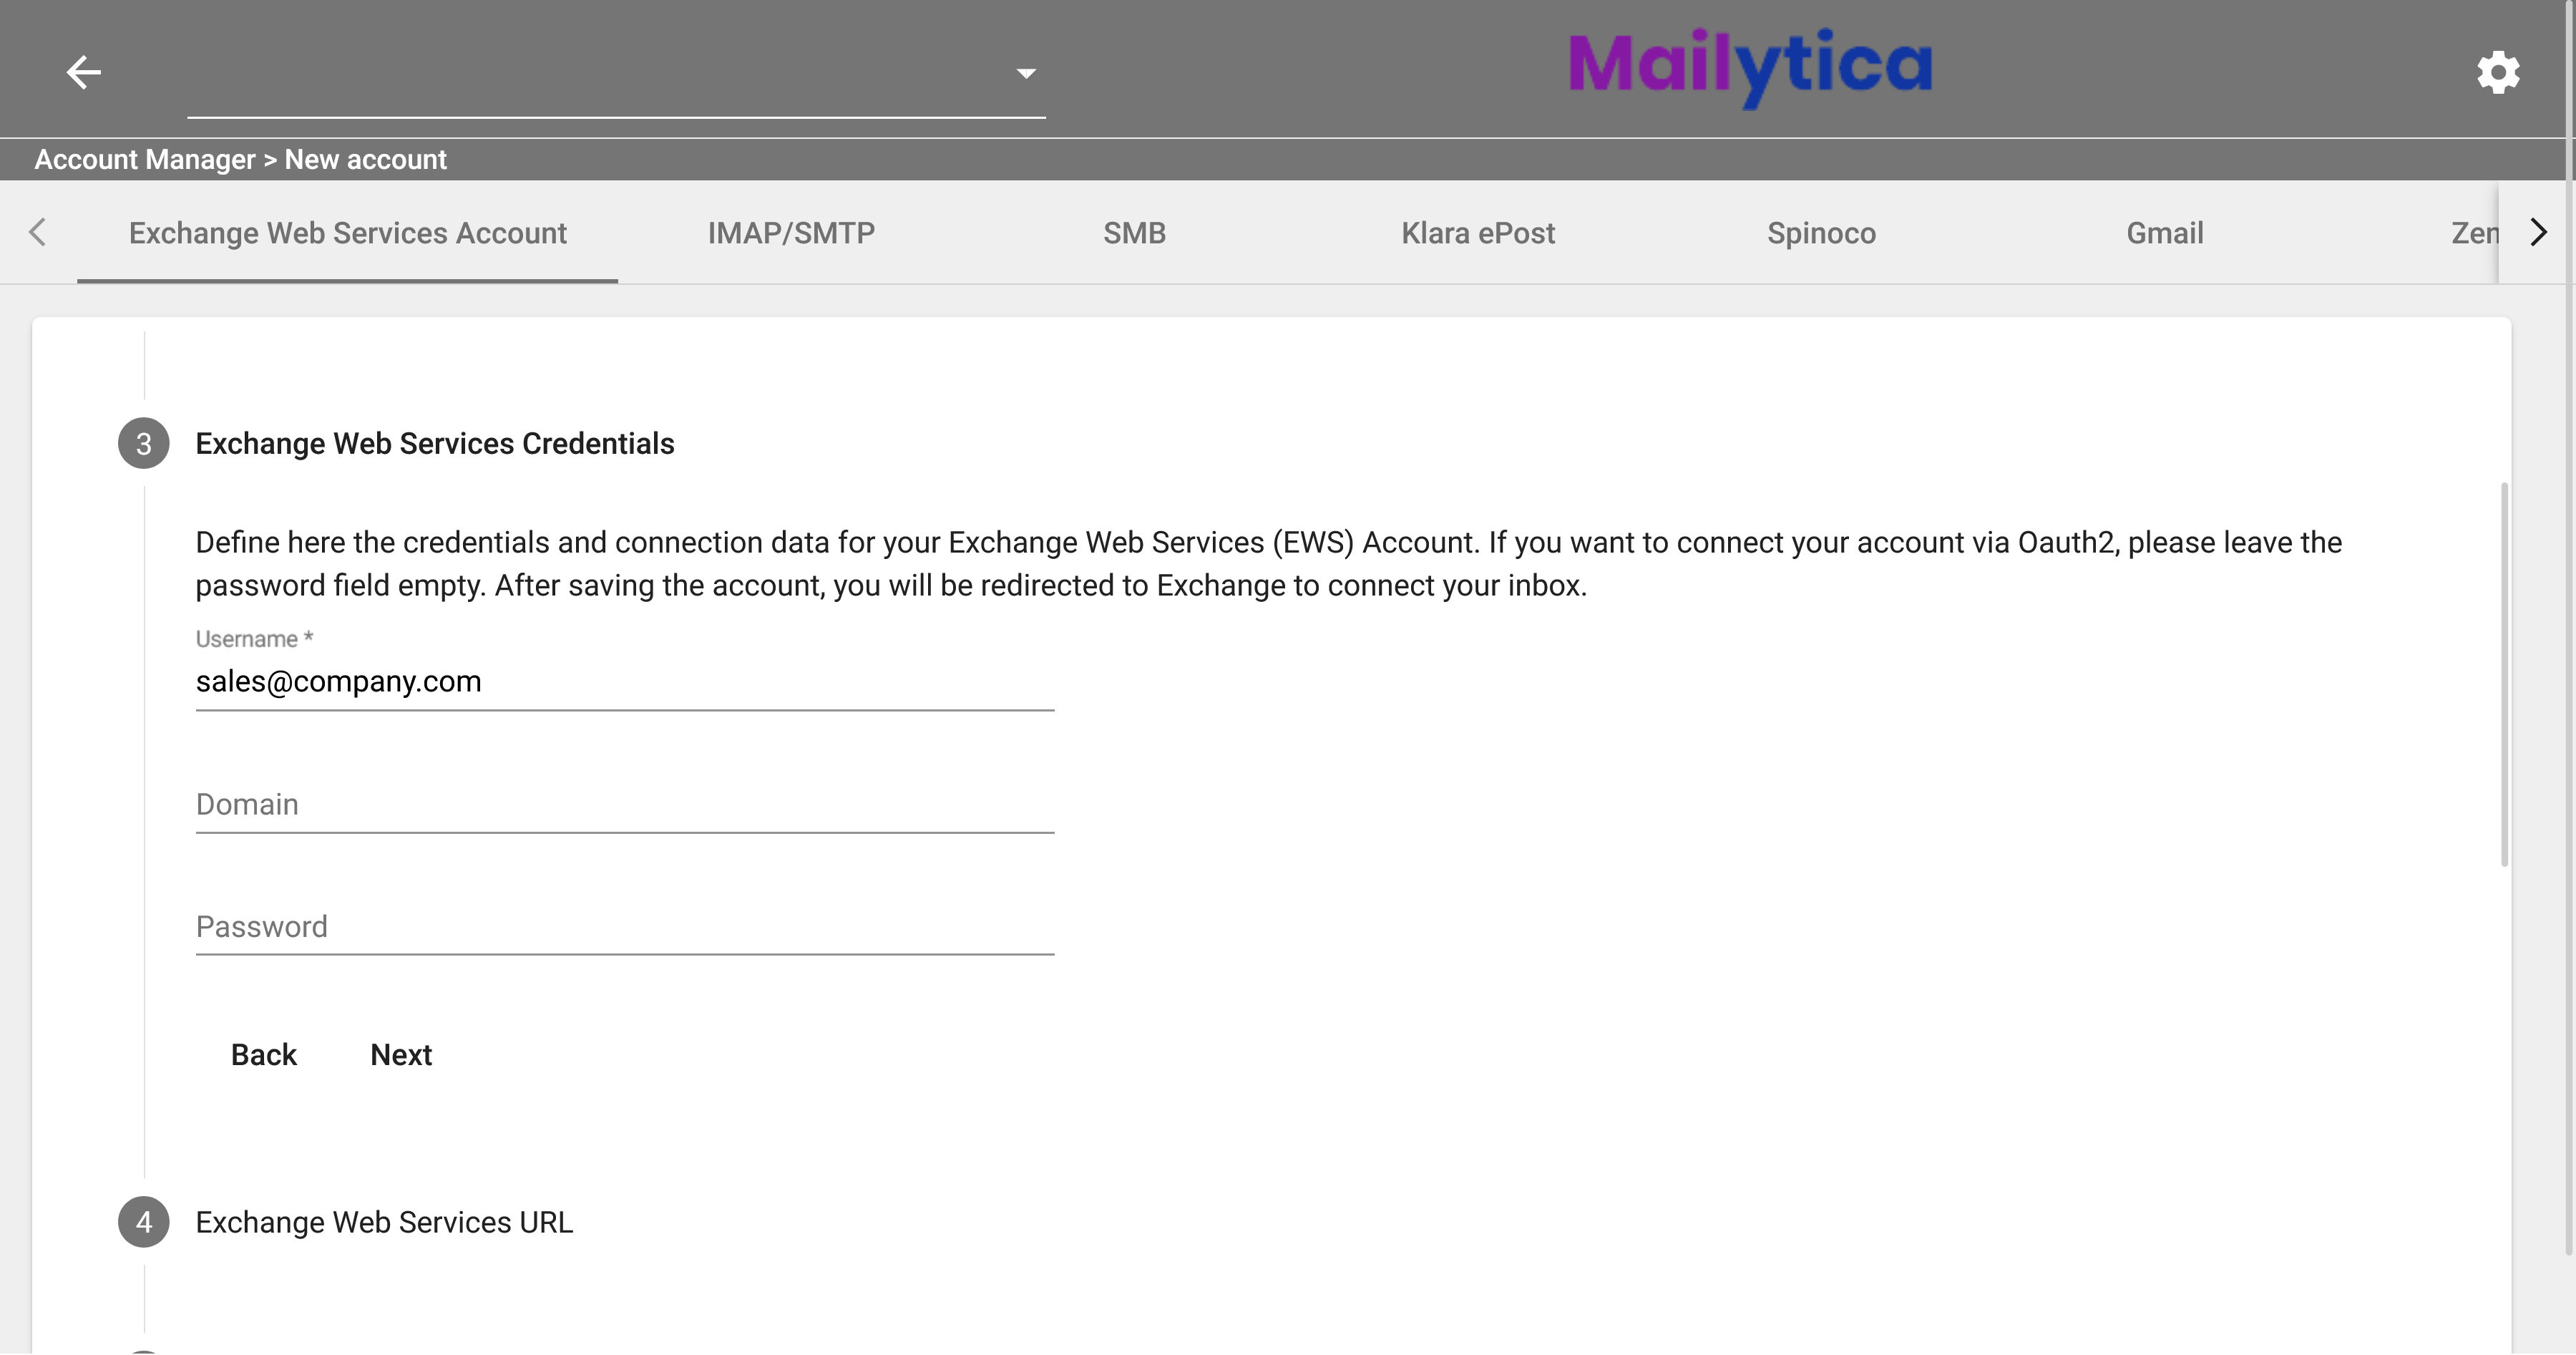
Next, in Exchange Web Services Credentials, you can define the credentials and connection data for your EWS account. In the Username field, type the email address that you wish to connect to. We recommend leaving the Domain and Password fields empty, so that you will be redirected to Microsoft’s website where you can log in using your credentials.
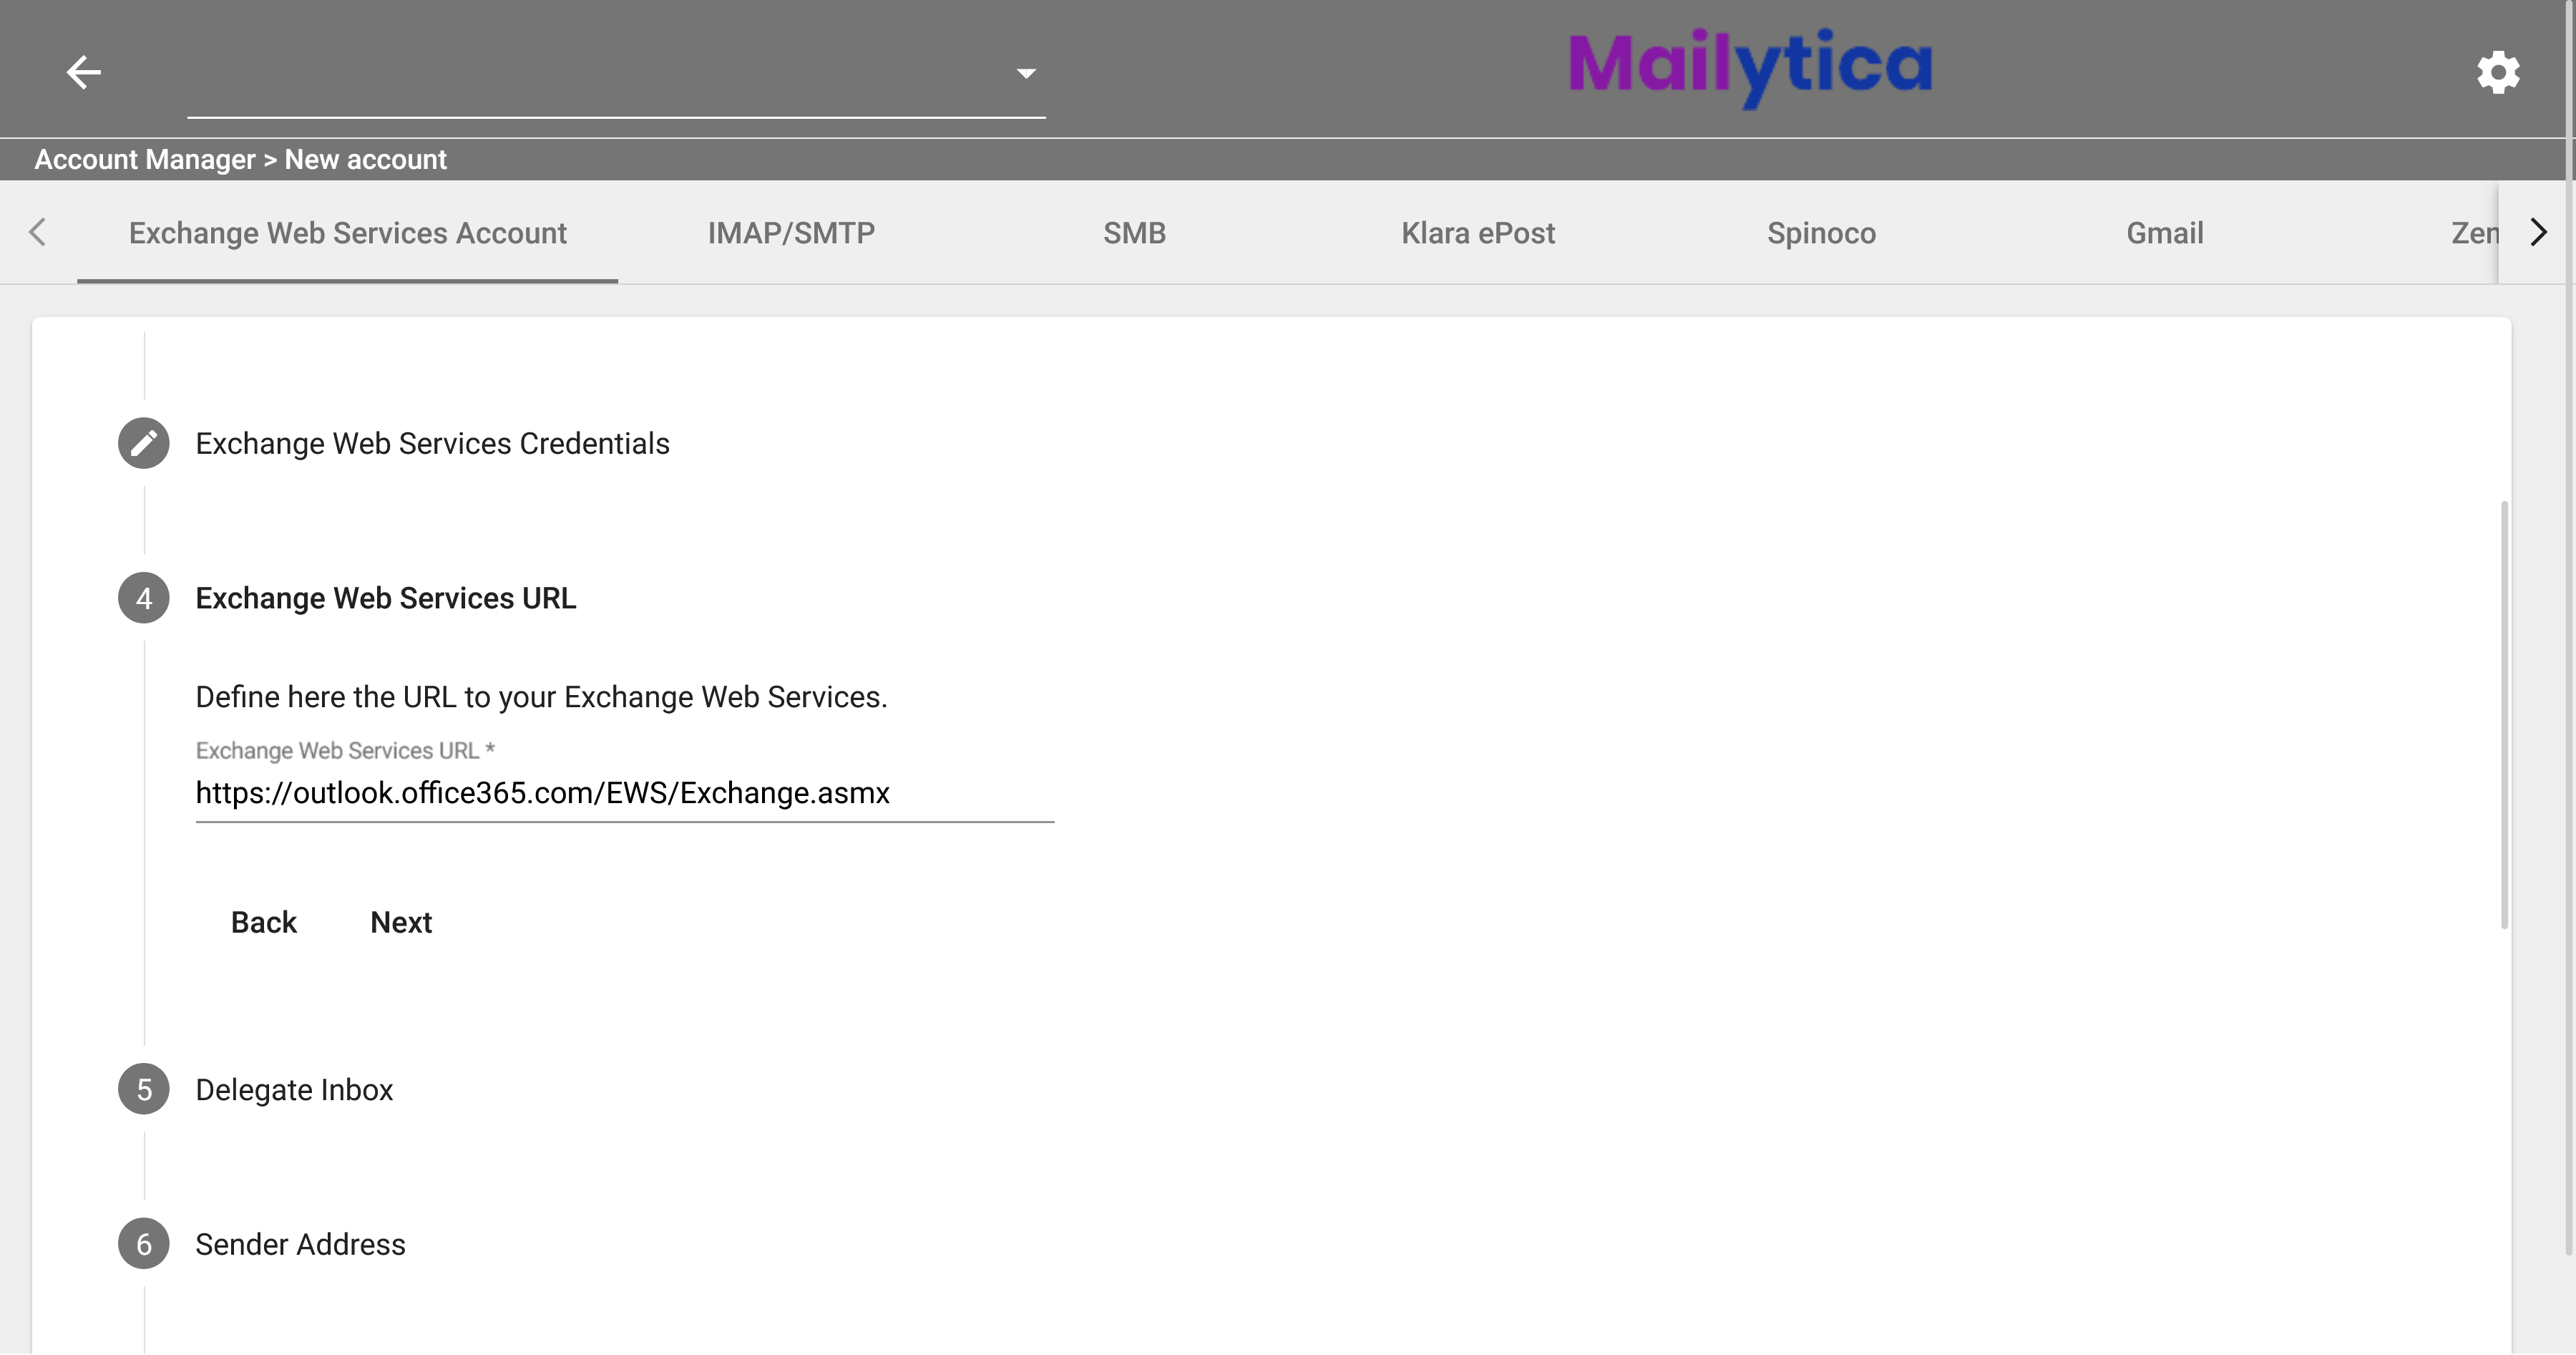
Then, in Exchange Web Services URL, you can define the URL to your Exchange Web Services. We recommend leaving the default address, as it is guaranteed to work with Office 365 / Outlook.
Next up is the Delegate Inbox section. When you delegate an inbox, you’re giving another user access to the same inbox that you use. For example, if you have a sales@company.com email address, and multiple sales representatives have access to it, then that account is a delegated inbox. If you want Mailytica to have access to the messages in a delegated inbox in your account, just type the corresponding address (e.g. sales@company.com). Otherwise, just leave this field empty.
Important
To use this feature, the account that you are adding must already have access to the delegated inbox. For more information please refer to Microsoft’s help page.
In the Sender Address section, you can choose to reply with an email address other than your own. For example, if you want to reply on behalf of your company’s general email address, then enter the corresponding address here. You can also use this option when replying from a delegated inbox. However, the account needs to have been granted send-as rights for that email box beforehand.
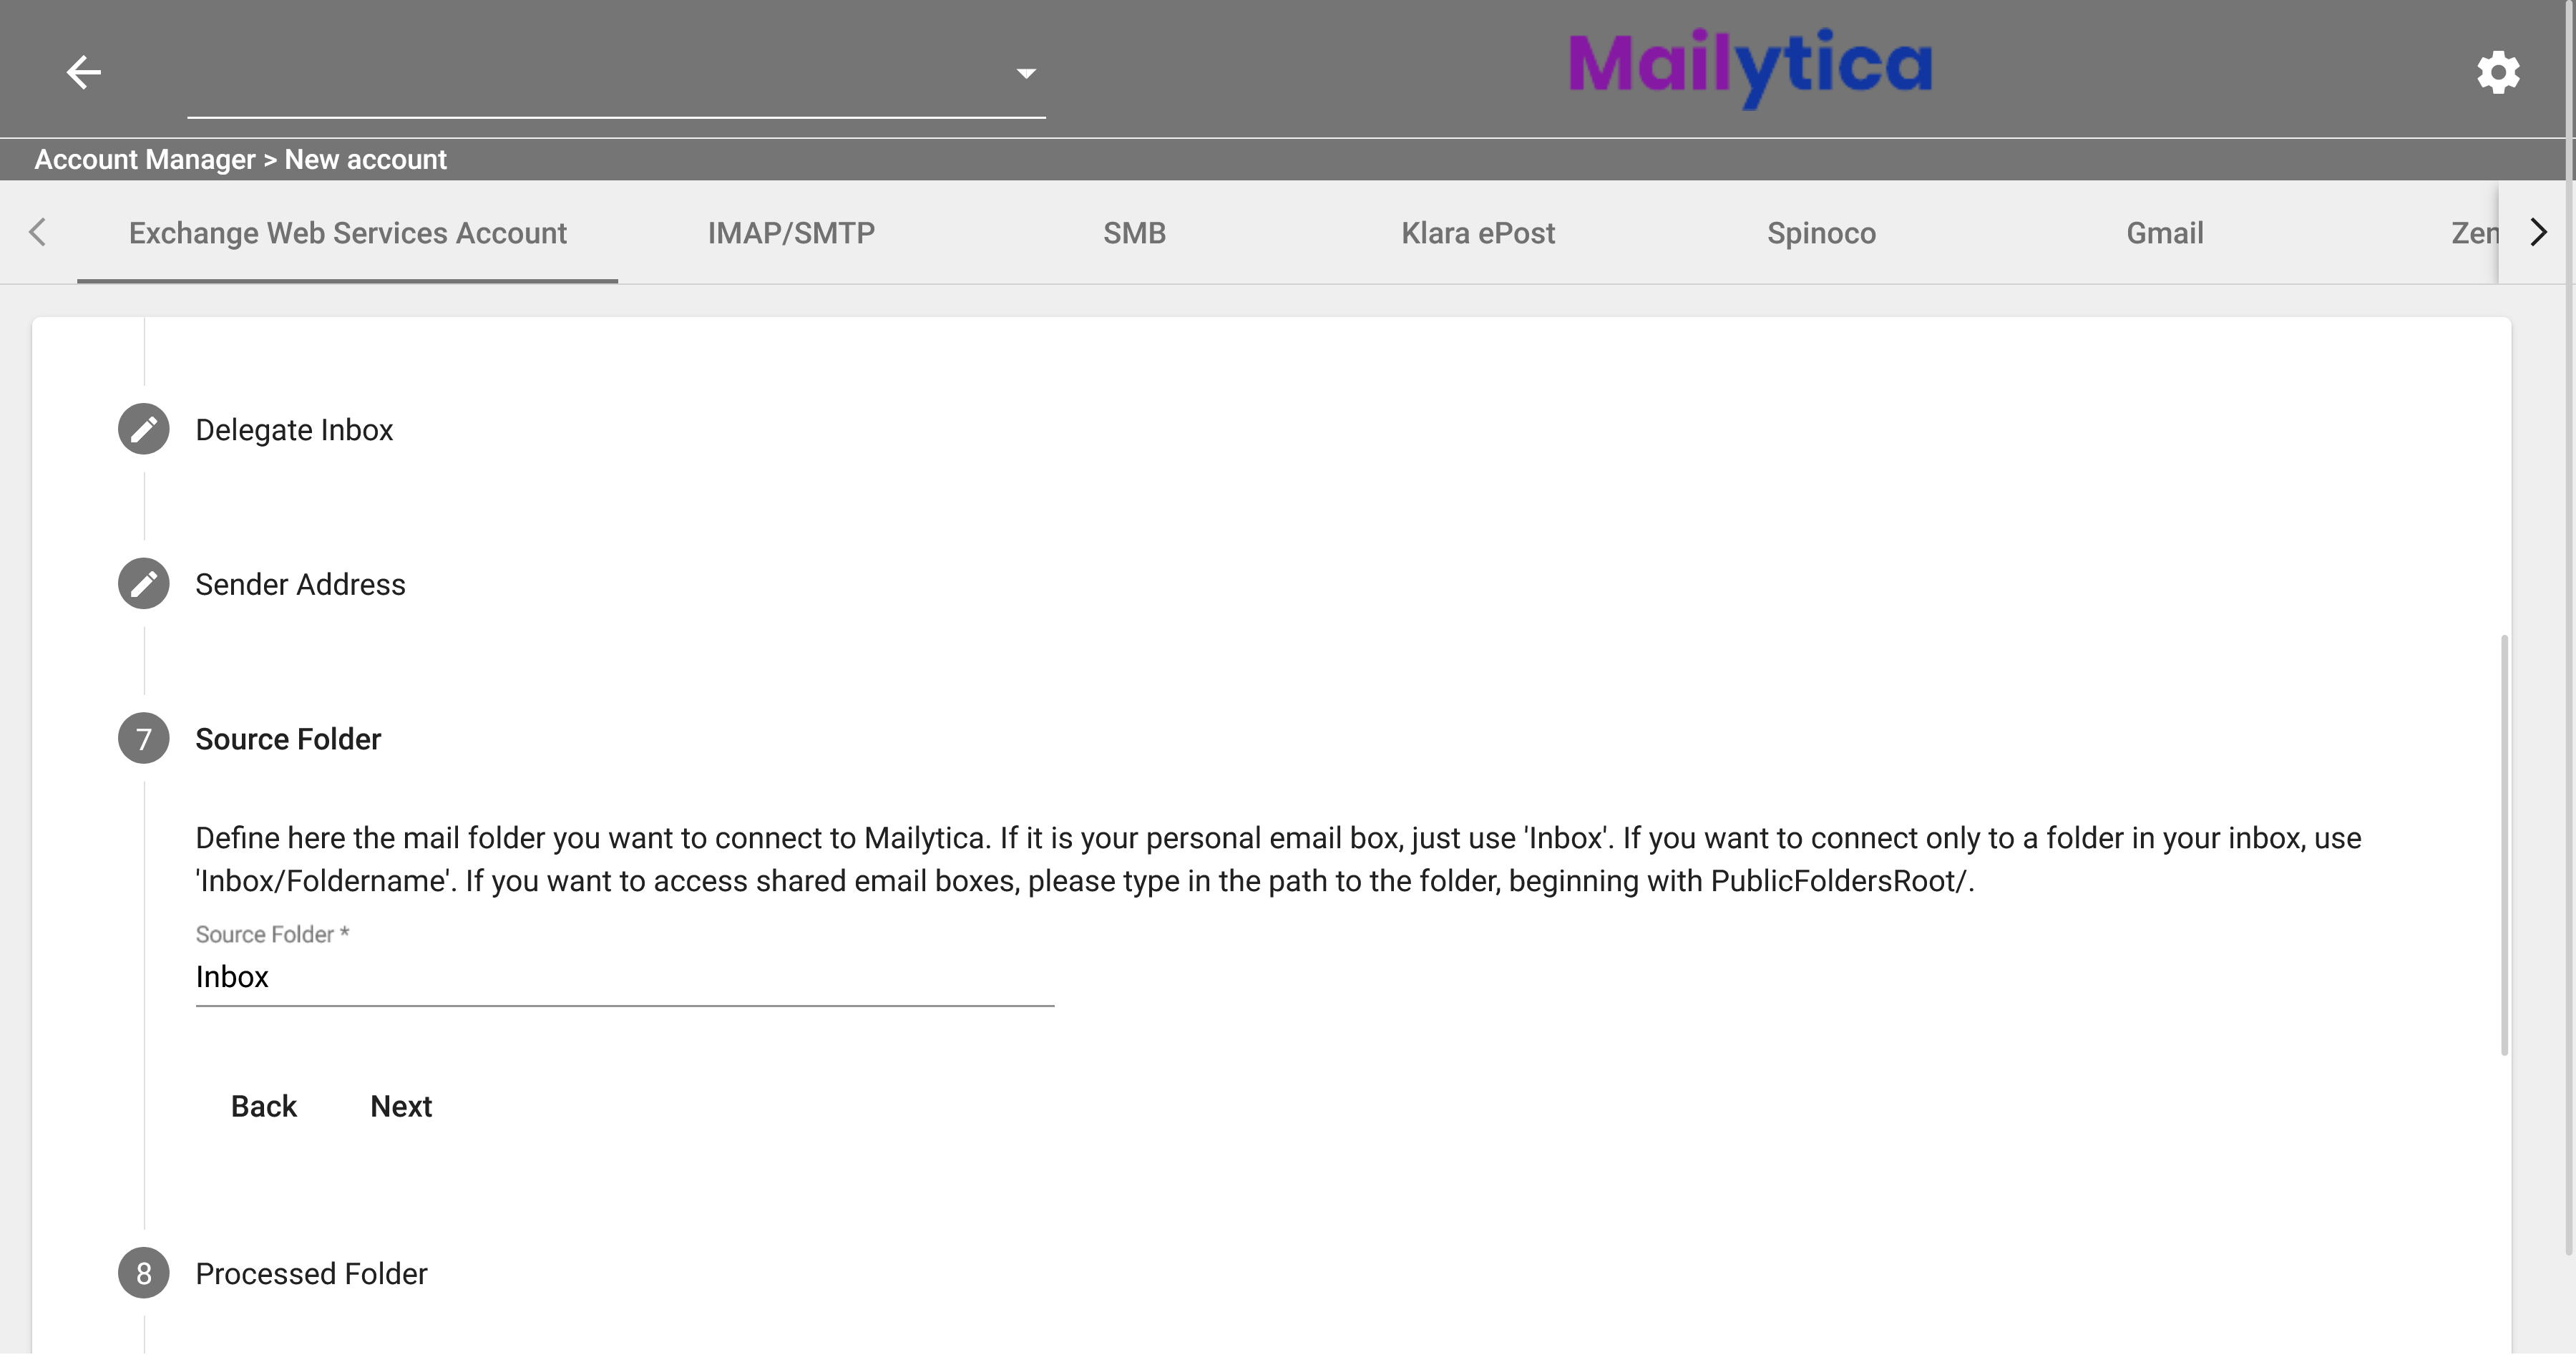
In the next step, you’ll need to define the Source Folder you want to connect to Mailytica. To connect to the folder you want, you need to know its path. In your email client, navigate to the folder whose contents you want to access. Then, in Mailytica, enter that path in the text field. For example, if you’re connecting to your inbox, simply type Inbox. If you’re connecting to subfolders within the inbox, type Inbox/Subfolder (with a trailing slash) in the text field. If you want to connect to shared folders, just follow these same rules—but instead of typing Inbox, type PublicFoldersRoot/Inbox.
In the Processed Folder field, you can define a folder in your email account where you’d like emails to be moved after they’ve been processed by Mailytica. This way, they won’t be processed again. This step is optional, so if you don’t want to move the emails, leave this field empty.
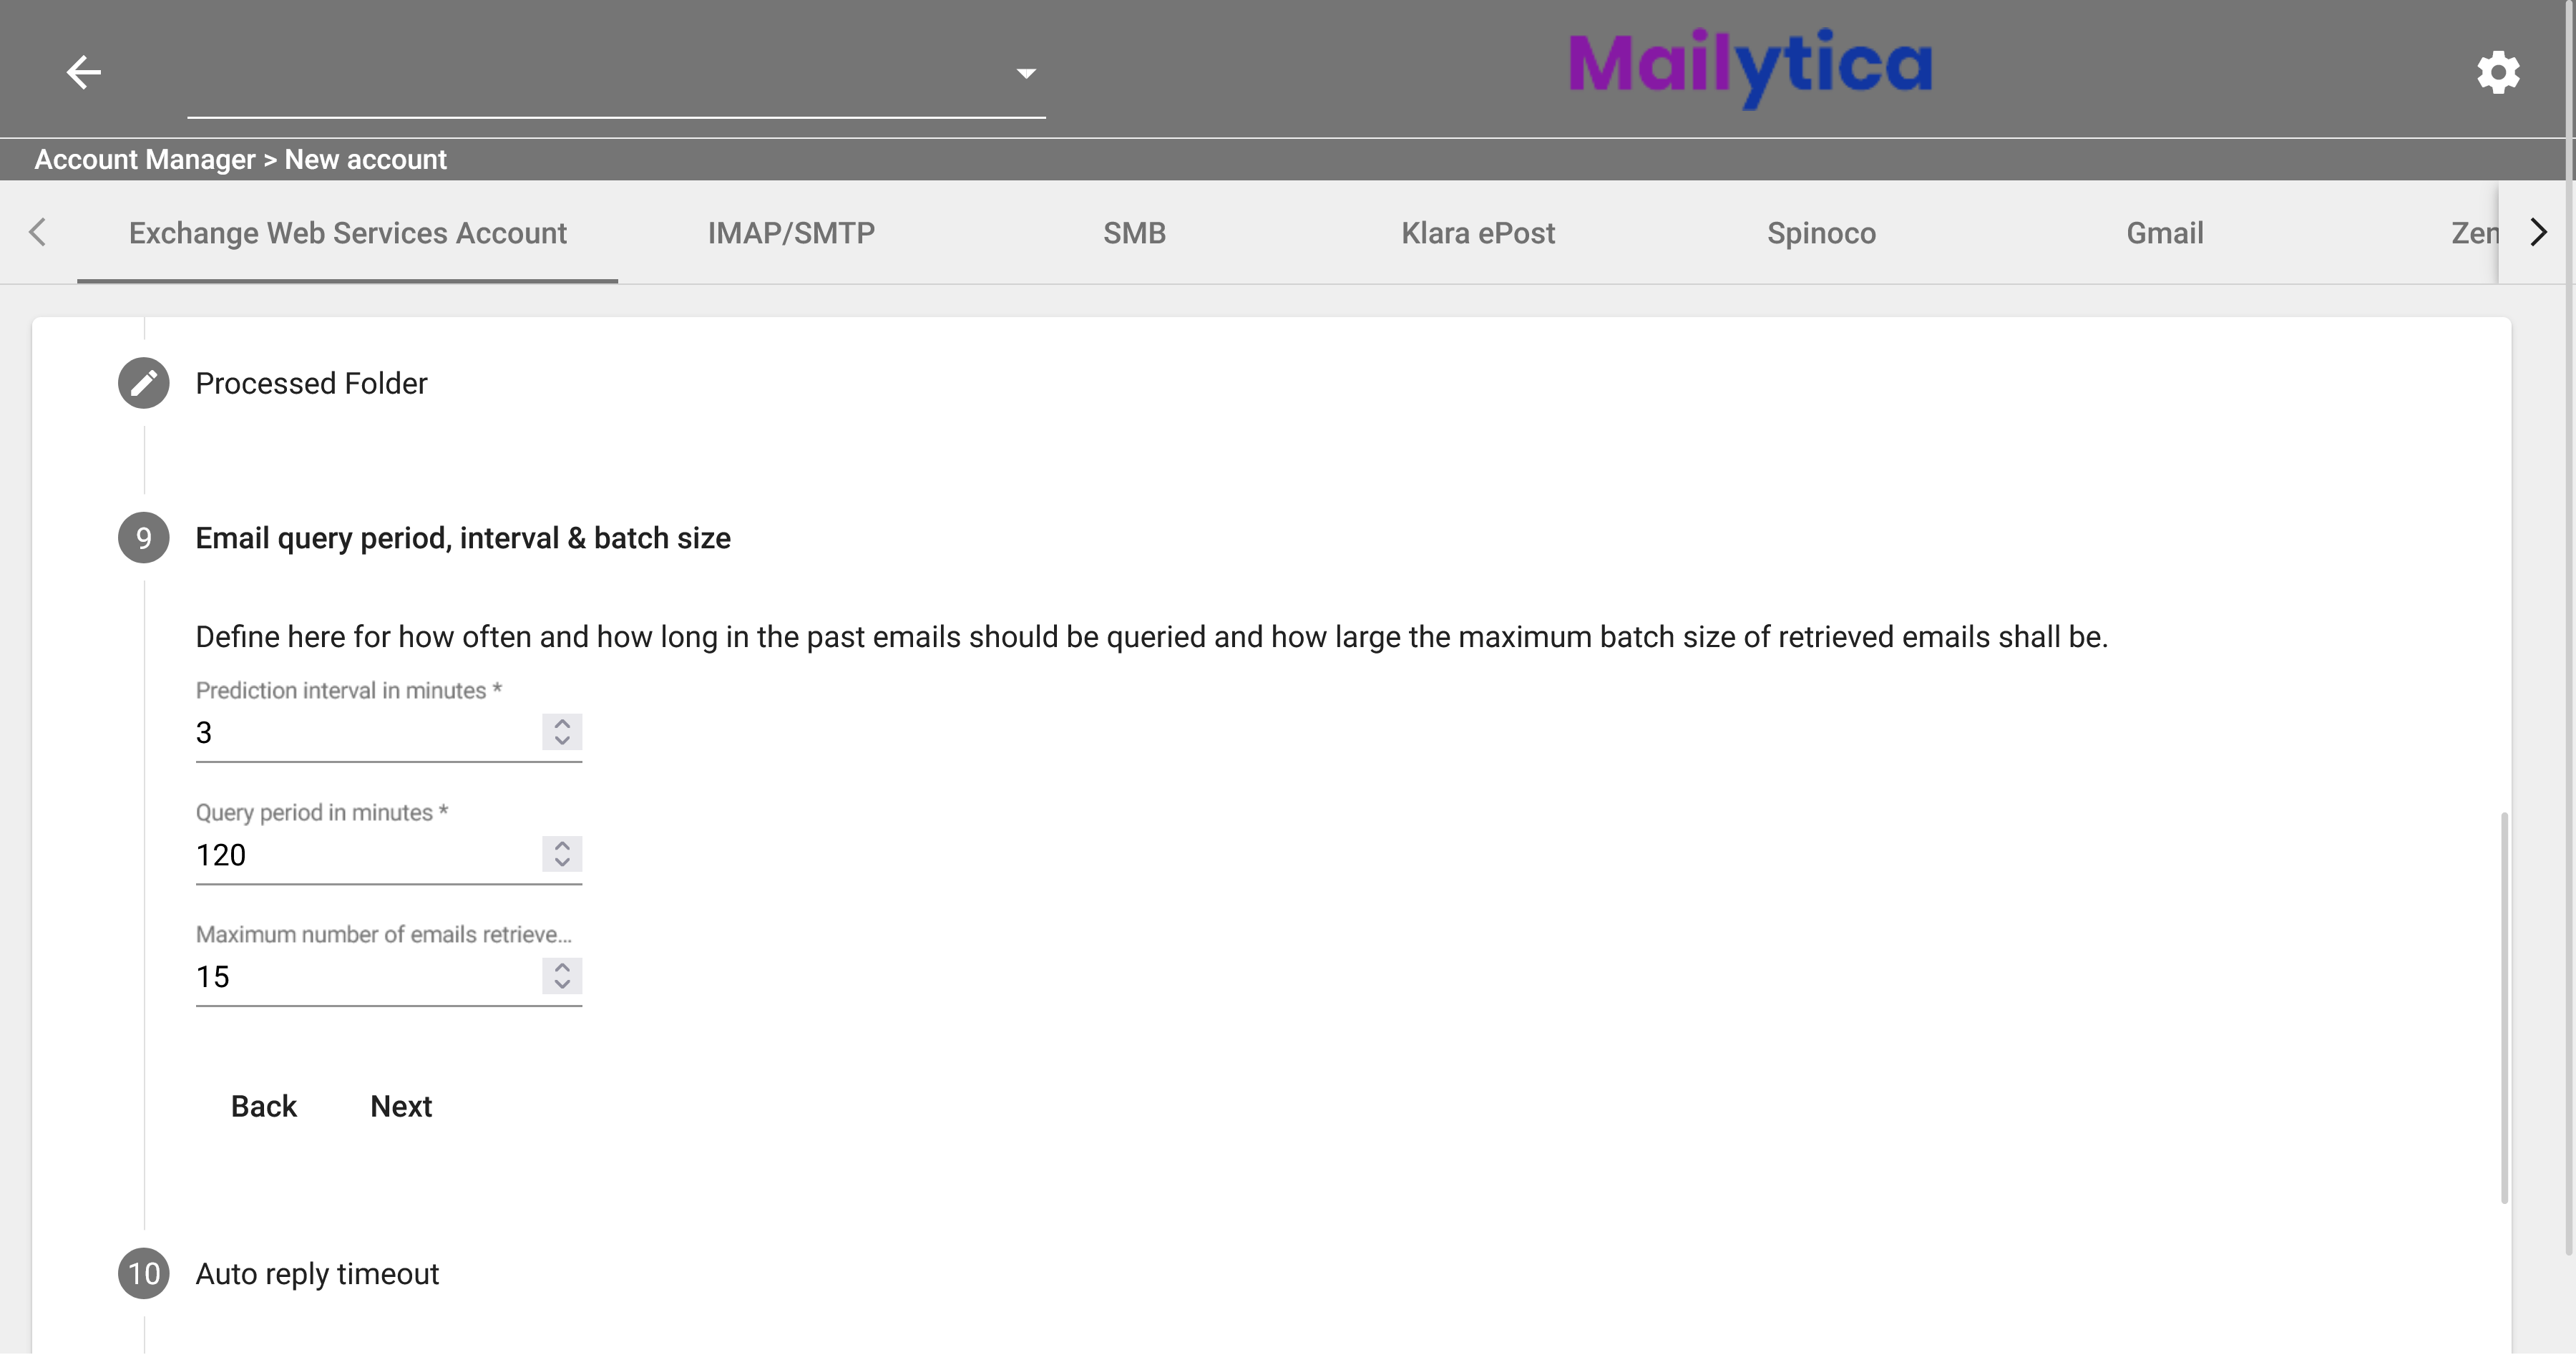
In Email query period, interval & batch size, you can specify how frequently emails should be retrieved—and also set a limit on the number of messages that are returned. First, Prediction interval in minutes refers to how often Mailytica will check for new messages in your inbox. Query period in minutes refers to the length of time over which messages are searched. Finally, Batch size is how many messages you want returned at a time.
Tip
For example, if Prediction interval in minutes is 3, and Query period in minutes is 120, it means that Mailytica will check your inbox every 3 minutes for messages received within the last 2 hours.
We recommend the following values:
Prediction interval in minutes: From 1 to 3 minutes.
Query period in minutes: ≥60 minutes.
Batch size: Depends on the volume / memory of your inbox. A rule of thumb is to enter the average number of messages that you expect to receive per query period.
Auto Reply Timeout allows you to configure auto replies so that they are not sent to the same recipient within a given time span. The default recommended value is 120 minutes.
Next, in the Create Absent Folders option, you can choose whether Mailytica should create folders inside your email account or not. If you select this option and move email messages to folders that do not exist yet—they will be created automatically by Mailytica. The recommended value is Active.
Then, in Retrieve Sent Emails, decide whether Mailytica should query sent emails from your account. When active, this allows Mailytica to retrieve your sent emails as well, so that it can better understand your back-and-forth communication with customers and detect follow-ups. The recommended value is Active.
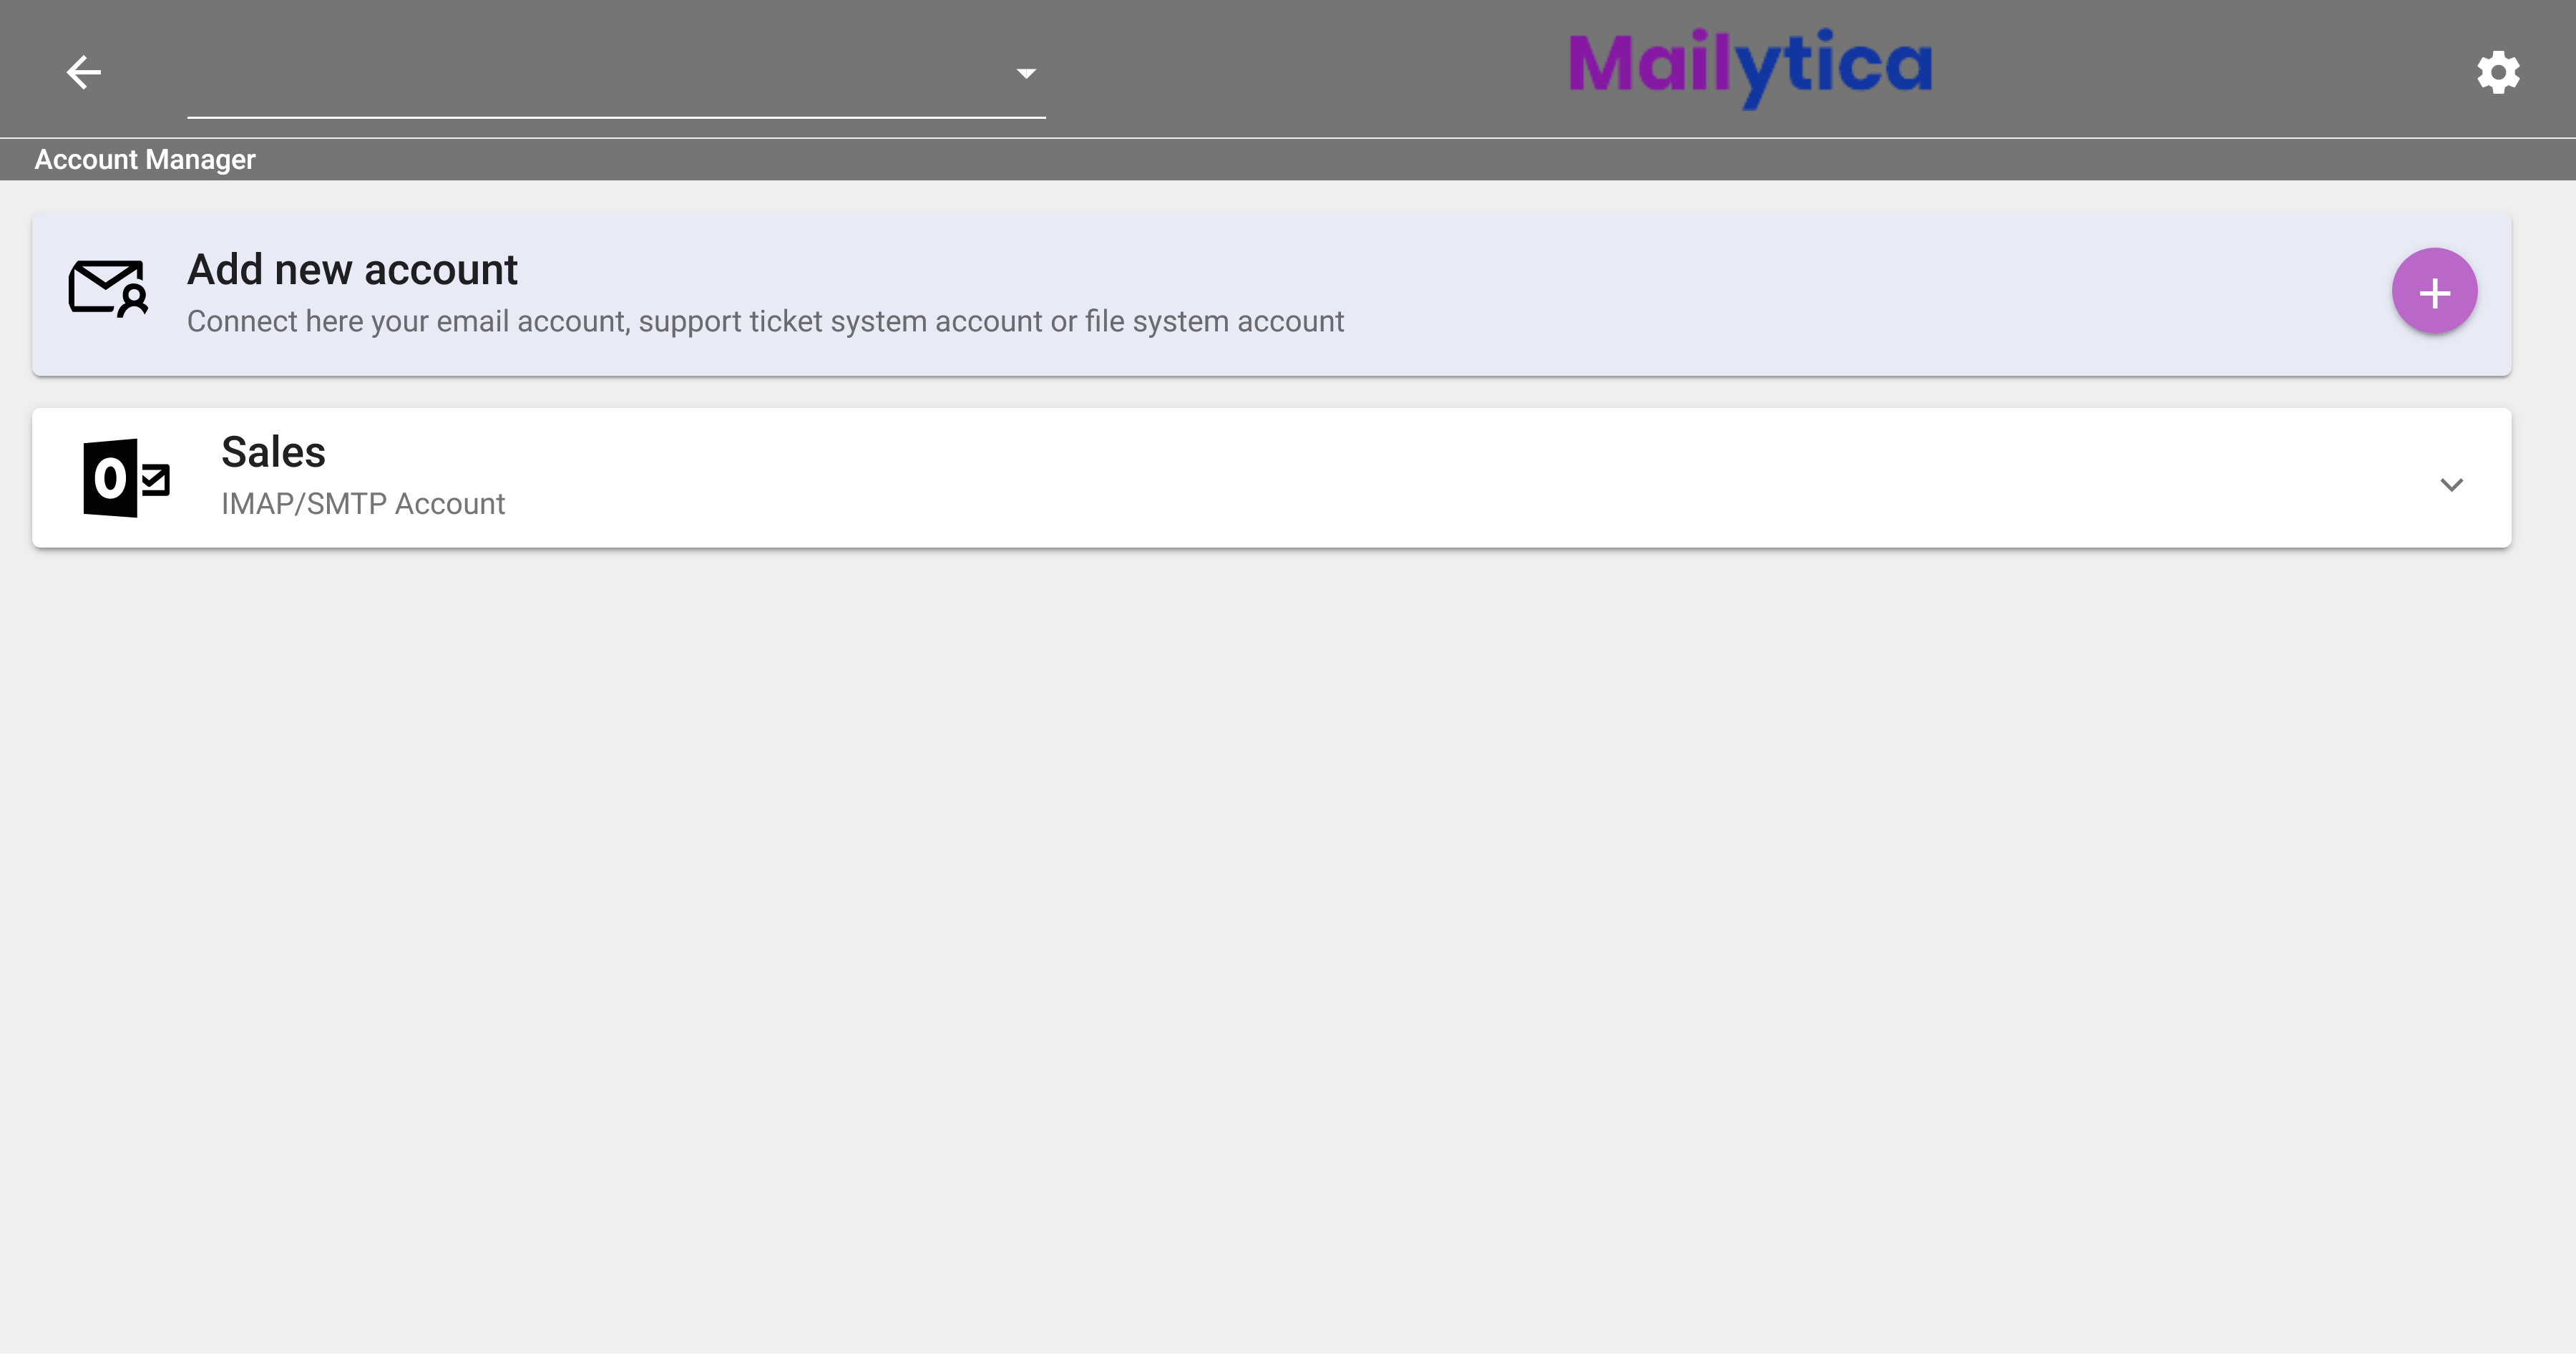
Finally, toggle the Active button in Account Status to activate your Exchange Web Services account and click Add. Now your new account should be listed in the Account Manager and will be ready to use with Mailytica.
SharePoint / OneDrive Account#
SharePoint, developed by Microsoft, is a web-based collaborative platform primarily used as a document management and storage system. OneDrive, also a Microsoft product, is closely intertwined with SharePoint. While SharePoint is designed for team-based collaboration, OneDrive is designed to be your personal space.
To connect a new SharePoint account to Mailytica, first log in to the Online Platform at mailytica.ai. Then, in the top right corner, click on the button to access the settings, and select Account Manager.
Once you’re in the Account Manager, click the button next to Add new account and select Sharepoint from the top tab bar.
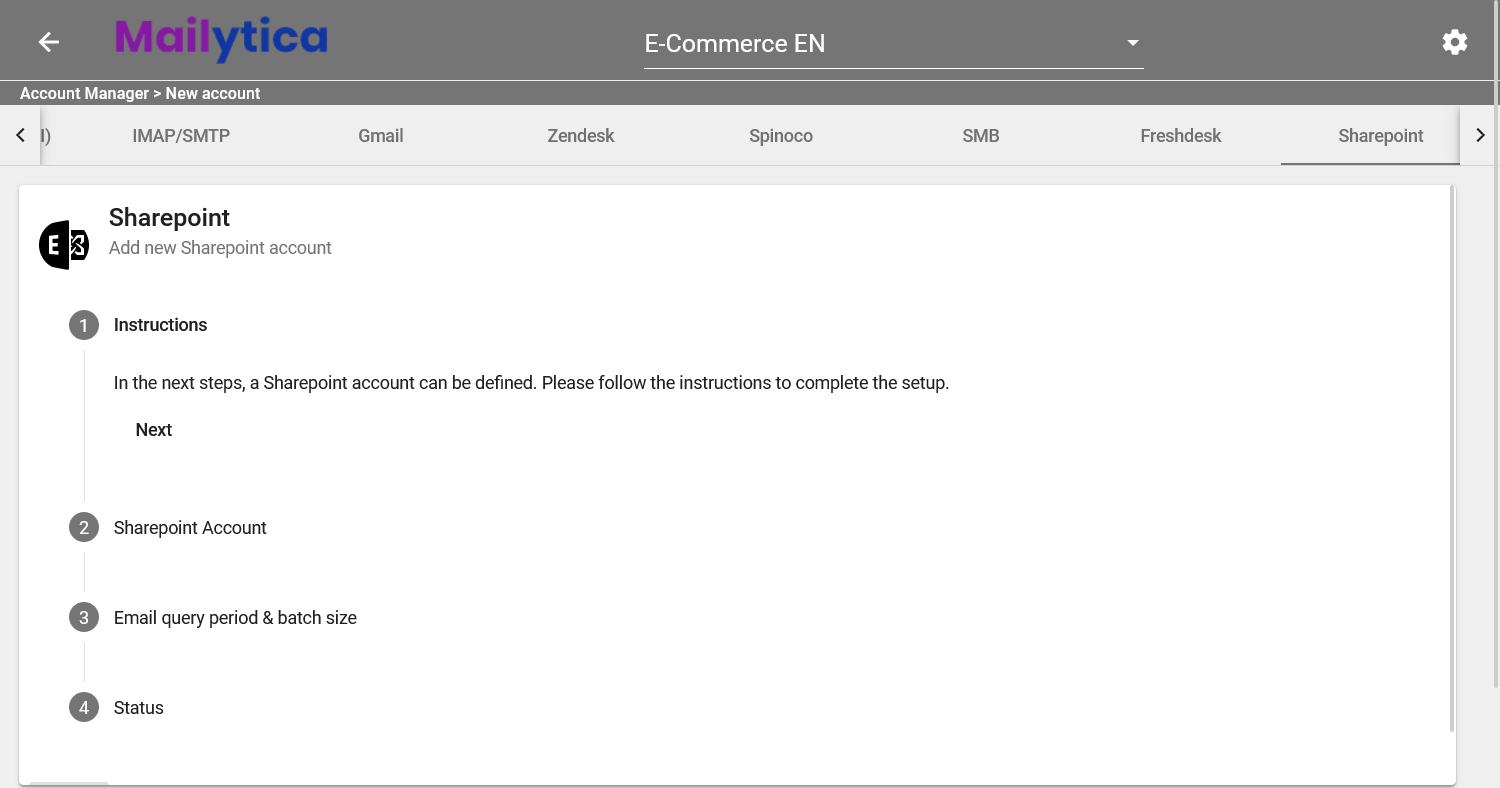
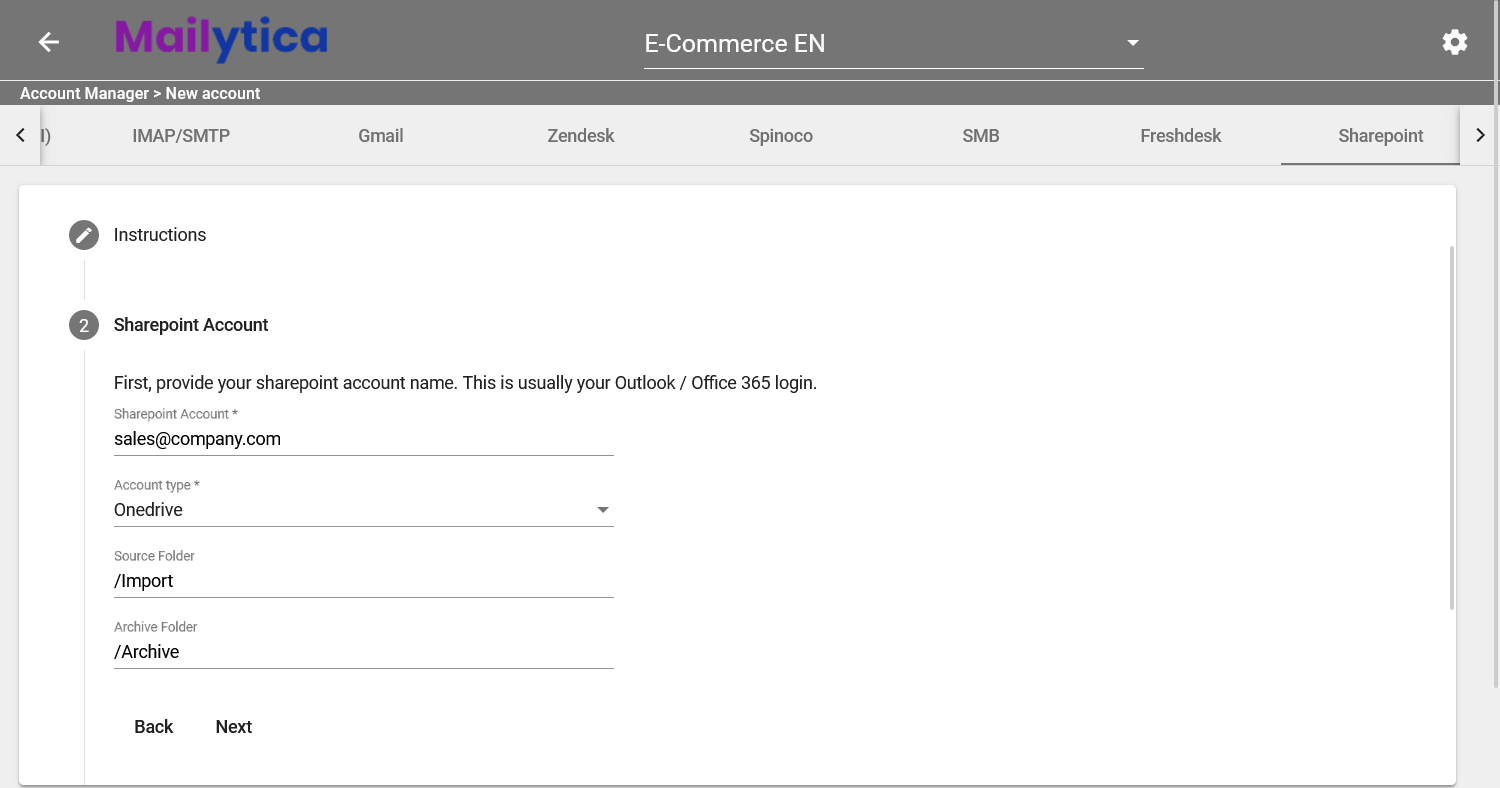
- Then, in the Sharepoint Account section, you’ll need to specify the following details:
Sharepoint Account: Type the email address that corresponds with the Sharepoint account you wish to connect.
Account Type: Select either Onedrive or Sharepoint from the dropdown menu based on your preference. We recommend selecting Onedrive.
Source Folder: Specify the path where your files will be located. For instance,
/Import.Archive Folder: Write the location where you want a backup of your message files to be stored, like
/Archive. This step is optional.
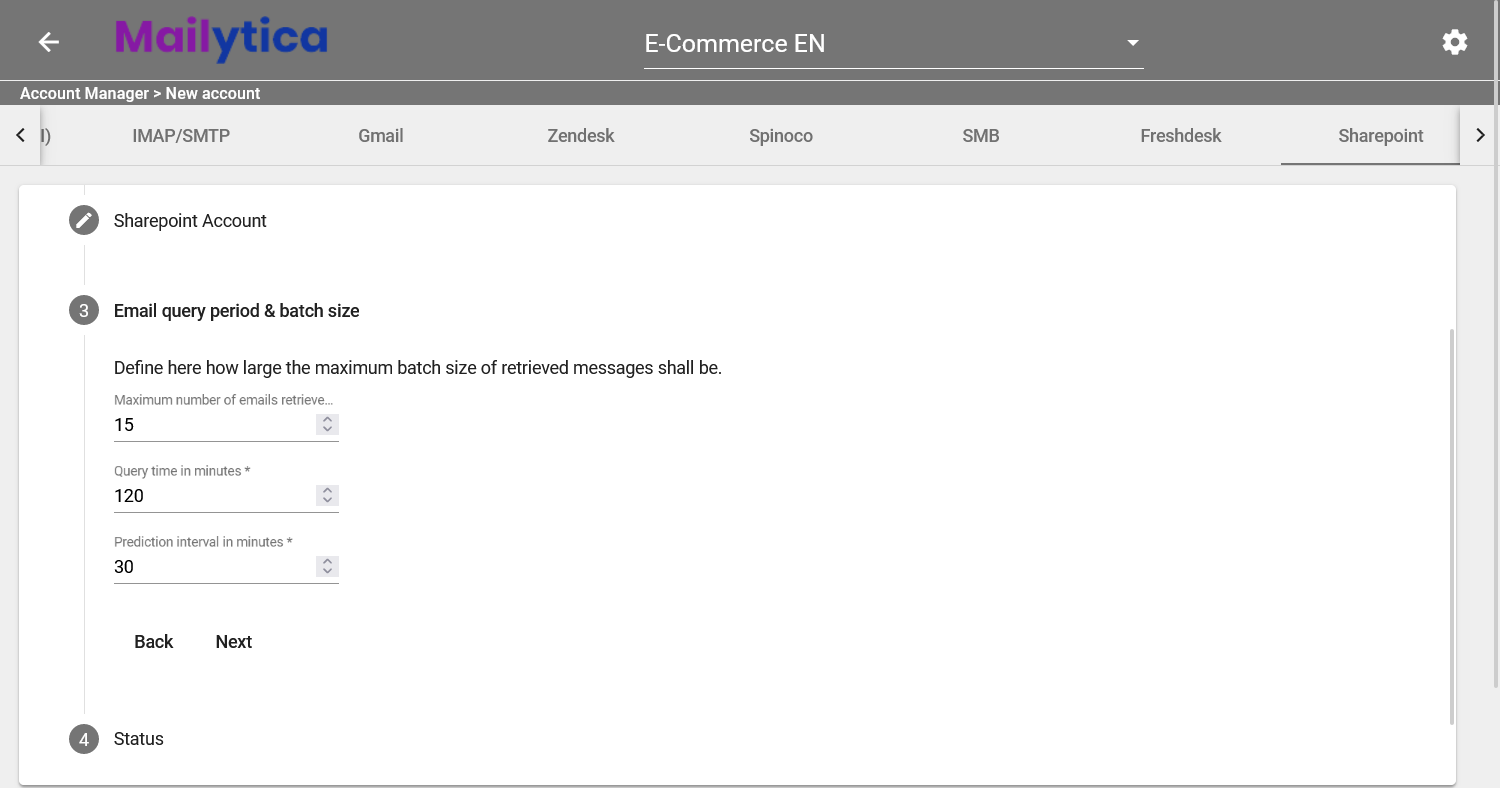
- Next, In Email query period & batch size, you can specify how frequently emails should be retrieved—and also set a limit on the number of messages that are returned.
Maximum number of emails retrieved per batch: This defines the number of messages you want to be returned at once.
Query time in minutes: This refers to the length of time over which messages are searched.
Prediction interval in minutes:This is the frequency at which Mailytica will search for new files in your source folder.
Finally, click on the status toggle button and set it to Active. Then click Add to finish the process.
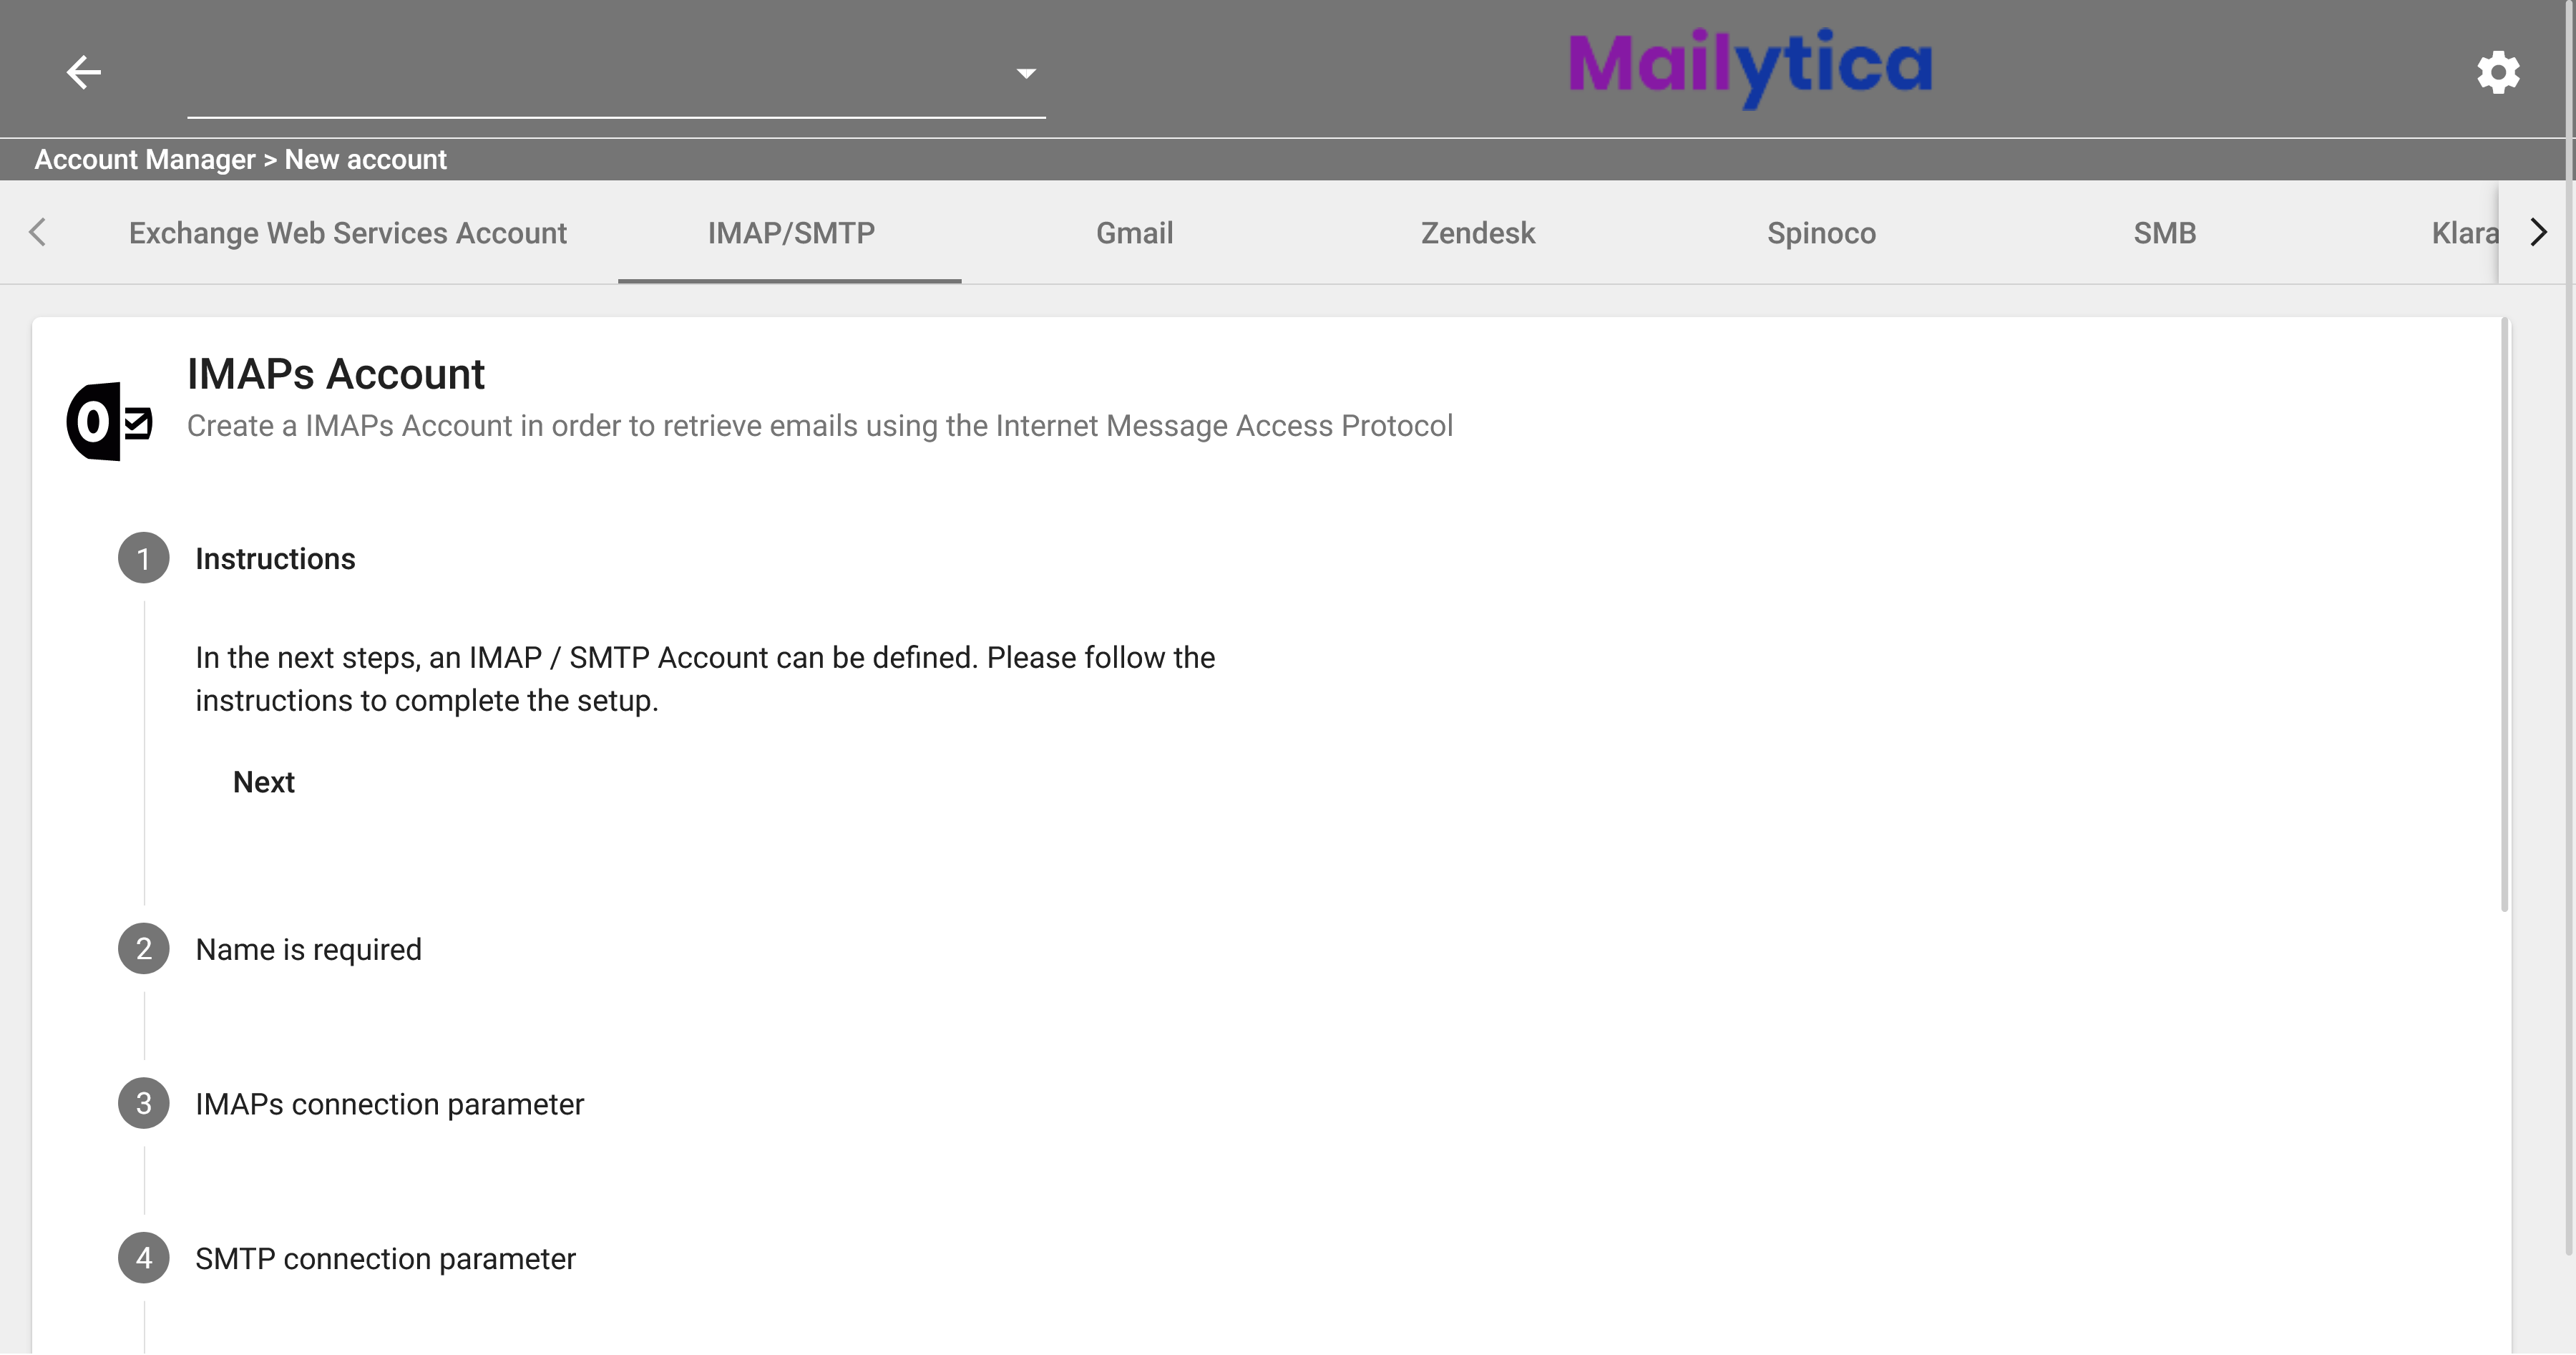
IMAP / SMTP Account#
Internet Message Access Protocol (IMAP) and Simple Mail Transfer Protocol (SMTP) are two protocols used by email clients to receive and send messages.
IMAP and SMTP are two different protocols, which are typically used together. The major difference between the two protocols is that IMAP allows access to a mailbox on the server and lets users retrieve, delete, or move messages. While SMTP is used to send email messages.
You can set up your IMAP/SMTP account in Mailytica by following the steps below:
To connect a new IMAP/SMTP account to Mailytica, first log in to the Online Platform at mailytica.ai. Then, in the top right corner, click on the button to access the settings, and select Account Manager.
Once you’re in the Account Manager click the button next to Add new account and select IMAP/SMTP from the top tab bar.
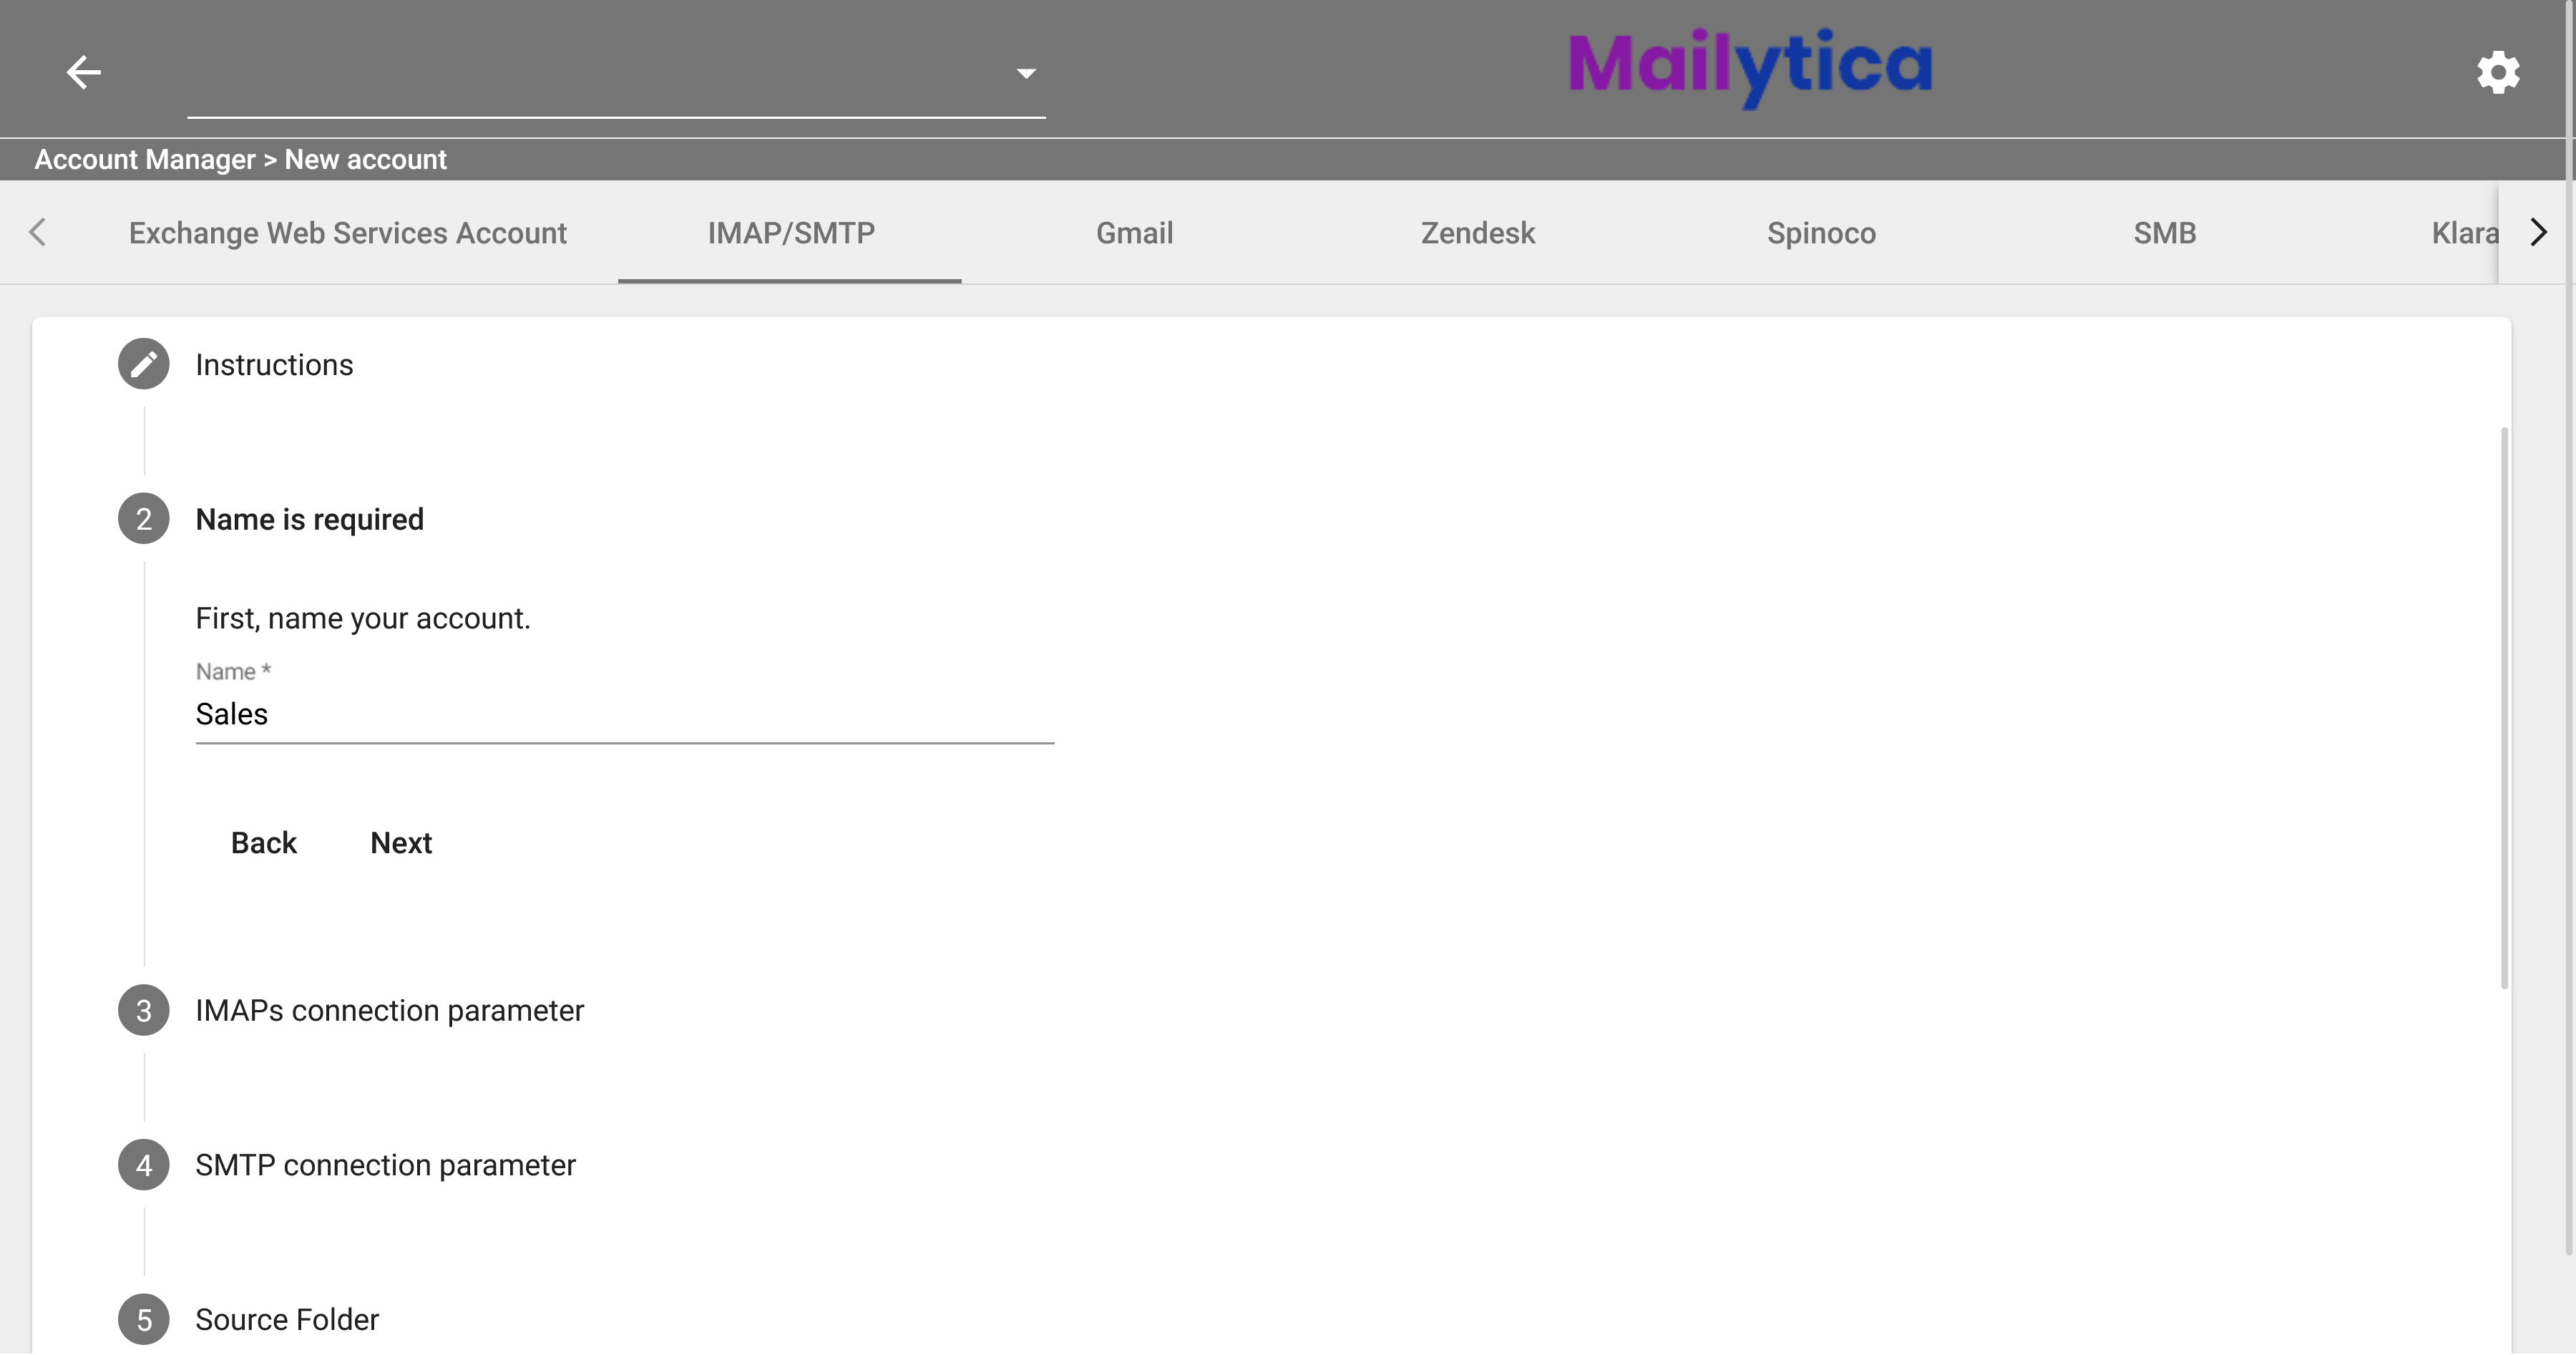
In the Account Name section, you can type a name that will identify your account inside Mailytica’s Online Platform. This is helpful if you have multiple accounts, so that you can easily tell them apart.
Next, in IMAPs Connection Parameters you should enter the connection data that corresponds to your email provider’s IMAP specifications.
Server URL: refers to your email provider’s IMAP server name (for example imap.gmail.com).
Port: This is the port number that you should use when connecting to your email provider’s server (the standard IMAP port is 993).
Login Name: Your email address (name@gmail.com).
Password: The password associated to your email address.
IMAP Server URL: outlook.office365.comIMAP Port: 993For more information please visit Microsoft’s help page: POP, IMAP, and SMTP settings for Outlook.comIMAP Server URL: imap.gmail.comIMAP Port: 993For more information please visit Gmail’s help page: Check Gmail through other email platformsIMAP Server URL: imap.ionos.comIMAP Port: 993For more information please visit Ionos’ help page: Settings For Your Email Programs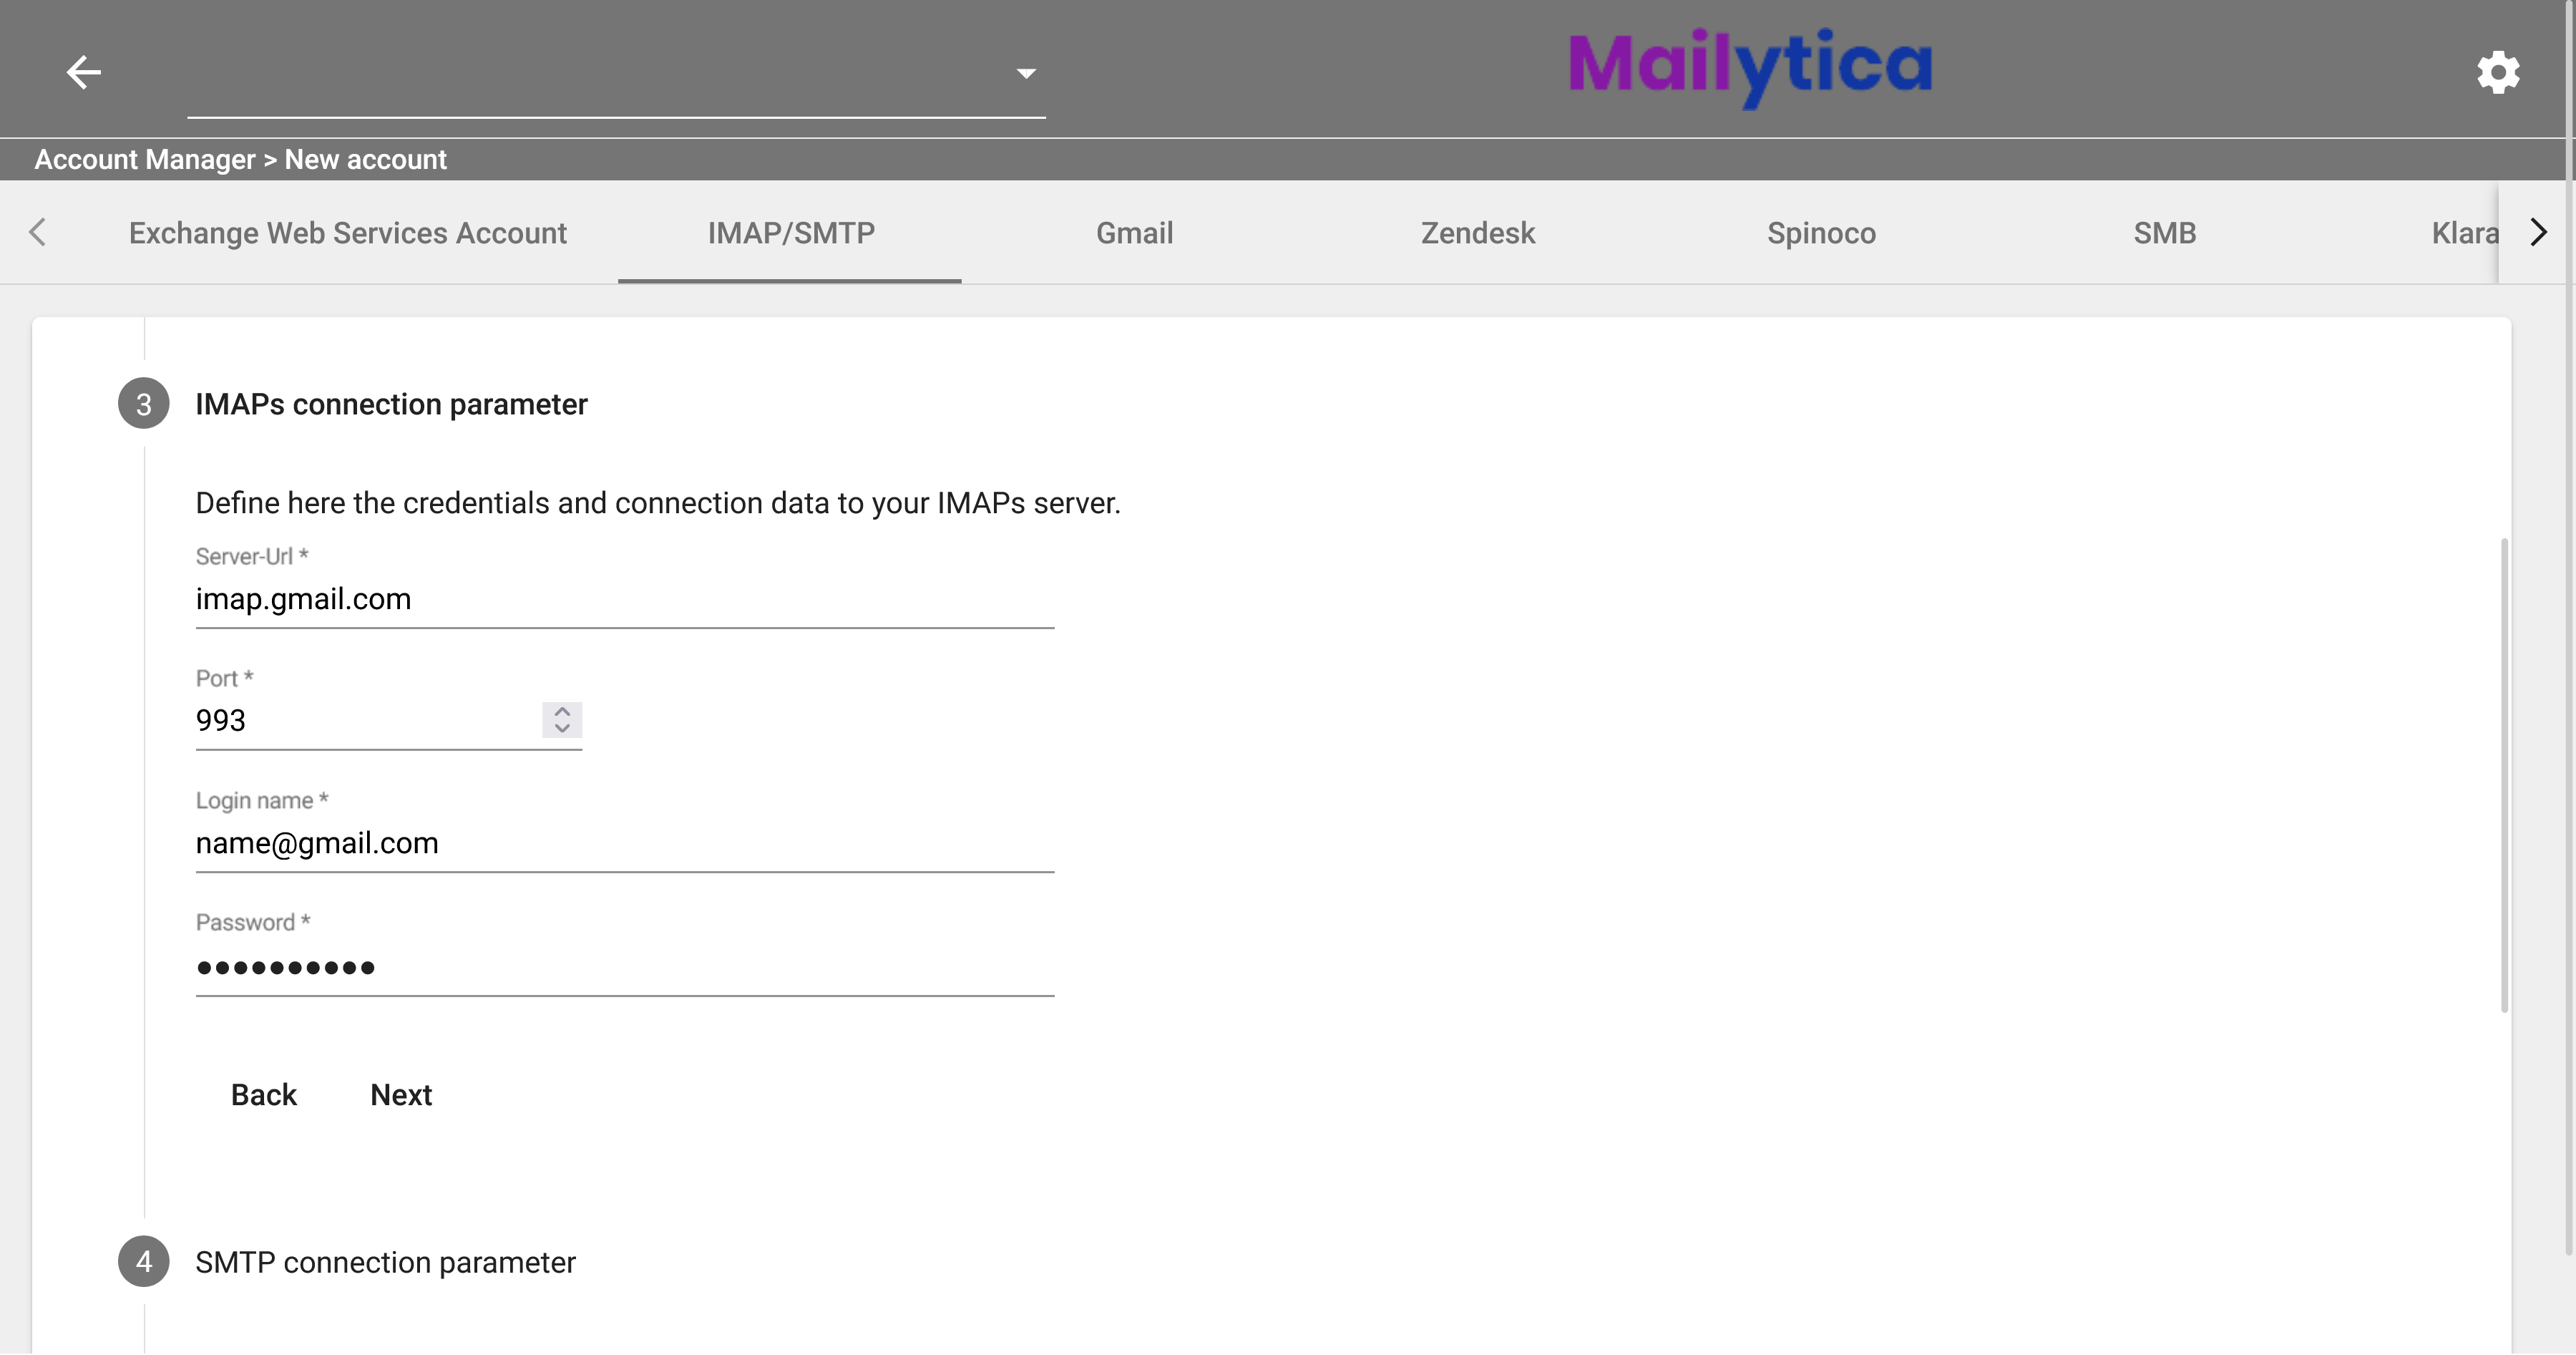
Similarly, in SMTP Connection Parameters you must also enter the connection data that corresponds to your email provider’s SMTP details.
Server URL: Refers to your email provider’s SMTP server name (for example smtp.gmail.com).
Port: This is the port number that you should use when connecting to your email provider’s server.
Encryption: This is a security setting that determines how your email provider secures the transmission of your messages. The two available options are SSL (Secure Sockets Layer) and STARTTLS.
Login Name: Your email address (name@gmail.com).
Password: The password associated to your email address.
Sender Email Address: This is the email address you want to use when sending messages. It is usually the same as your login name, unless you email provider doesn’t allow SMTP connections.
SMTP Server URL: smtp-mail.outlook.comSMTP Port: 587SMTP Encryption: STARTTLSFor more information please visit Microsoft’s help page: POP, IMAP, and SMTP settings for Outlook.comSMTP Server URL: smtp.gmail.comSMTP Port for SSL: 465SMTP Port for TLS/STARTTLS: 587SMTP Encryption: SSL and STARTTLSFor more information please visit Gmail’s help page: Check Gmail through other email platformsSMTP Server URL: smtp.ionos.comSMTP Port for SSL: 465SMTP Port for TLS/STARTTLS: 587SMTP Encryption: SSL and STARTTLSFor more information please visit Ionos’ help page: Settings For Your Email ProgramsImportant
If you’re using an email provider that doesn’t allow an SMTP connection, you can still connect your IMAP/SMTP account with Mailytica using SendGrind. This is normally the case with accounts running on Microsoft Azure.
To set up an account with SendGrind, just fill the SMTP Connection Parameters as follows:
Server URL: smtp.sendgrind.netPort: 465Encryption: SSLLogin Name: Your API keyPassword: Your passwordSender Email Address: Your email address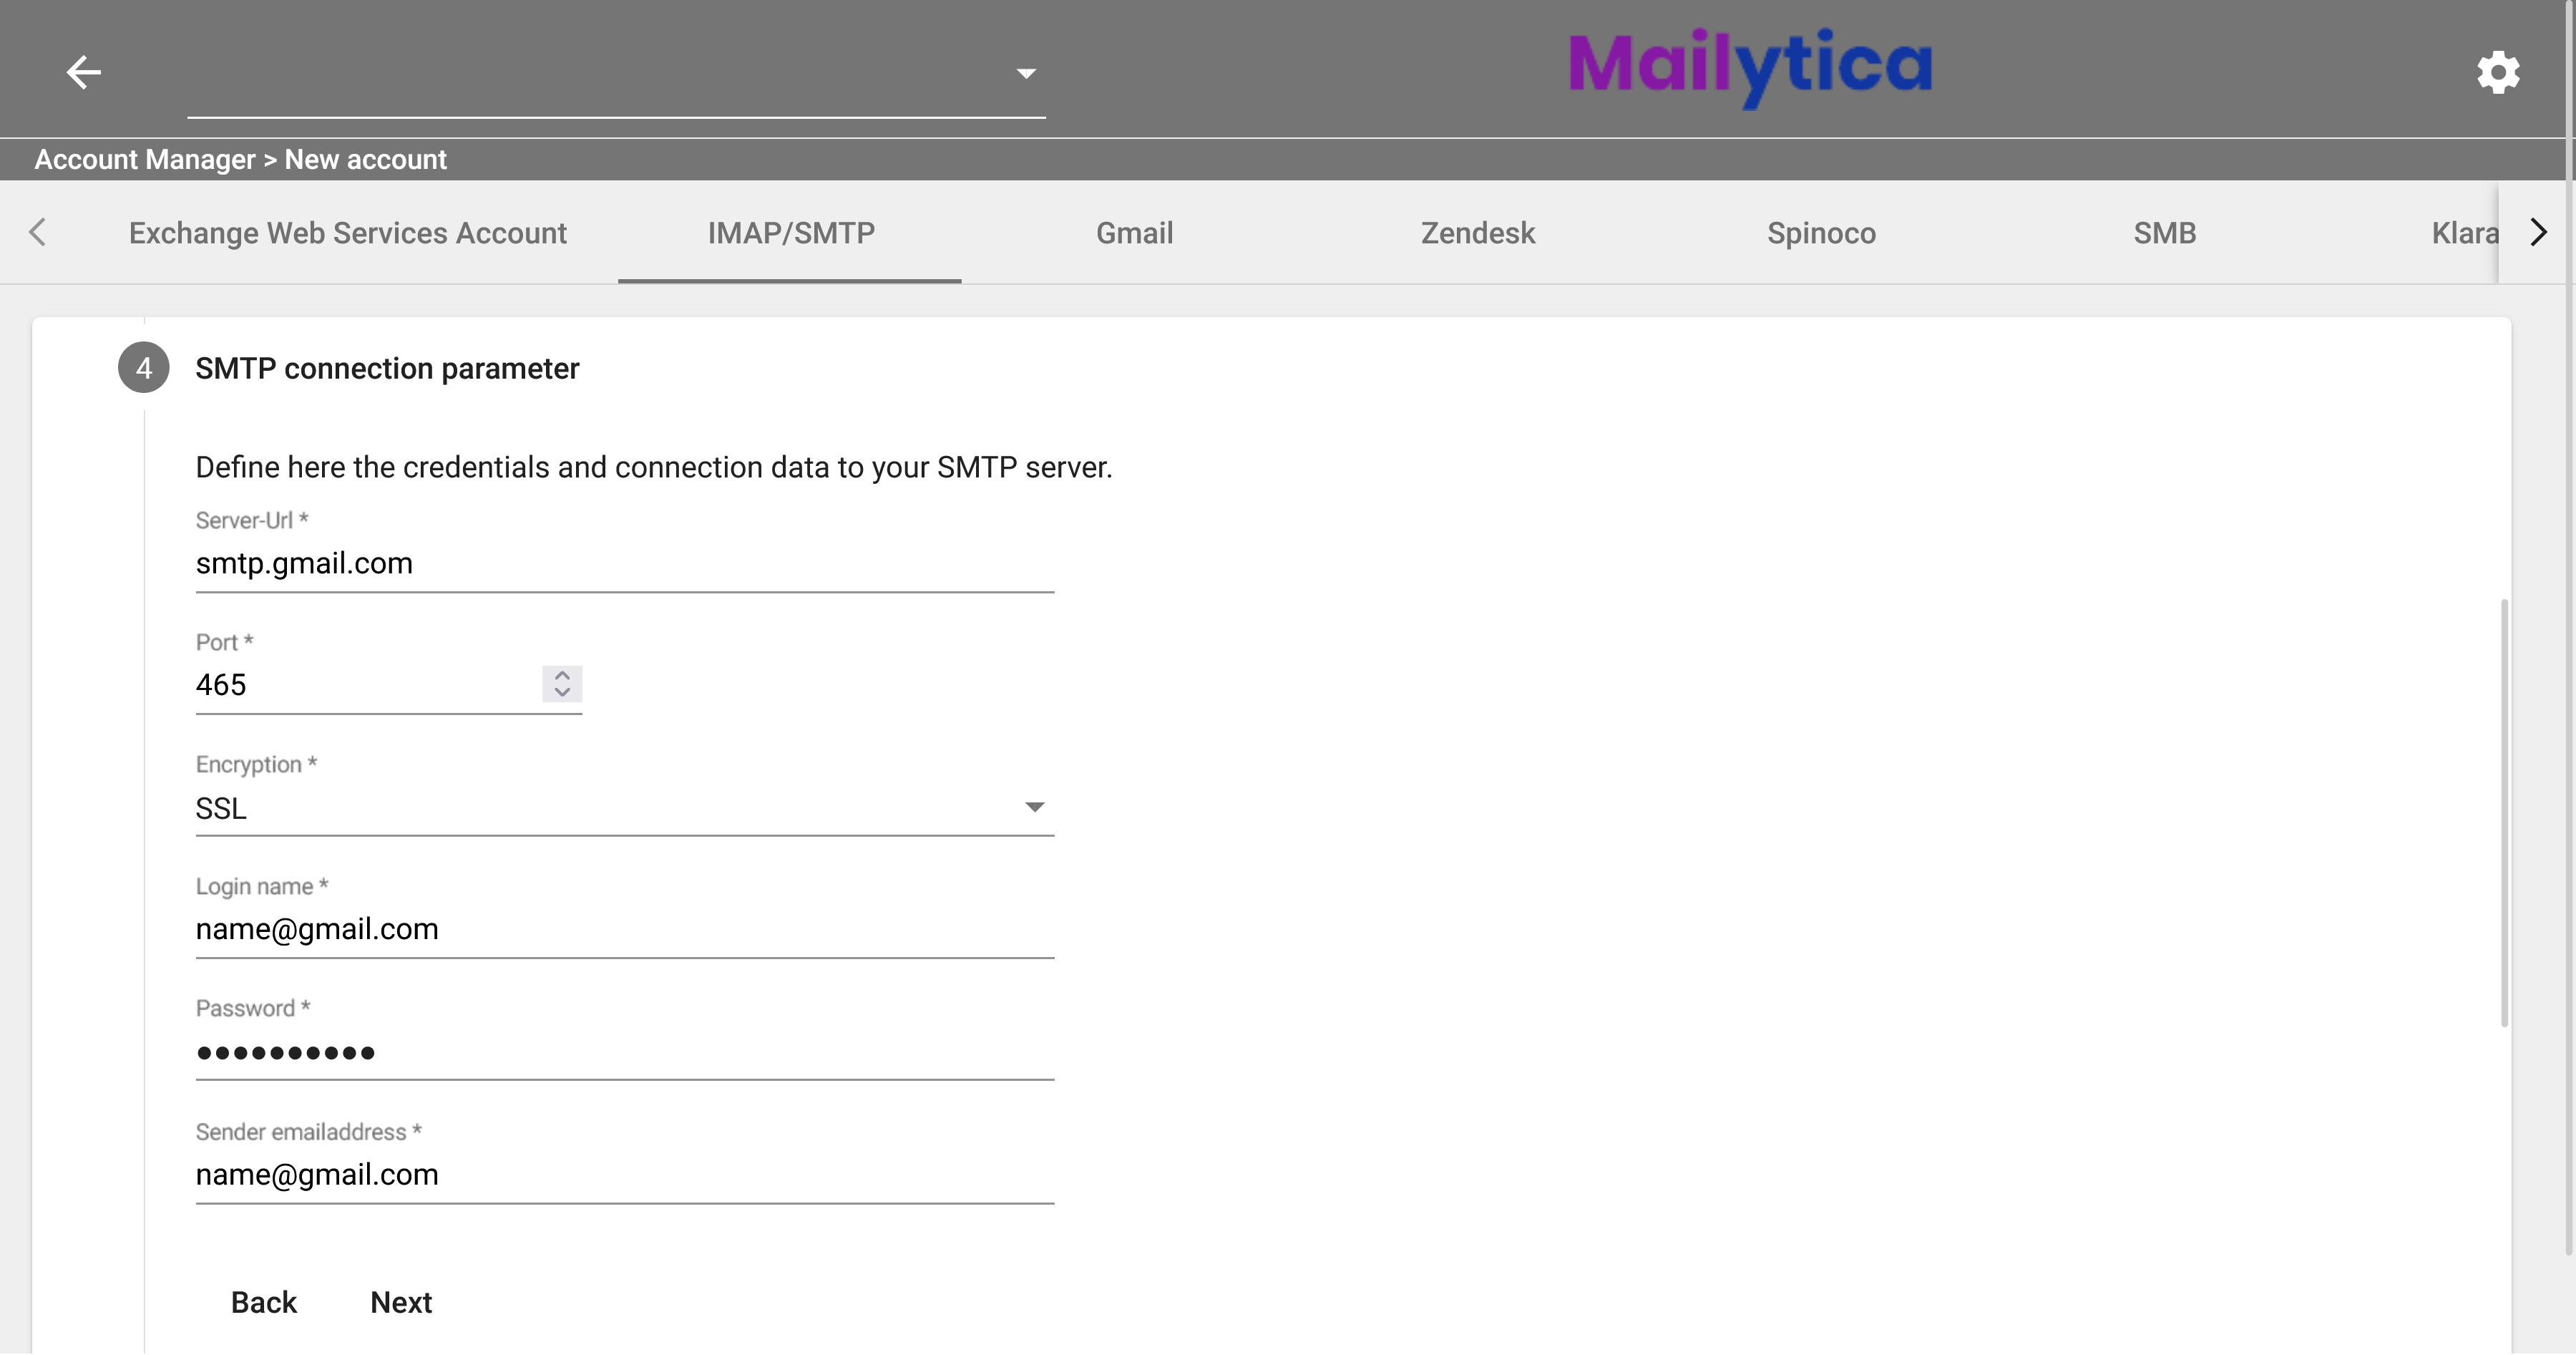
In the Source Folder field, you’ll need to define the folder you want to connect to Mailytica. To connect to the folder you want, you need to know its path. In your email client, navigate to the folder whose contents you want to access. Then, in Mailytica, select that path from the dropdown menu. For example, if you’re connecting to your inbox, simply select INBOX (normally in all caps). If you’re connecting to subfolders within the inbox, select INBOX/Subfolder (with a trailing slash).
In Email query period, interval & batch size, you can specify how frequently emails should be retrieved—and also set a limit on the number of messages that are returned. First, Prediction interval in minutes refers to how often Mailytica will check for new messages in your inbox. Query period in minutes refers to the length of time over which messages are searched. Finally, Batch size is how many messages you want returned at a time.
Tip
For example, if Prediction interval in minutes is 3, and Query period in minutes is 120, it means that Mailytica will check your inbox every 3 minutes for messages received within the last 2 hours.
We recommend the following values:
Prediction interval in minutes: From 1 to 3 minutes.
Query period in minutes: ≥60 minutes.
Batch size: Depends on the volume / memory of your inbox. A rule of thumb is to enter the average number of messages that you expect to receive per query period.
Auto Reply Timeout allows you to configure auto replies so that they are not sent to the same recipient within a given time span. The default recommended value is 120 minutes.
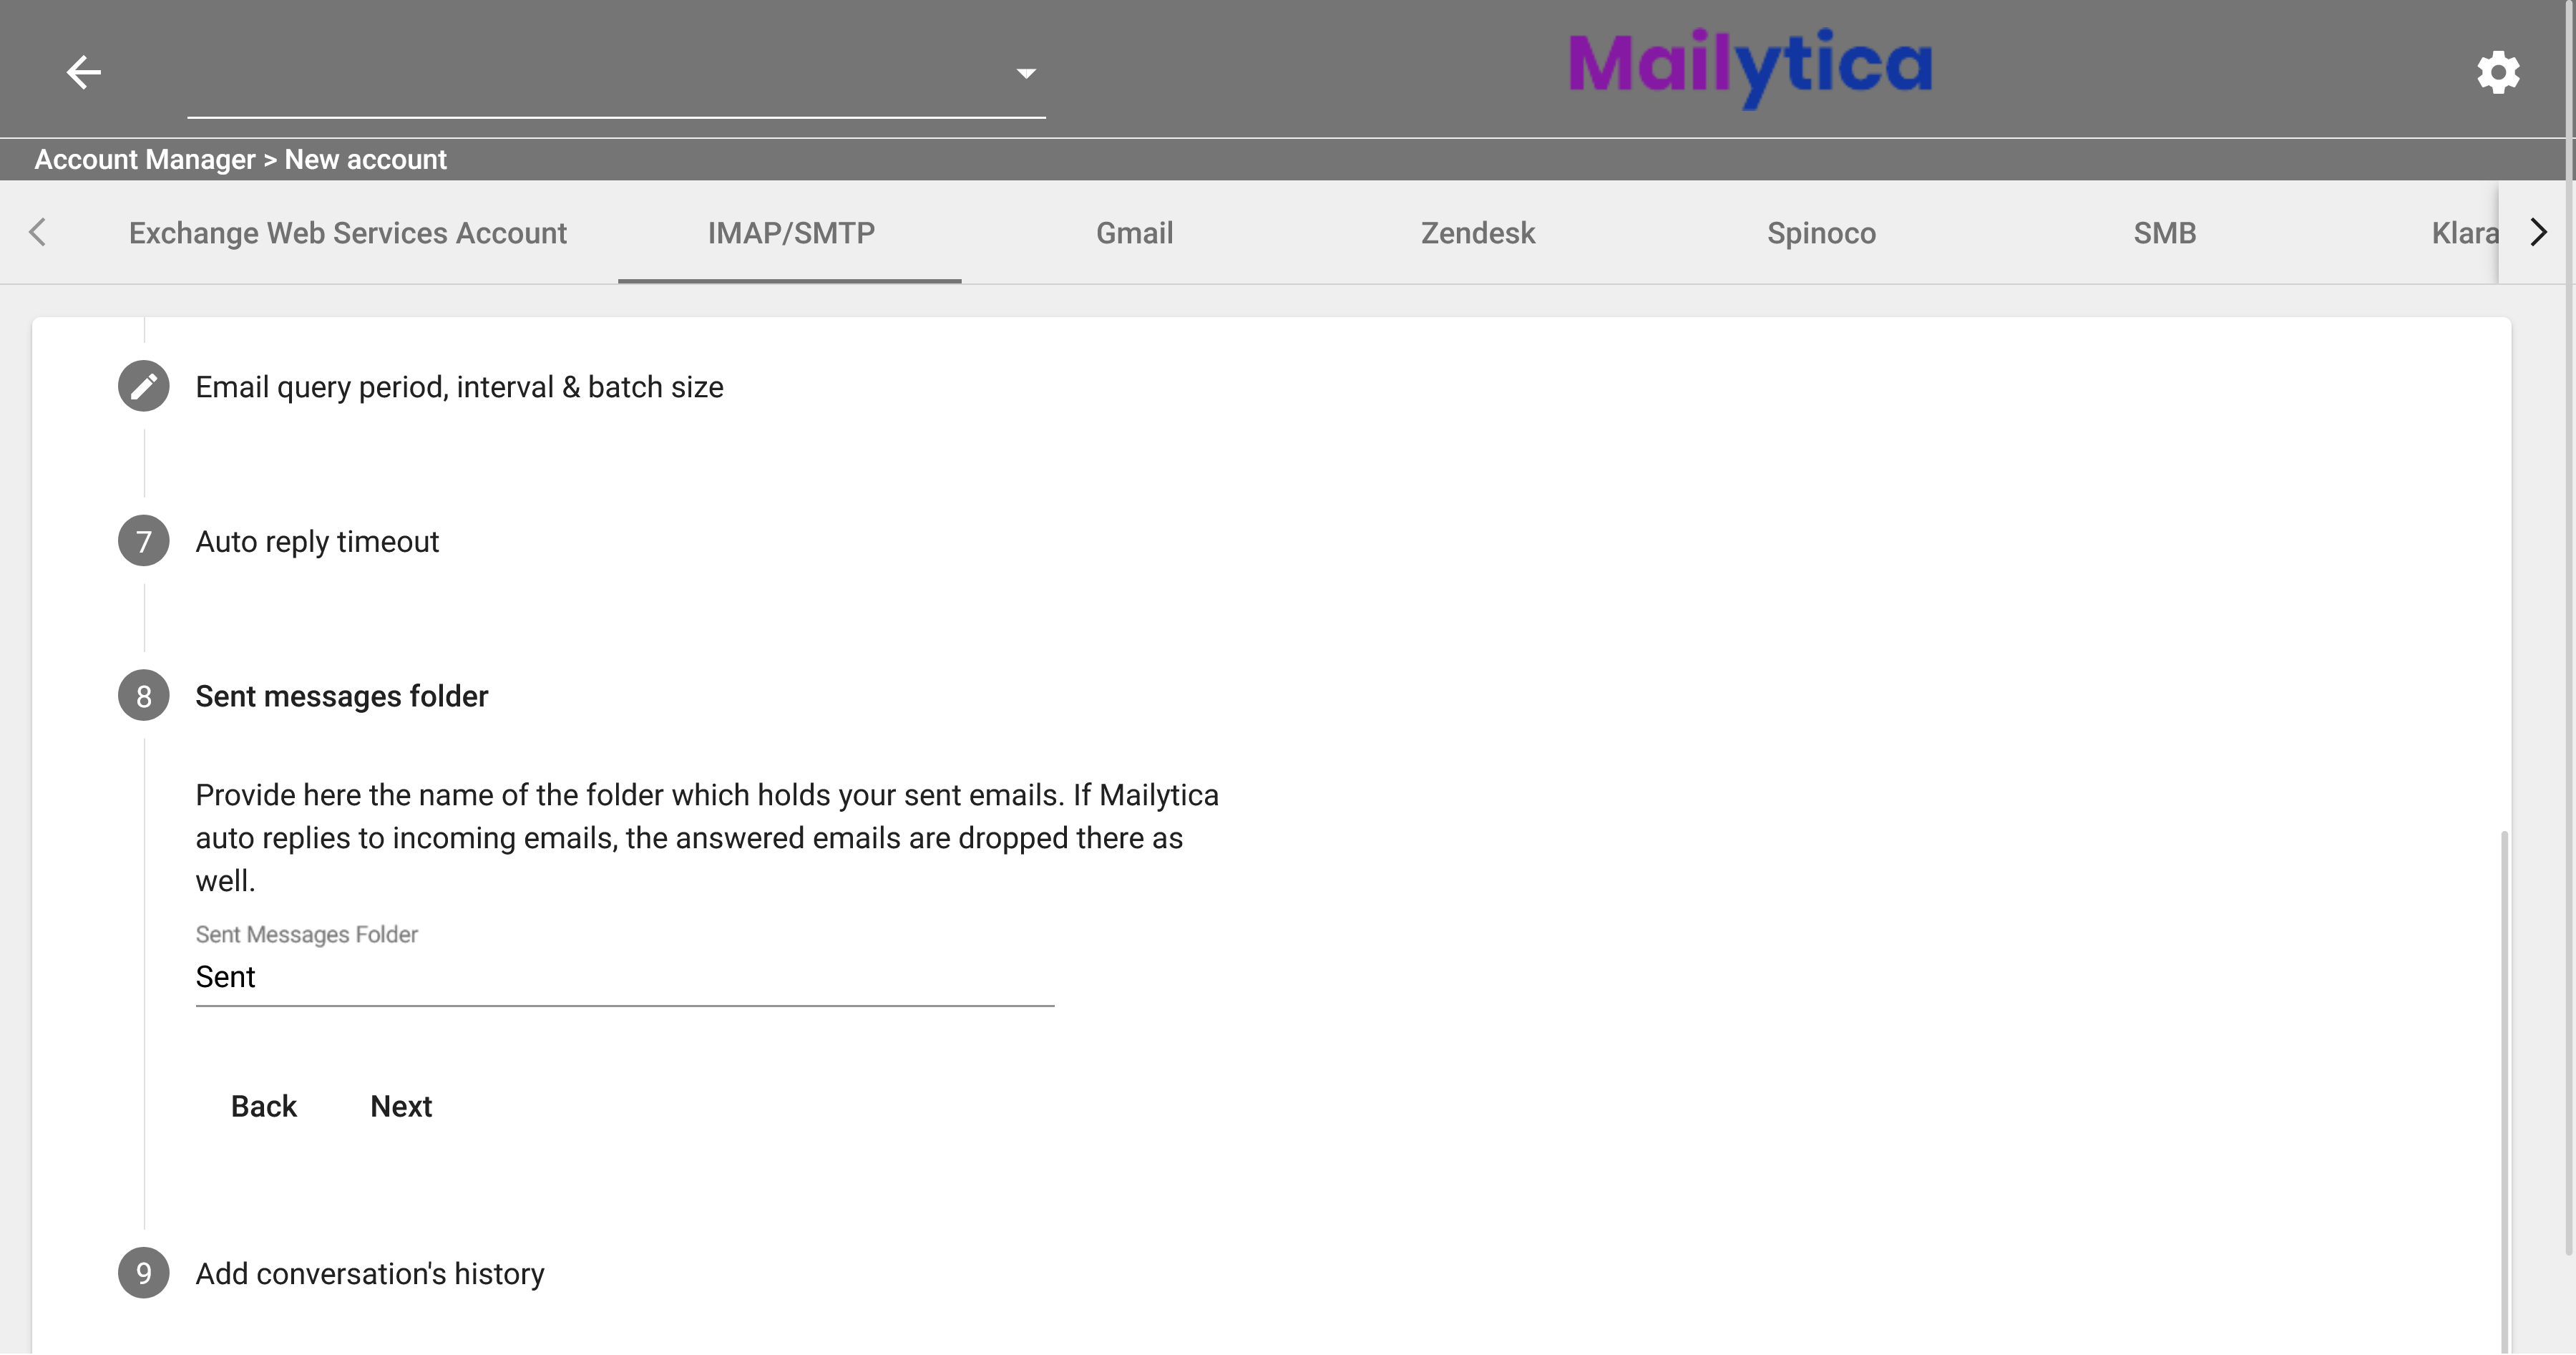
Then, in the Sent Messages Folder field, provide the name of the folder where your sent emails are stored. If you use Smart Responses to automatically respond to incoming emails, Mailytica will also store those messages in this folder.
Next, toggle the button in Add Conversation’s History if you want Mailytica to attach the email conversation history to the messages. This will ensure that the recipient can see all the emails that have been exchanged between you and your contact.
Finally, click Add. Now your new account should be listed in the Account Manager and will be ready to use with Mailytica.