Test Area#
The Test Area is a tool designed to test how Mailytica will classify and process new emails. This tool is not the same as the email client you normally use to send your emails. It is a mock email server that will process and simulate Mailytica’s output for you without sending it out to your clients.
The Test Area is useful if you want to test out Mailytica’s features before using them on your real email accounts. This functionality is recommended to users who will set up Mailytica’s functionalities and want to ensure that everything is configured correctly before using it in a real context.
Tip
It is not required to use the Test Area, but doing so can help if you want to become more familiar with Mailytica.
For example, if you created an email parsing rule to extract data from your incoming messages, you can use the test area to make sure that Mailytica is extracting and storing all the correct information.
You can even verify that Mailytica is classifying your emails correctly. Similarly, you can verify if Mailytica will suggest appropriate Smart Responses to specific email topics.
To access the Test Area, login to Mailytica’s Online Platform and select your project. From there, click on Test Area at the bottom of the left-side menu.
Important
Whatever feature you intend on testing must already be configured in your project. So for instance, if you want to test email parsing rules, you should have created at least one parsing rule in your project.
Submit Test Emails#
Understanding the Test Email Interface#
Once you click Test Area at the bottom of Mailytica’s left-side menu, a new screen will appear with several sections. These sections include:
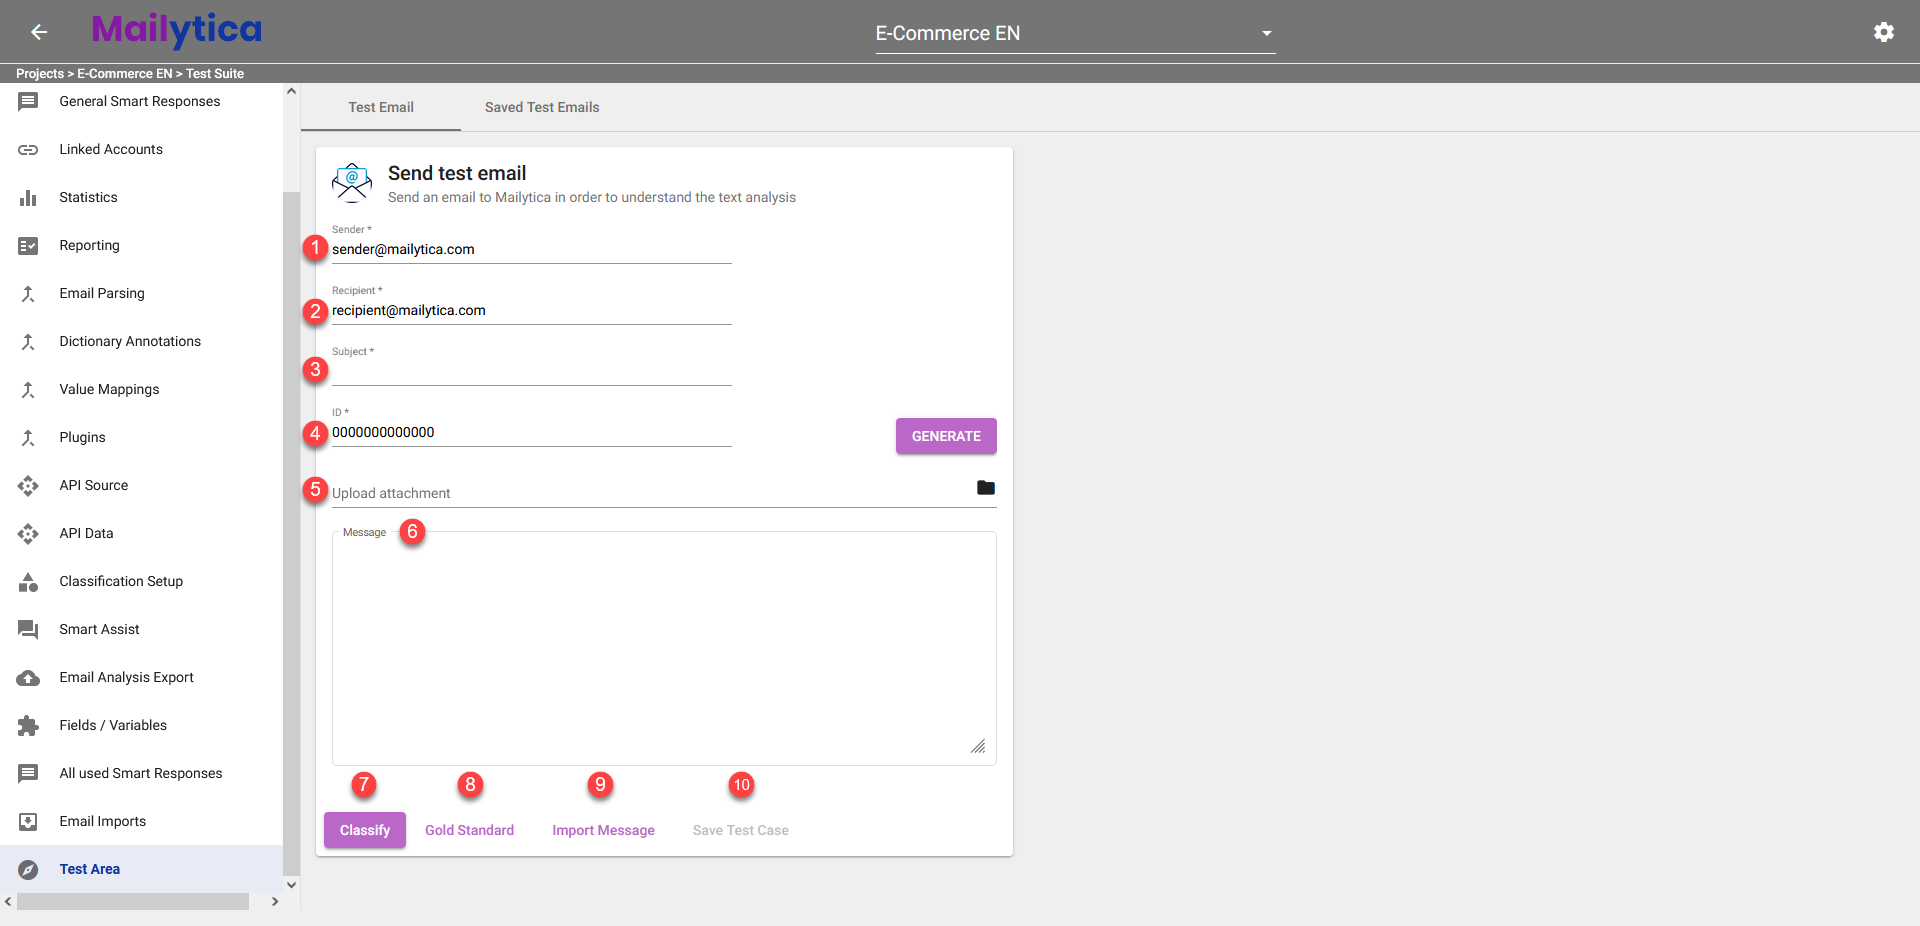
Sender: The email address that will be used as the sender of the test email. We suggest leaving the default setting
sender@mailytica.com, as it is an address that Mailytica provides for testing purposes. However, if you set up an email parsing rule that concerns the sender information, make sure to adjust this field accordingly.Recipient: The email address that will be used as the recipient of the test email. We recommend leaving the default setting
recipient@mailytica.com, as it is an address that Mailytica provides for testing purposes. However, if you set up an email parsing rule that concerns the recipient information, make sure to adjust this field accordingly.Subject: The subject line for your test email. Use a subject line that would be typical for your use case. This is particularly important if you’re testing models that rely on the information found in the subject line.
ID: A unique message ID automatically generated by Mailytica. This will help you identify which message is being tested in your reports, as well as allow you to import the message and its results for later viewing. We recommend keeping the default value for the ID, but if you’d like to generate a new random one, simply click on Generate.
Upload Attachment: You can upload a file attachment for your test message. To do so, click on Upload Attachment and select the file from your computer. This is only necessary if you’re testing a model or functionality that relies on the attachments found in your emails. Otherwise, feel free to leave this section blank.
Message: This is where you’ll enter your test message. You can either copy and paste the test message from another application or enter it manually. Make sure that the message you are writing is relevant to the functionality being tested.
Classify: After you’ve finished writing your test email you can click the Classify button to send your message and obtain the test results.
Gold Standard: After you’ve completed your test and received your results, you can click on the Gold Standard button to tell Mailytica that the message was classified correctly. This is optional.
Import Message: If you have already written and processed a test message before, you can import it into Mailytica by clicking on the Import button and adding the message ID (from Step 4). This will save you time because you don’t have to re-type the message. You can also use this feature if you want to modify the test email after writing it manually.
Save Test Case: Once you have completed a test, you can save it by clicking on the Save Test Case button. This allows you to go back and modify your test at any time later if necessary.
Submitting a Test Email: A Step-by-Step Example#
The Test Area is a sandbox environment used to validate rules and classifications models before deploying them in a real context. To submit a test email, follow these steps:
First, access the Test Area, by logging in to Mailytica’s Online Platform and selecting your project. From there, click on Test Area at the bottom of the left-side menu.
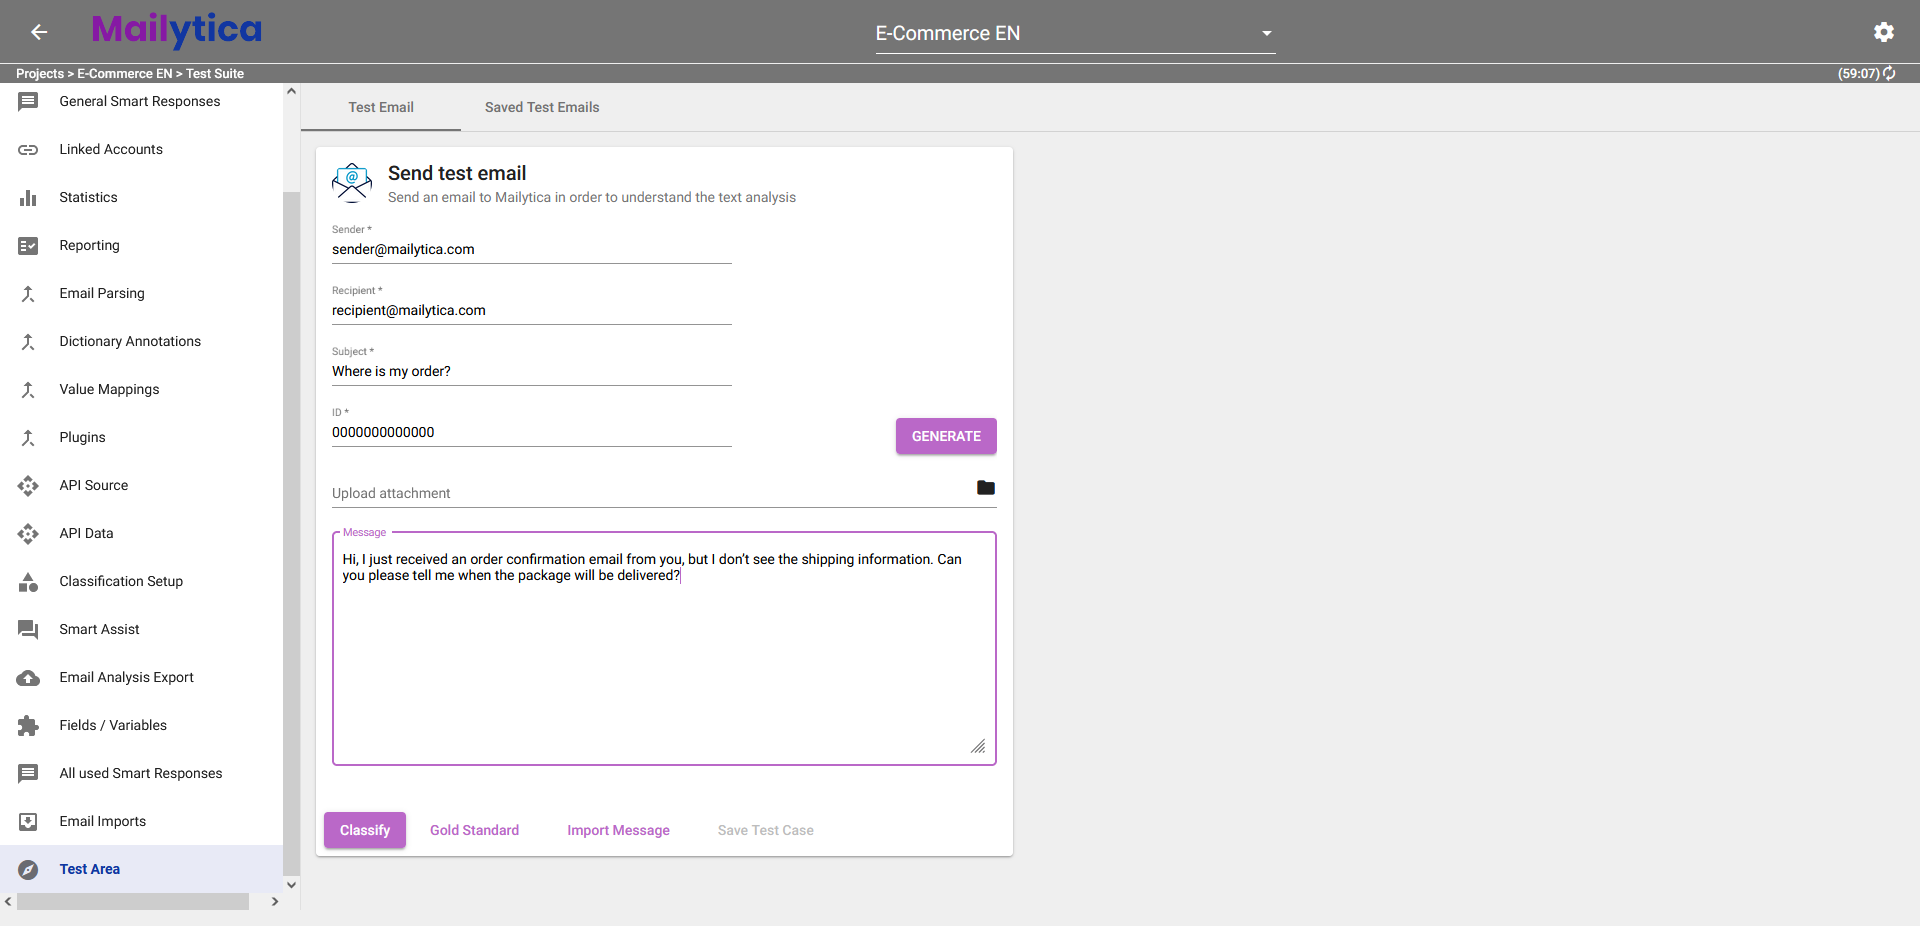
In the Subject field write the subject of your test message. For instance, we’ll write Where is my order? to test a model that was previously trained to identify emails about shipping and deliveries.
In the Message field, write the message you would like to submit with your test email. We recommend that the test message should be similar to messages you receive from your customers. For instance, we’ll write Hi, I just received an order confirmation email from you, but I don’t see the shipping information. Can you please tell me when the package will be delivered?.
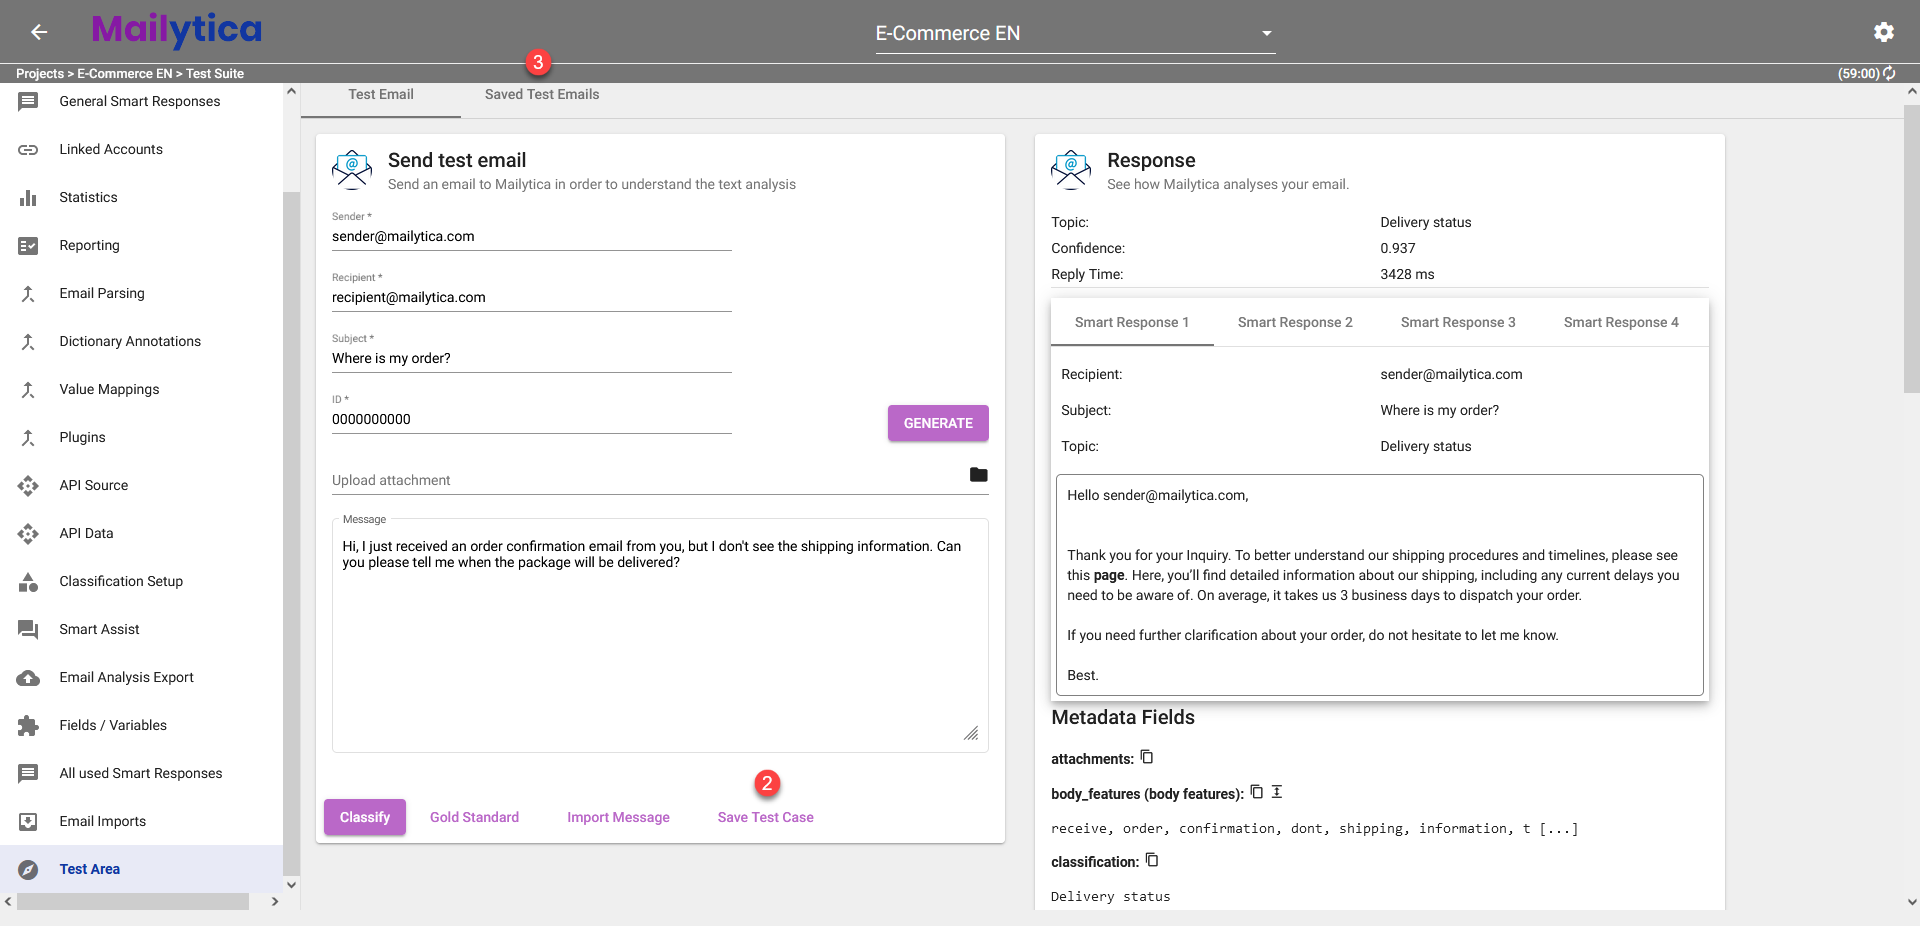
Click the Classify button and you will instantly see your results on the right side of the screen.

The test results will indicate the topic that Mailytica has assigned to your message. Under Confidence, it will display how confident it is that the topic is correct (from 0 to 1, with 1 being most confident). Then, the Reply Time it took Mailytica to answer the test email, and how Mailytica would have replied with a Smart Response.
Further below you will find a list of Metadata Fields, which are simply variables predefined by Mailytica (see Mailytica’s Email Data for more information) or fields created through Email Parsing Rules, Dictionary Annotations, and so on.
For example, if you created an email parsing rule to store the person’s contact information under a variable called contact_info, then it should appear under Metadata Fields.
At the bottom of the results, you can export your request (test email) and response (Mailytica’s test results) data as JSON files.
Save Test Emails#
One useful feature of Mailytica’s Test Area is the ability to save test emails. Using this feature, you can save time and streamline your testing process by reusing saved messages in future tests—without having to create them again from scratch every time.
By saving your test emails, you can easily access and review the data you entered, making it easier to check results and make necessary changes. In this section, we’ll show you how to save test emails and access them later for further review.
First, submit a test email using the steps outlined in the Submit Test Emails section.
Once you have sent the test email, click on the Save Test Case button located below the message box on the right side panel.
Next, Mailytica will automatically show you the list of saved emails, but to access it manually, click on the Saved Test Emails tab in the top bar.
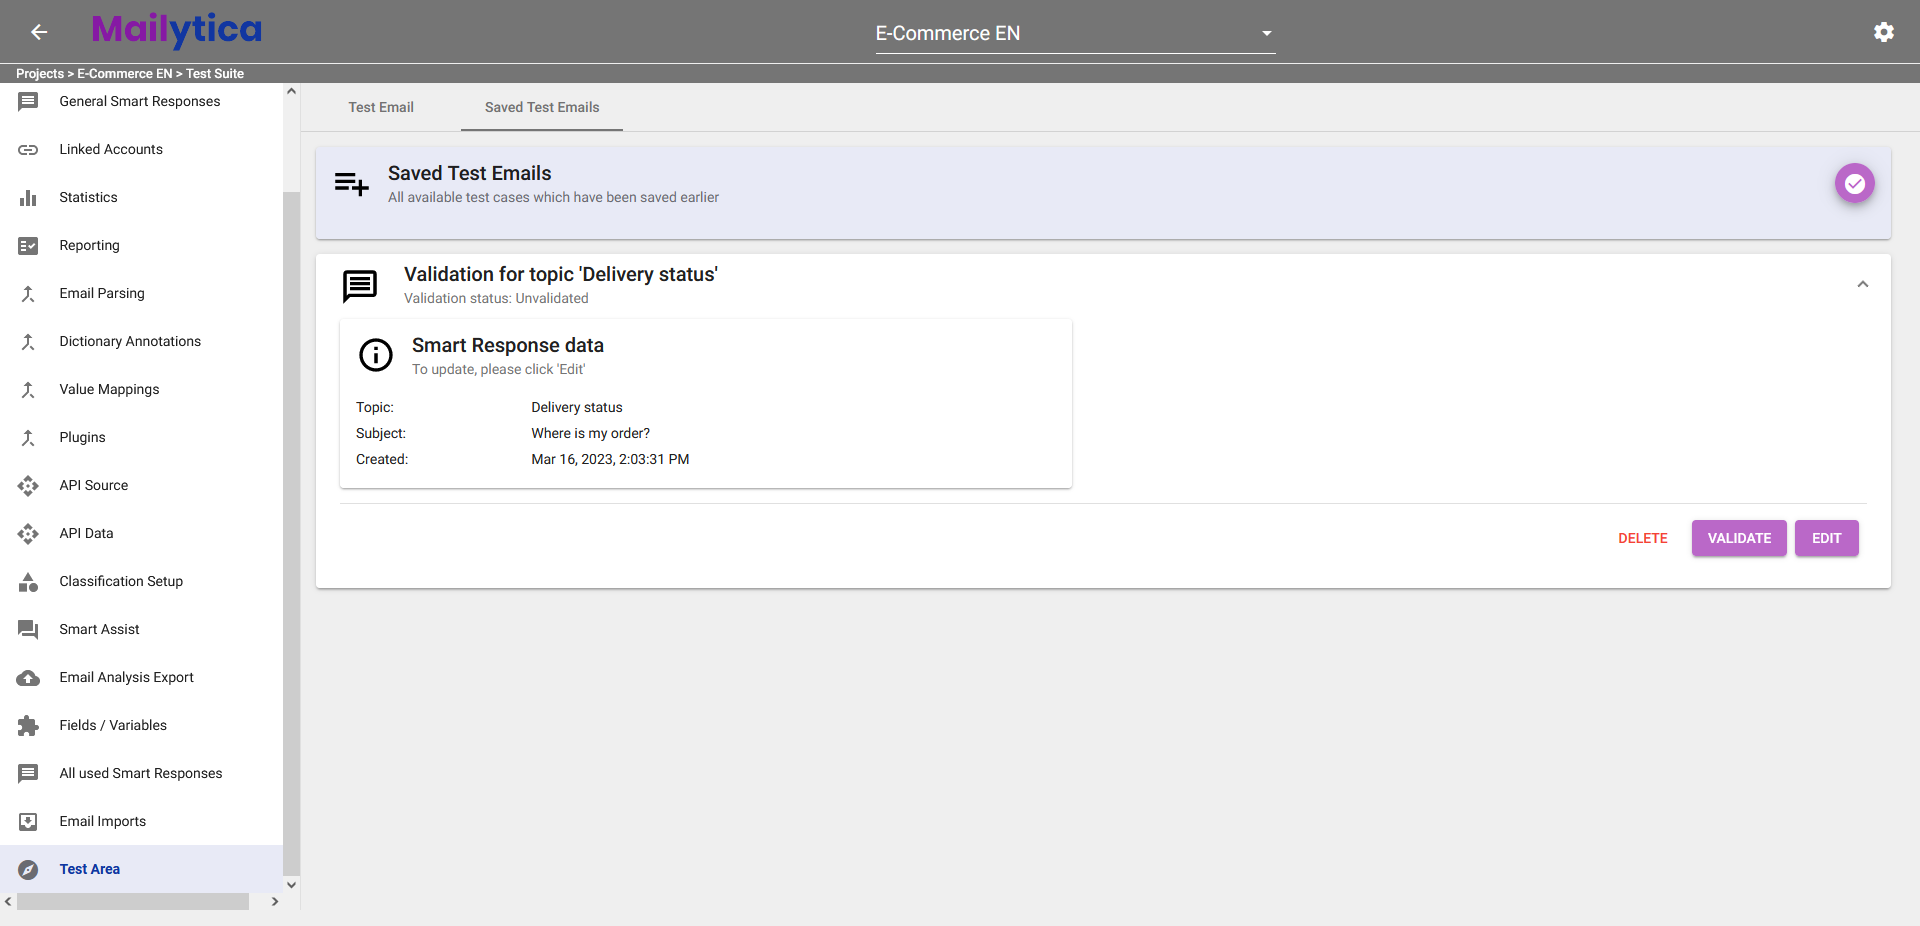
The Saved Test Emails section displays all the test emails you’ve saved. To examine a particular saved email, simply select it and then click Edit. You’ll be returned to the Send Test Email screen so that you can make any necessary changes.
The Test Area provides a space to review and test Mailytica’s responses, ensuring that they are error-free and look exactly as intended. As such, it is highly recommended that you take advantage of the test area when configuring any of Mailytica’s features.