Smart Responses#
Smart Responses allow you to manage your responses by automatically replying to emails with pre-defined messages. Mailytica’s Smart Responses are the ideal way to automate your email responses and minimize the time spent on repetitive emails. This feature uses artificial intelligence to detect email topics and respond accordingly.
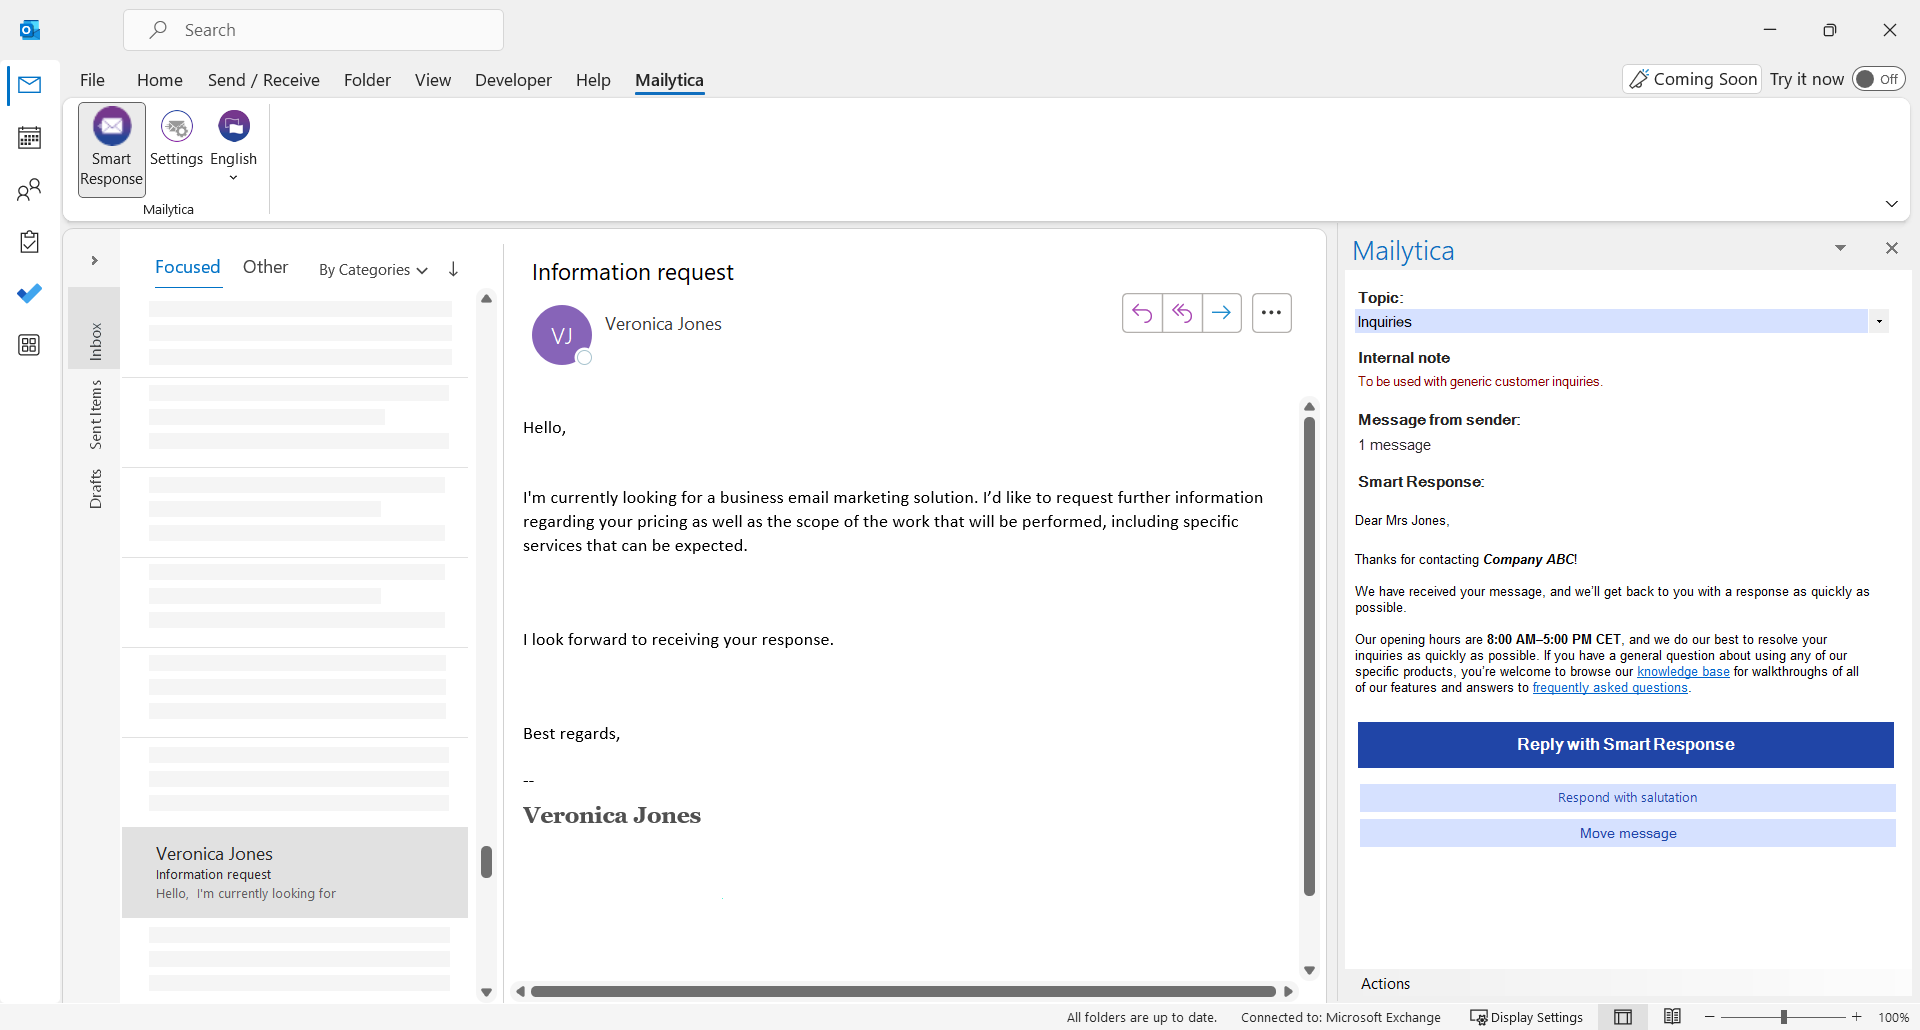
Smart Responses can be used in two different ways: either by automatically replying to emails, or by suggesting replies as drafts within Mailytica’s integrations.
Add Smart Response#
To create a new Smart Response, simply add it to the Online Platform by following the instructions below. Once added, the Smart Response will be ready to use in any of Mailytica’s integrations.
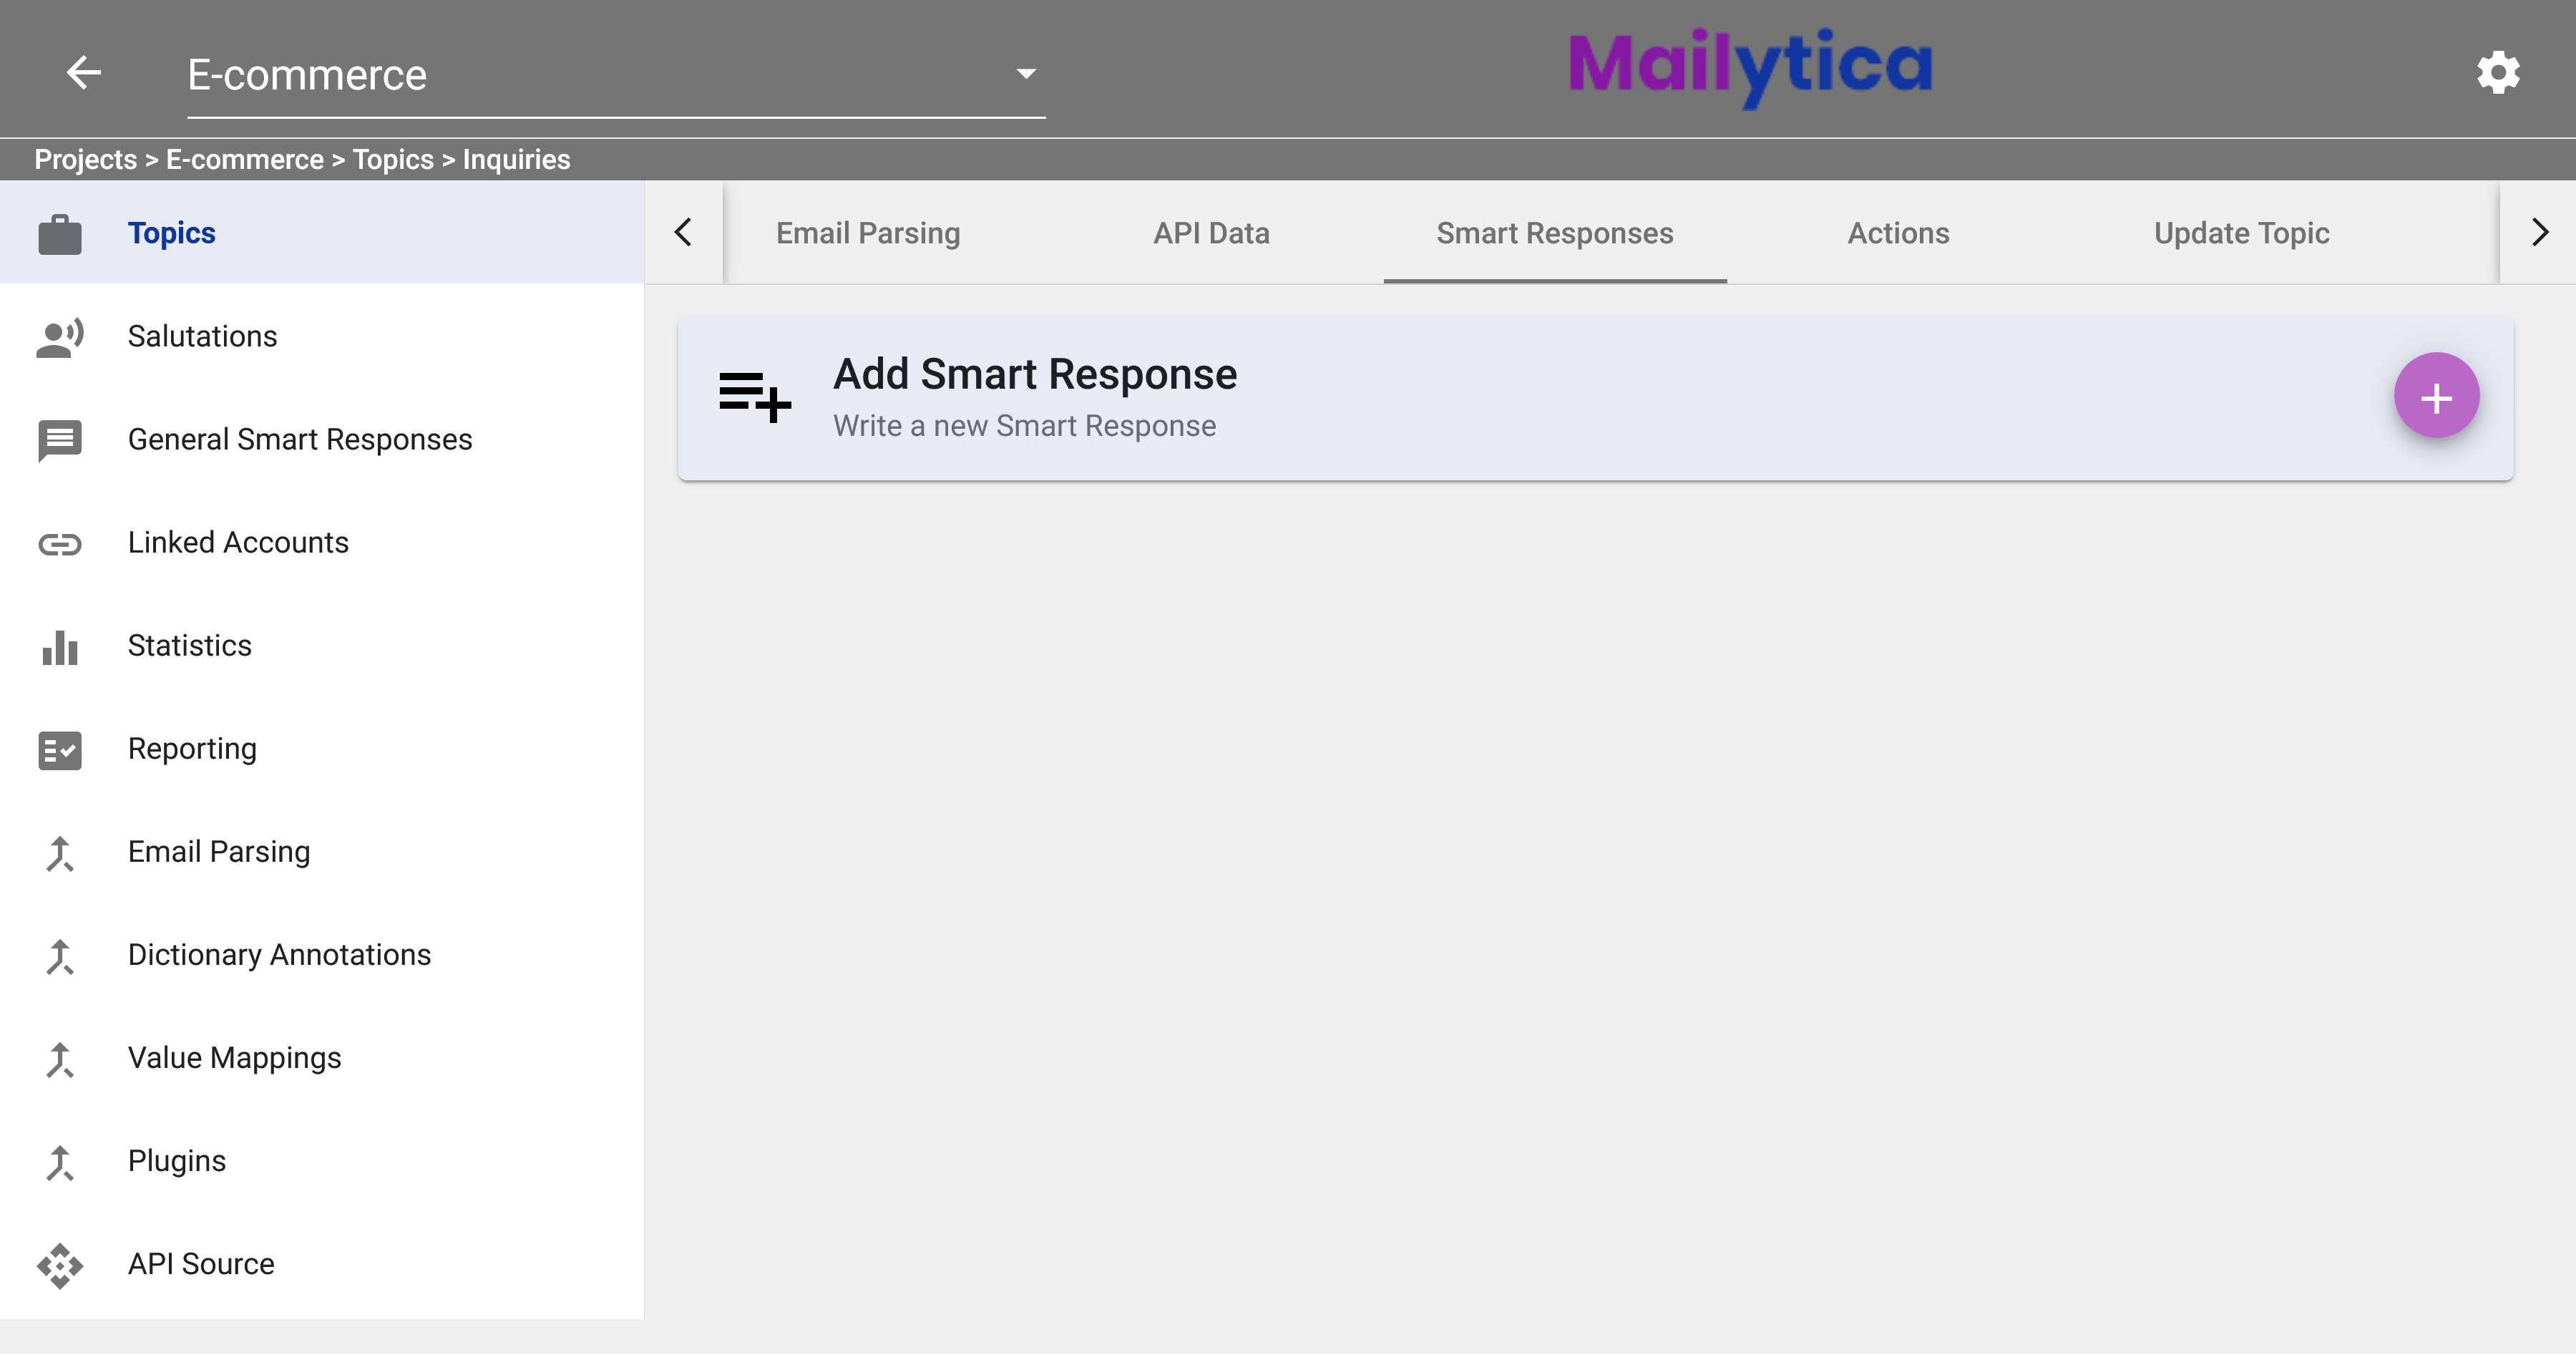
In the Edit section of your topic, select Smart Responses from the top tab bar. Then click on the button to add a Smart Response.
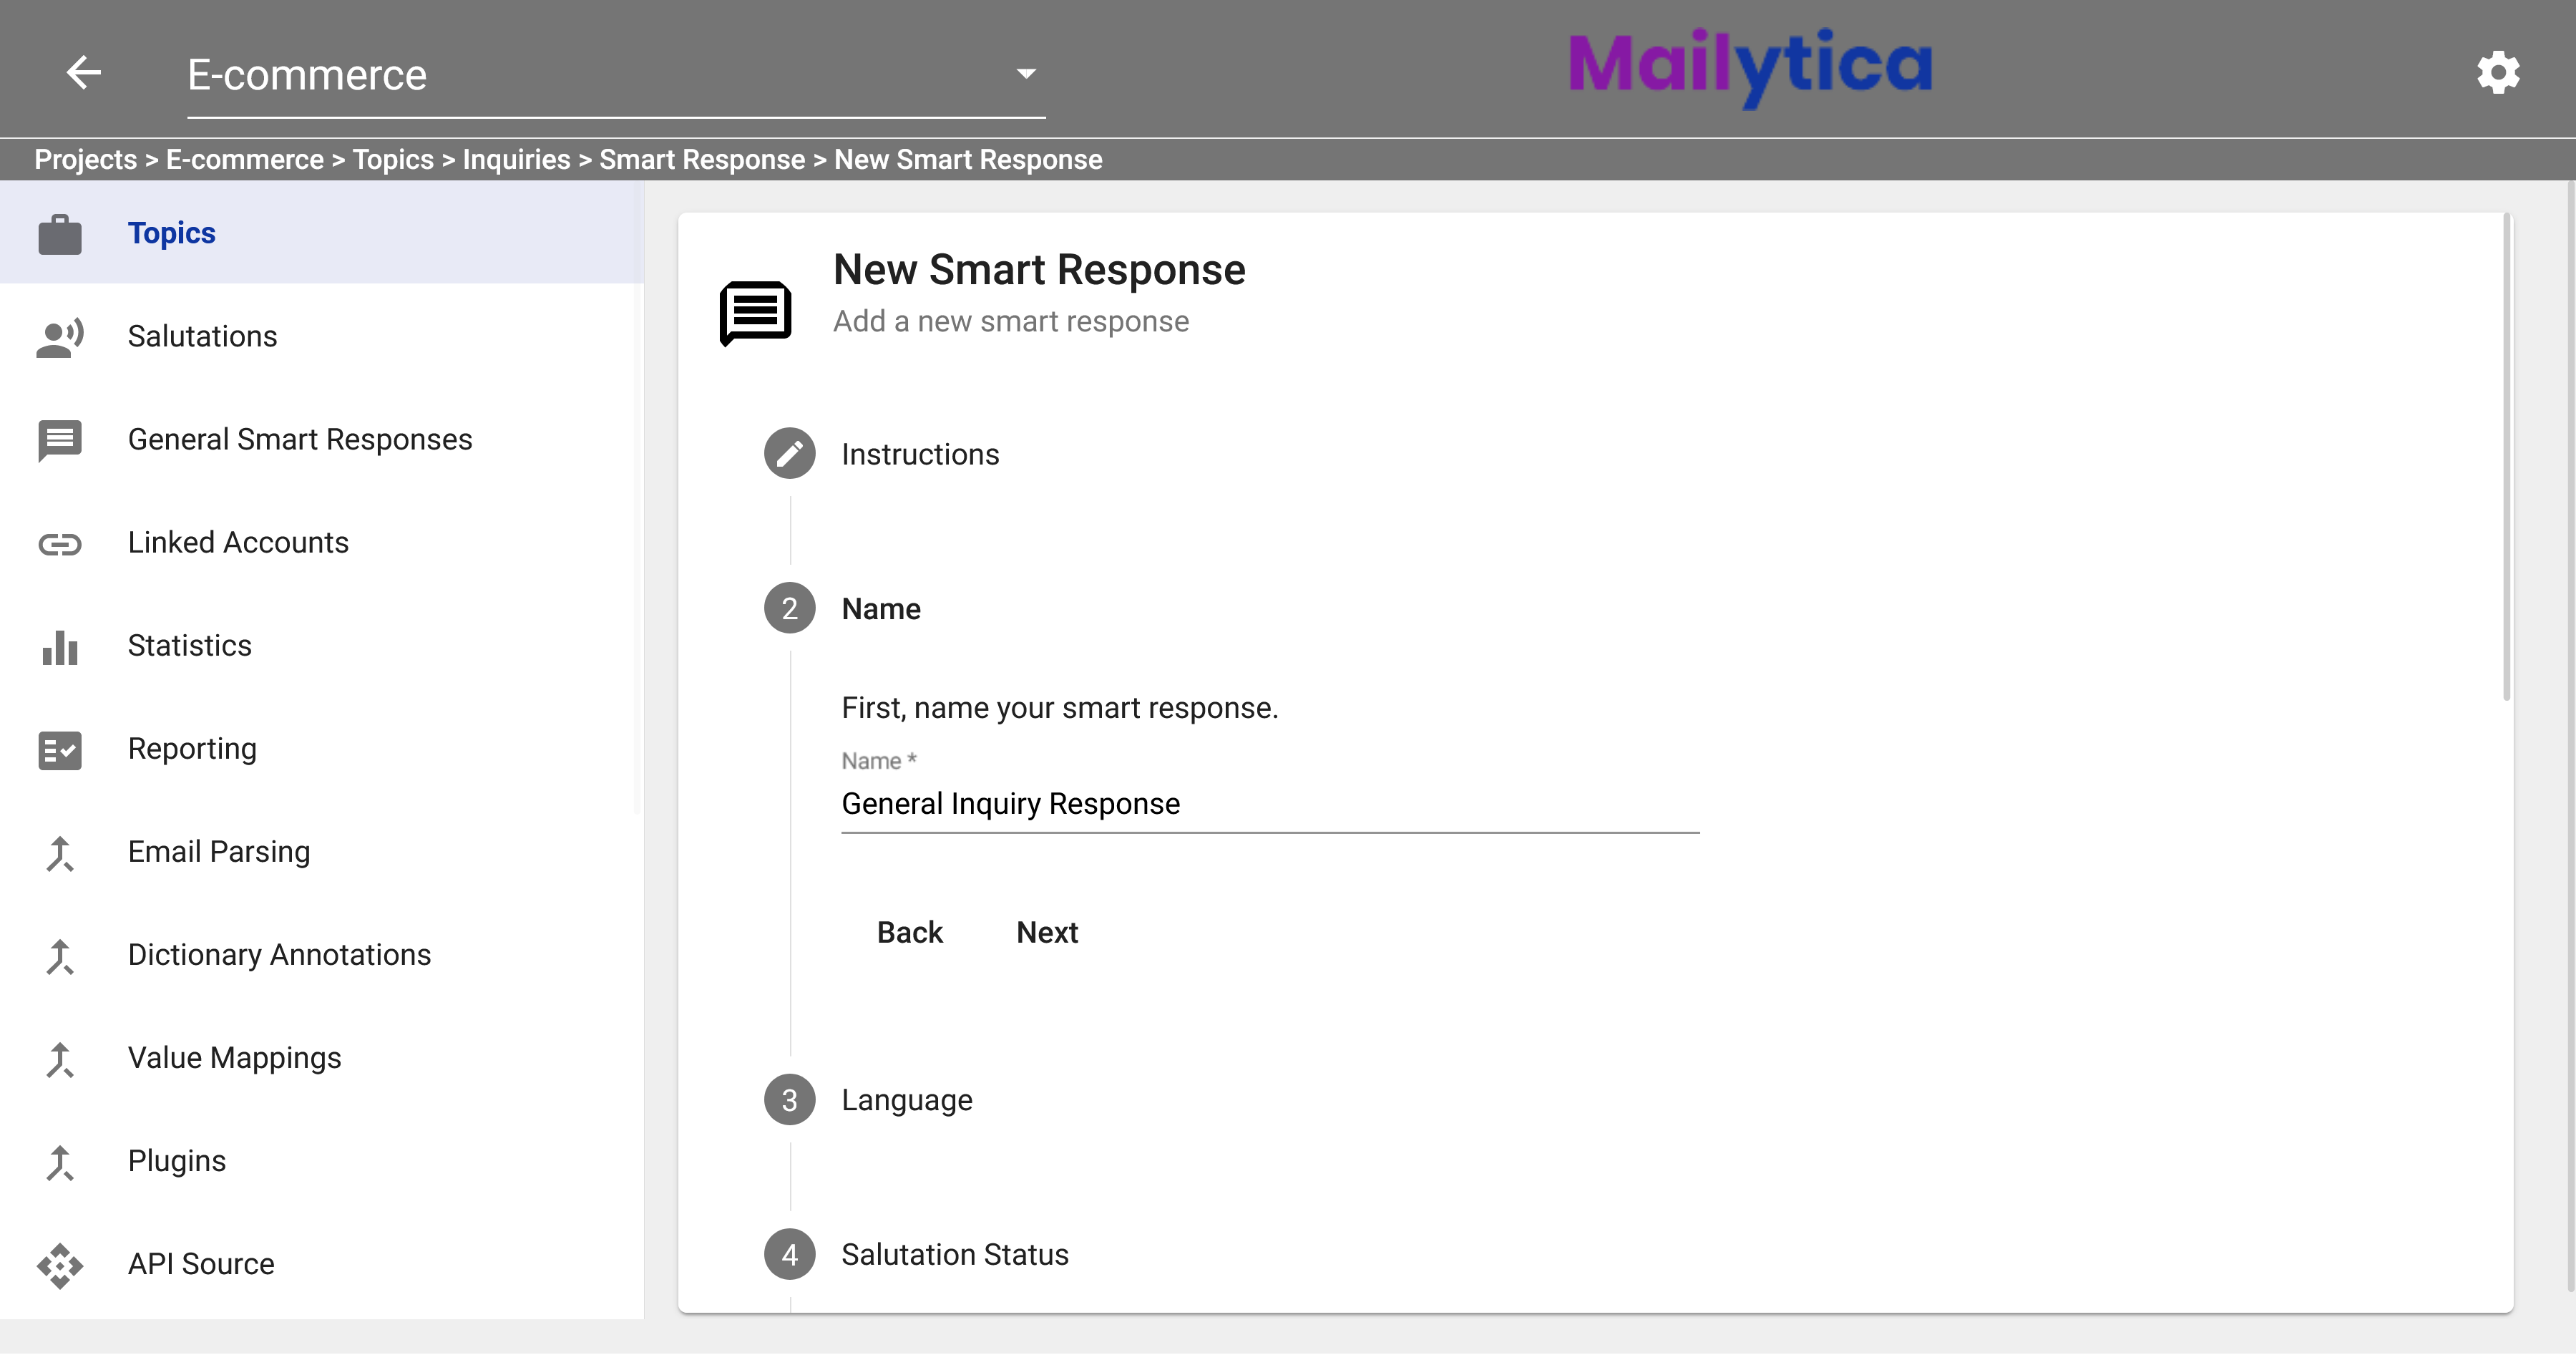
The New Smart Response section will show you the instructions on how to create a new Smart Response. Click Next, and it will prompt you to type a name for your Smart Response. For example, we’ll create a new Smart Response to reply to general customer inquiries, and we’ll name it General Inquiry Response.
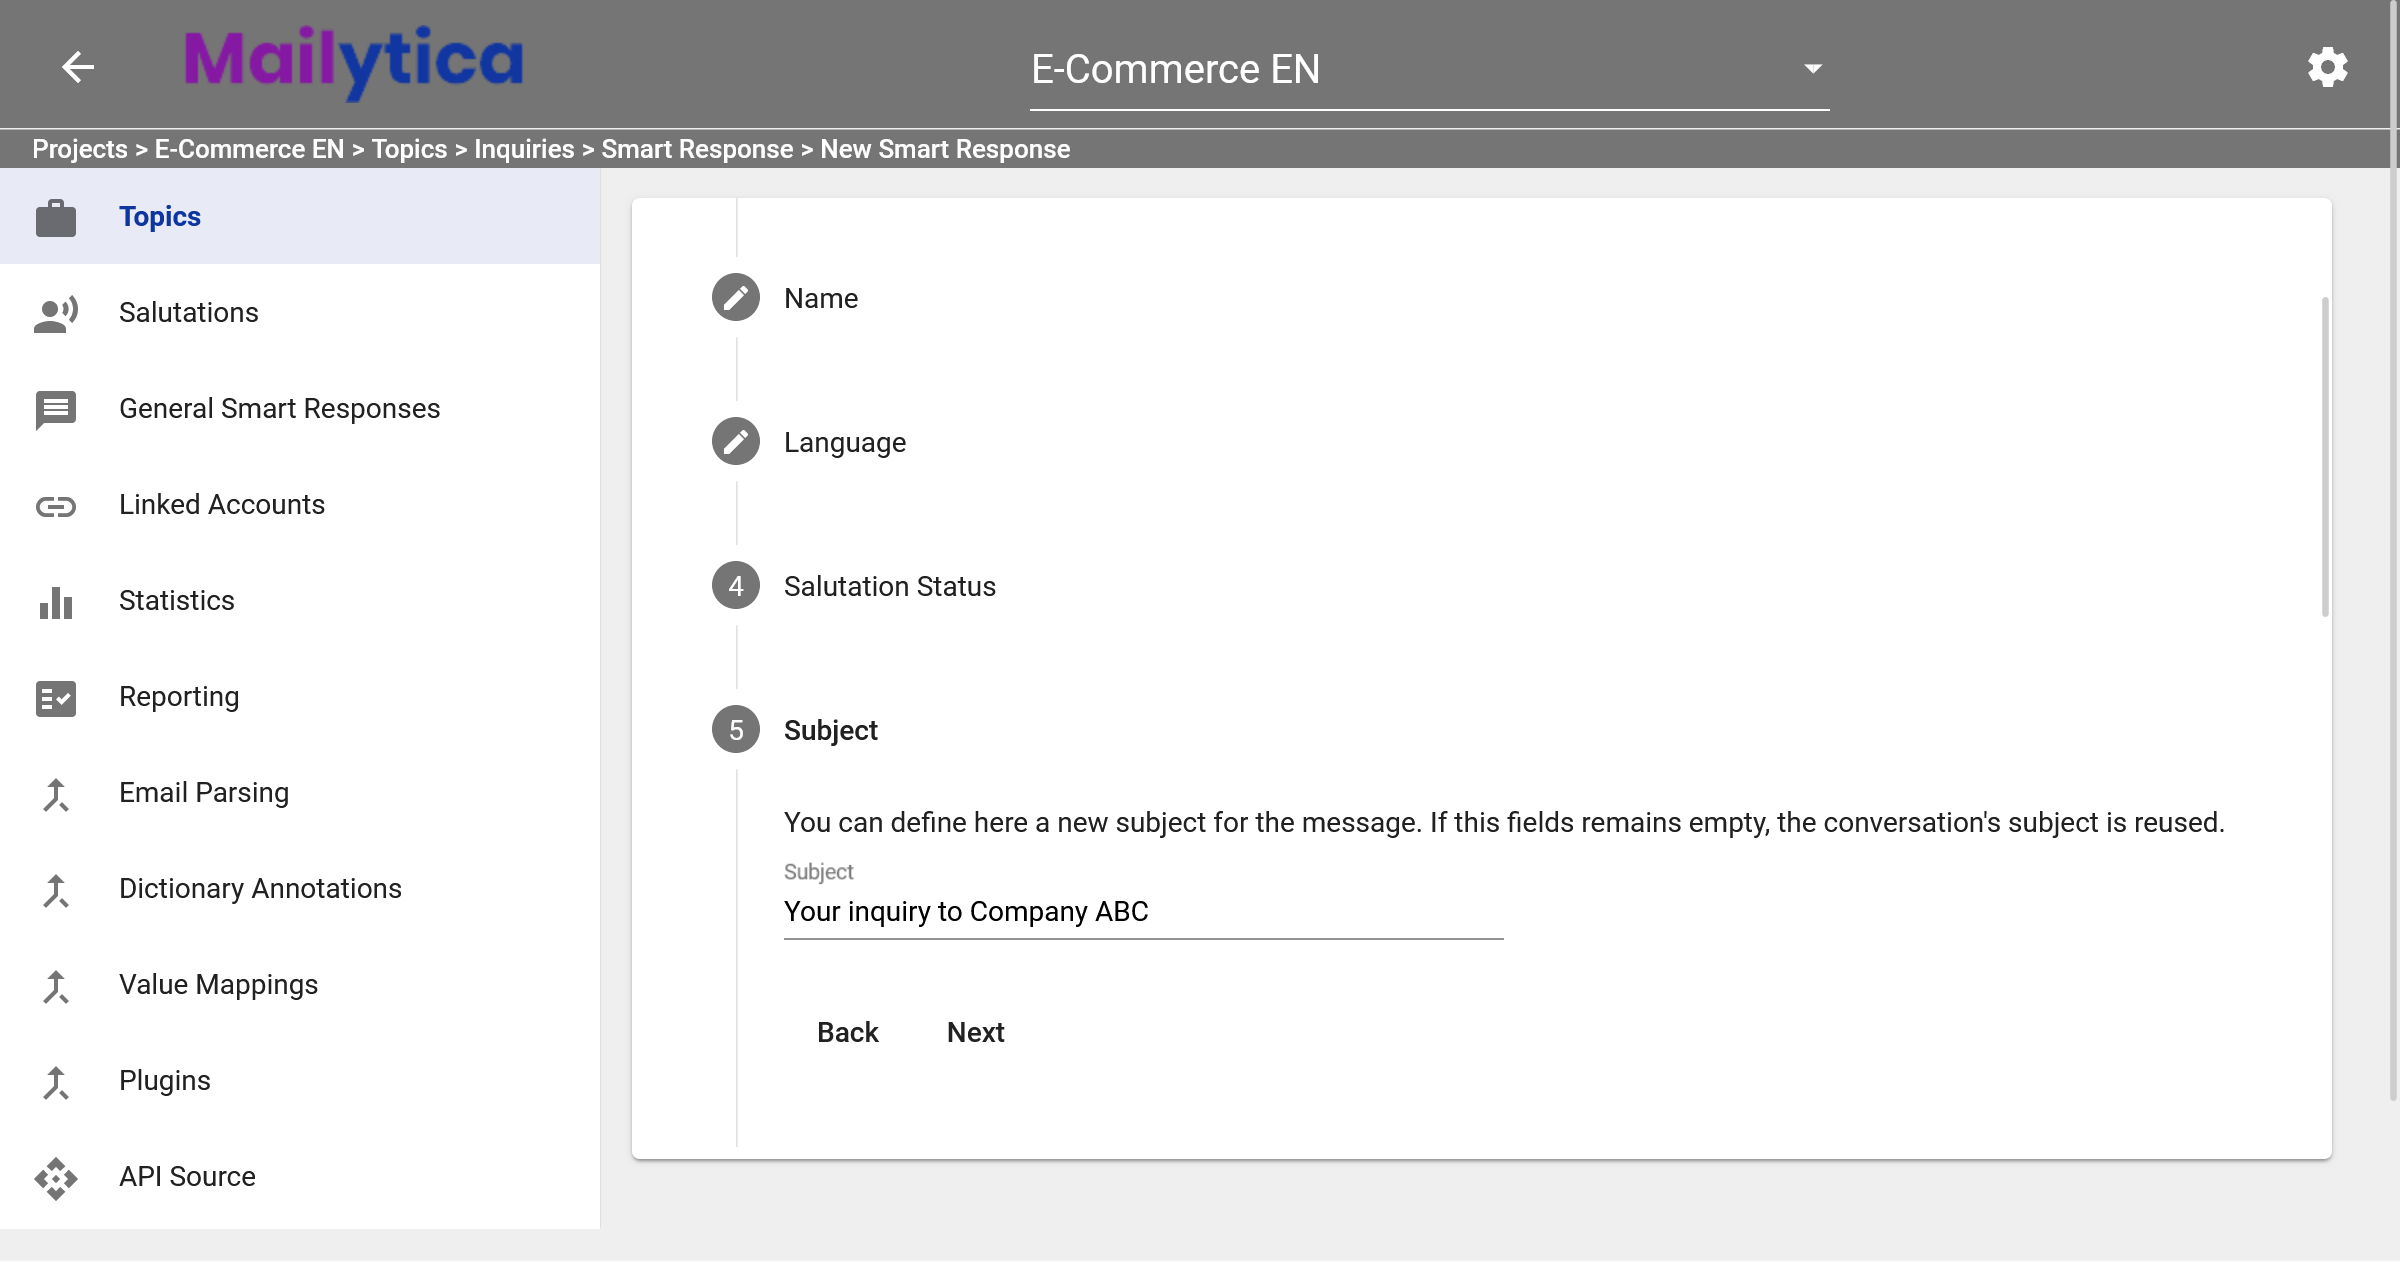
Next, choose the Language of your Smart Response. When you receive an email message, the AI-powered Smart Response will suggest a reply in the same language. For example, if you set the language of your Smart Response to English, Mailytica’s integration will give you suggestions for how to respond to emails received in English. If you receive email messages in additional languages, you can create Smart Responses for each one.
Following, in Salutation Status you can choose to include a salutation in your Smart Response. When active, Mailytica’s integration will add a salutation at the start of your message. The salutation can use the person’s last name: Dear Mrs. Jones, for example. Or a more generic salutation can also be used: Dear Madam, or Dear Sir. The recommended default value is Active.
In the Subject, enter a subject line that is relevant for your Smart Response.
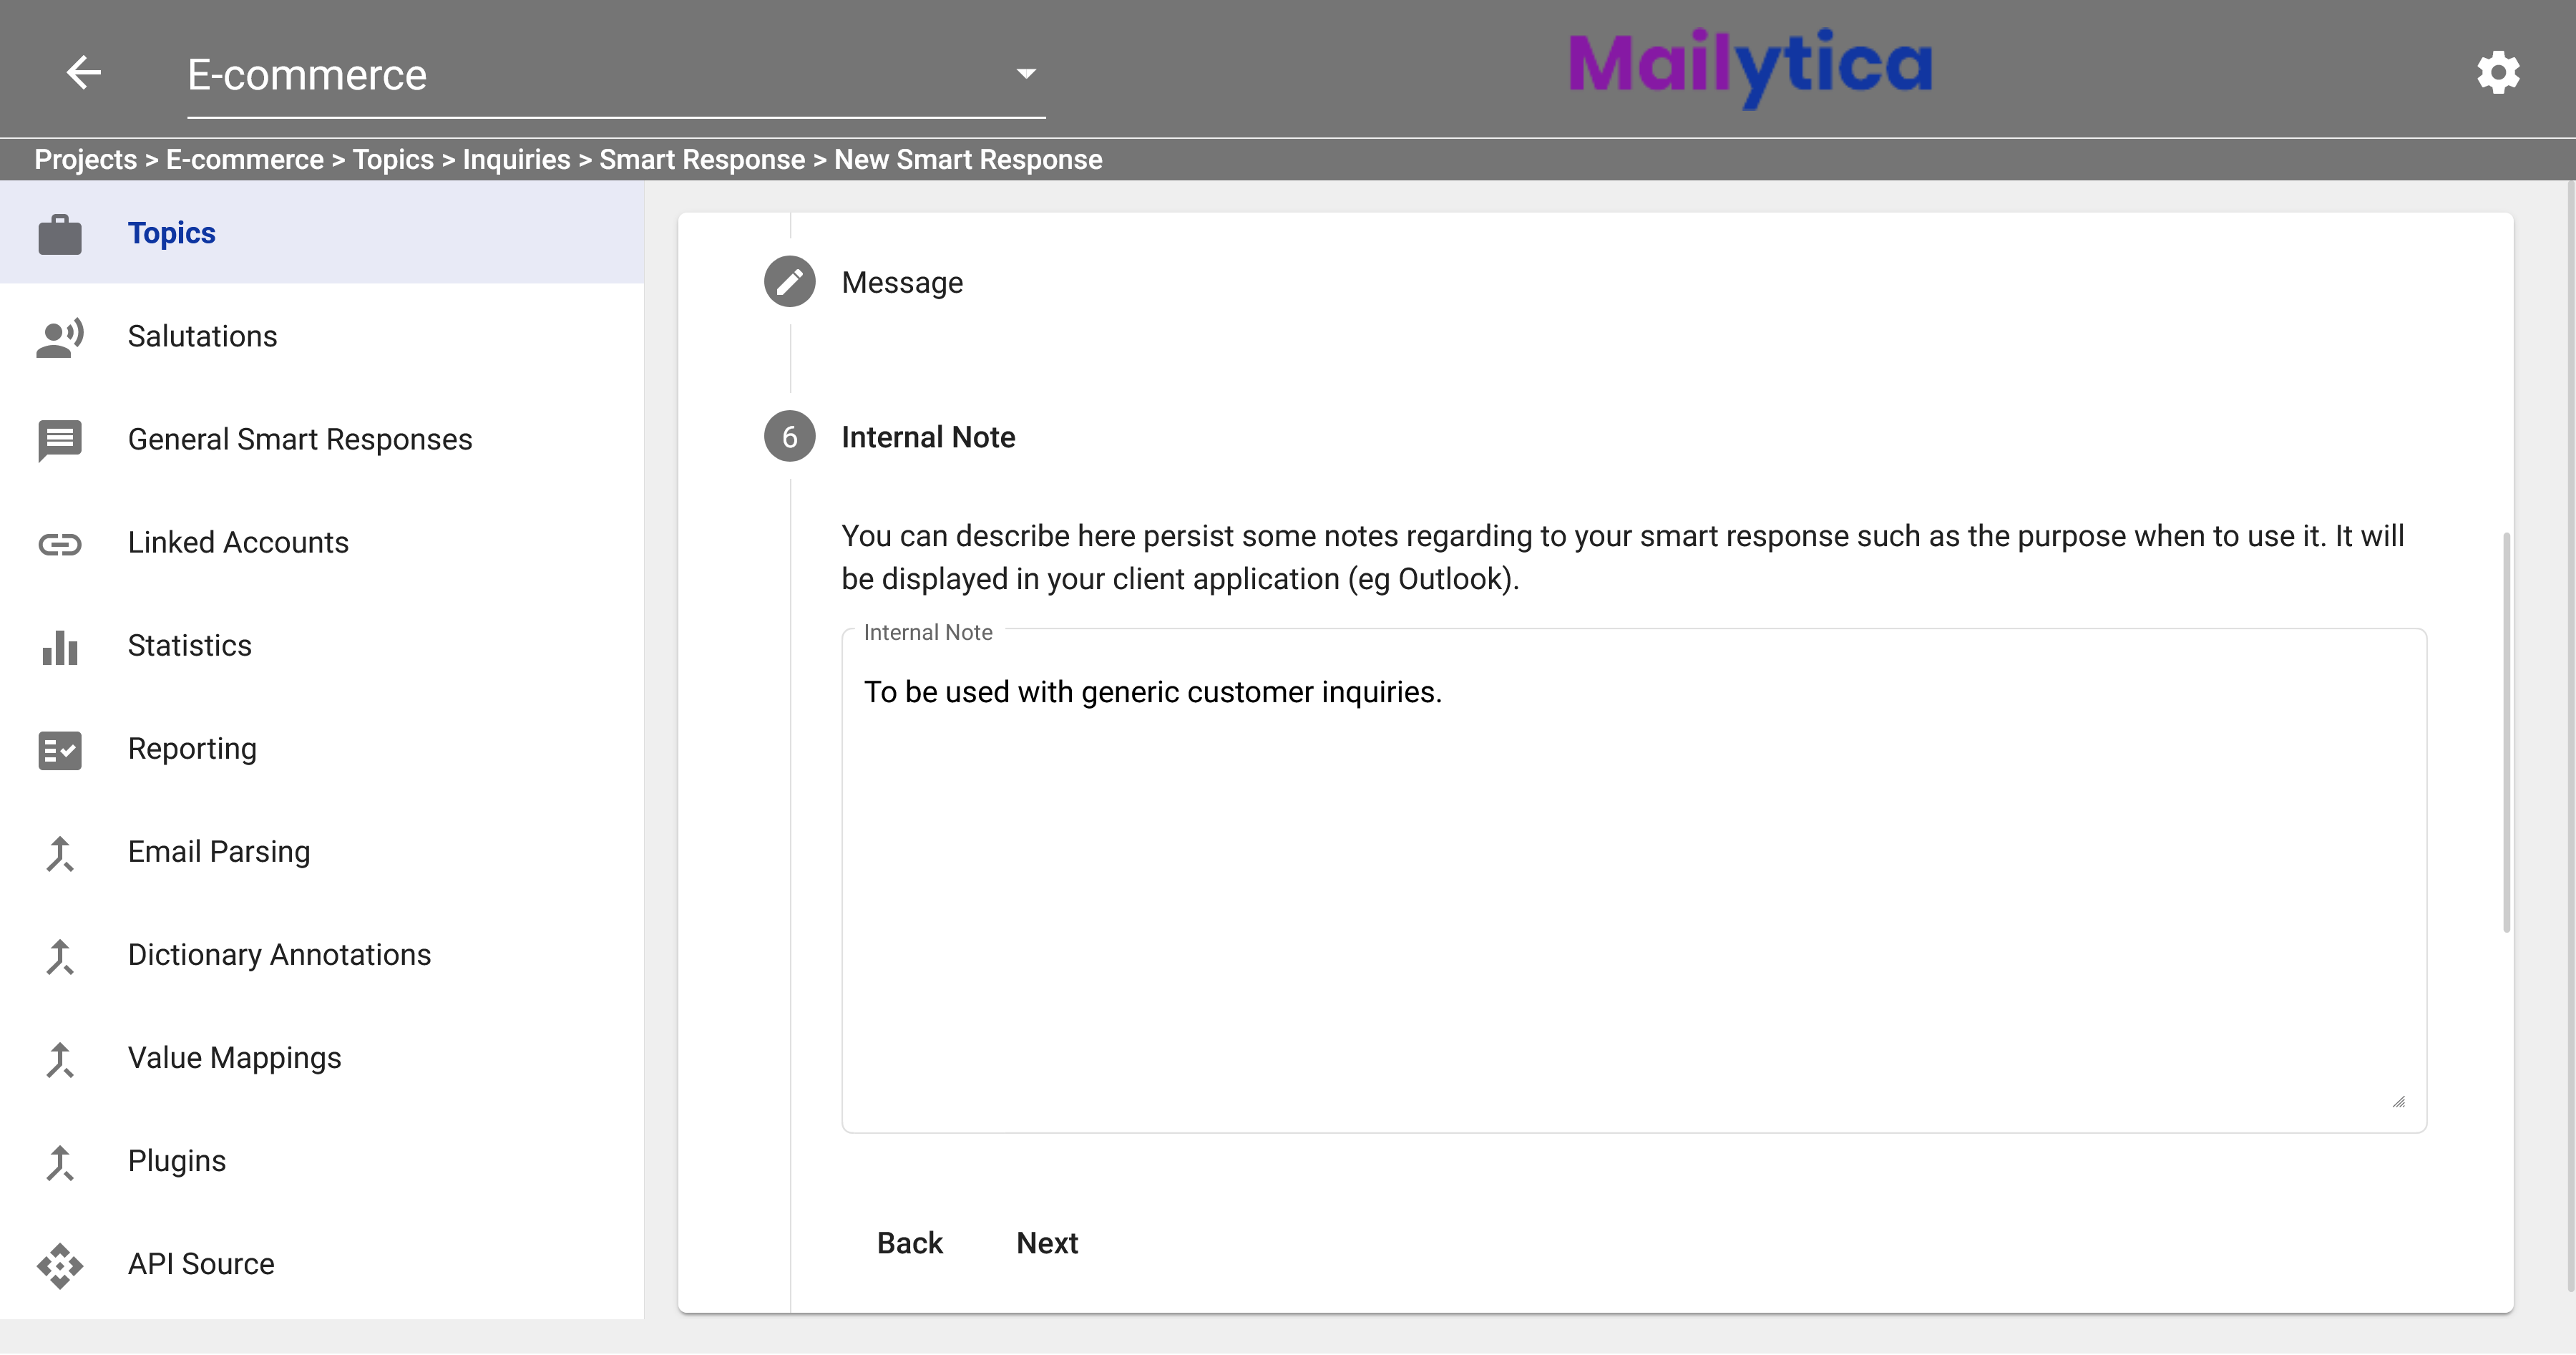
You then have the option of adding an Internal Note to be displayed in Mailytica’s integrations. Internal notes can be helpful for clarifying the purpose of the Smart Response or specifying the cases for using it.
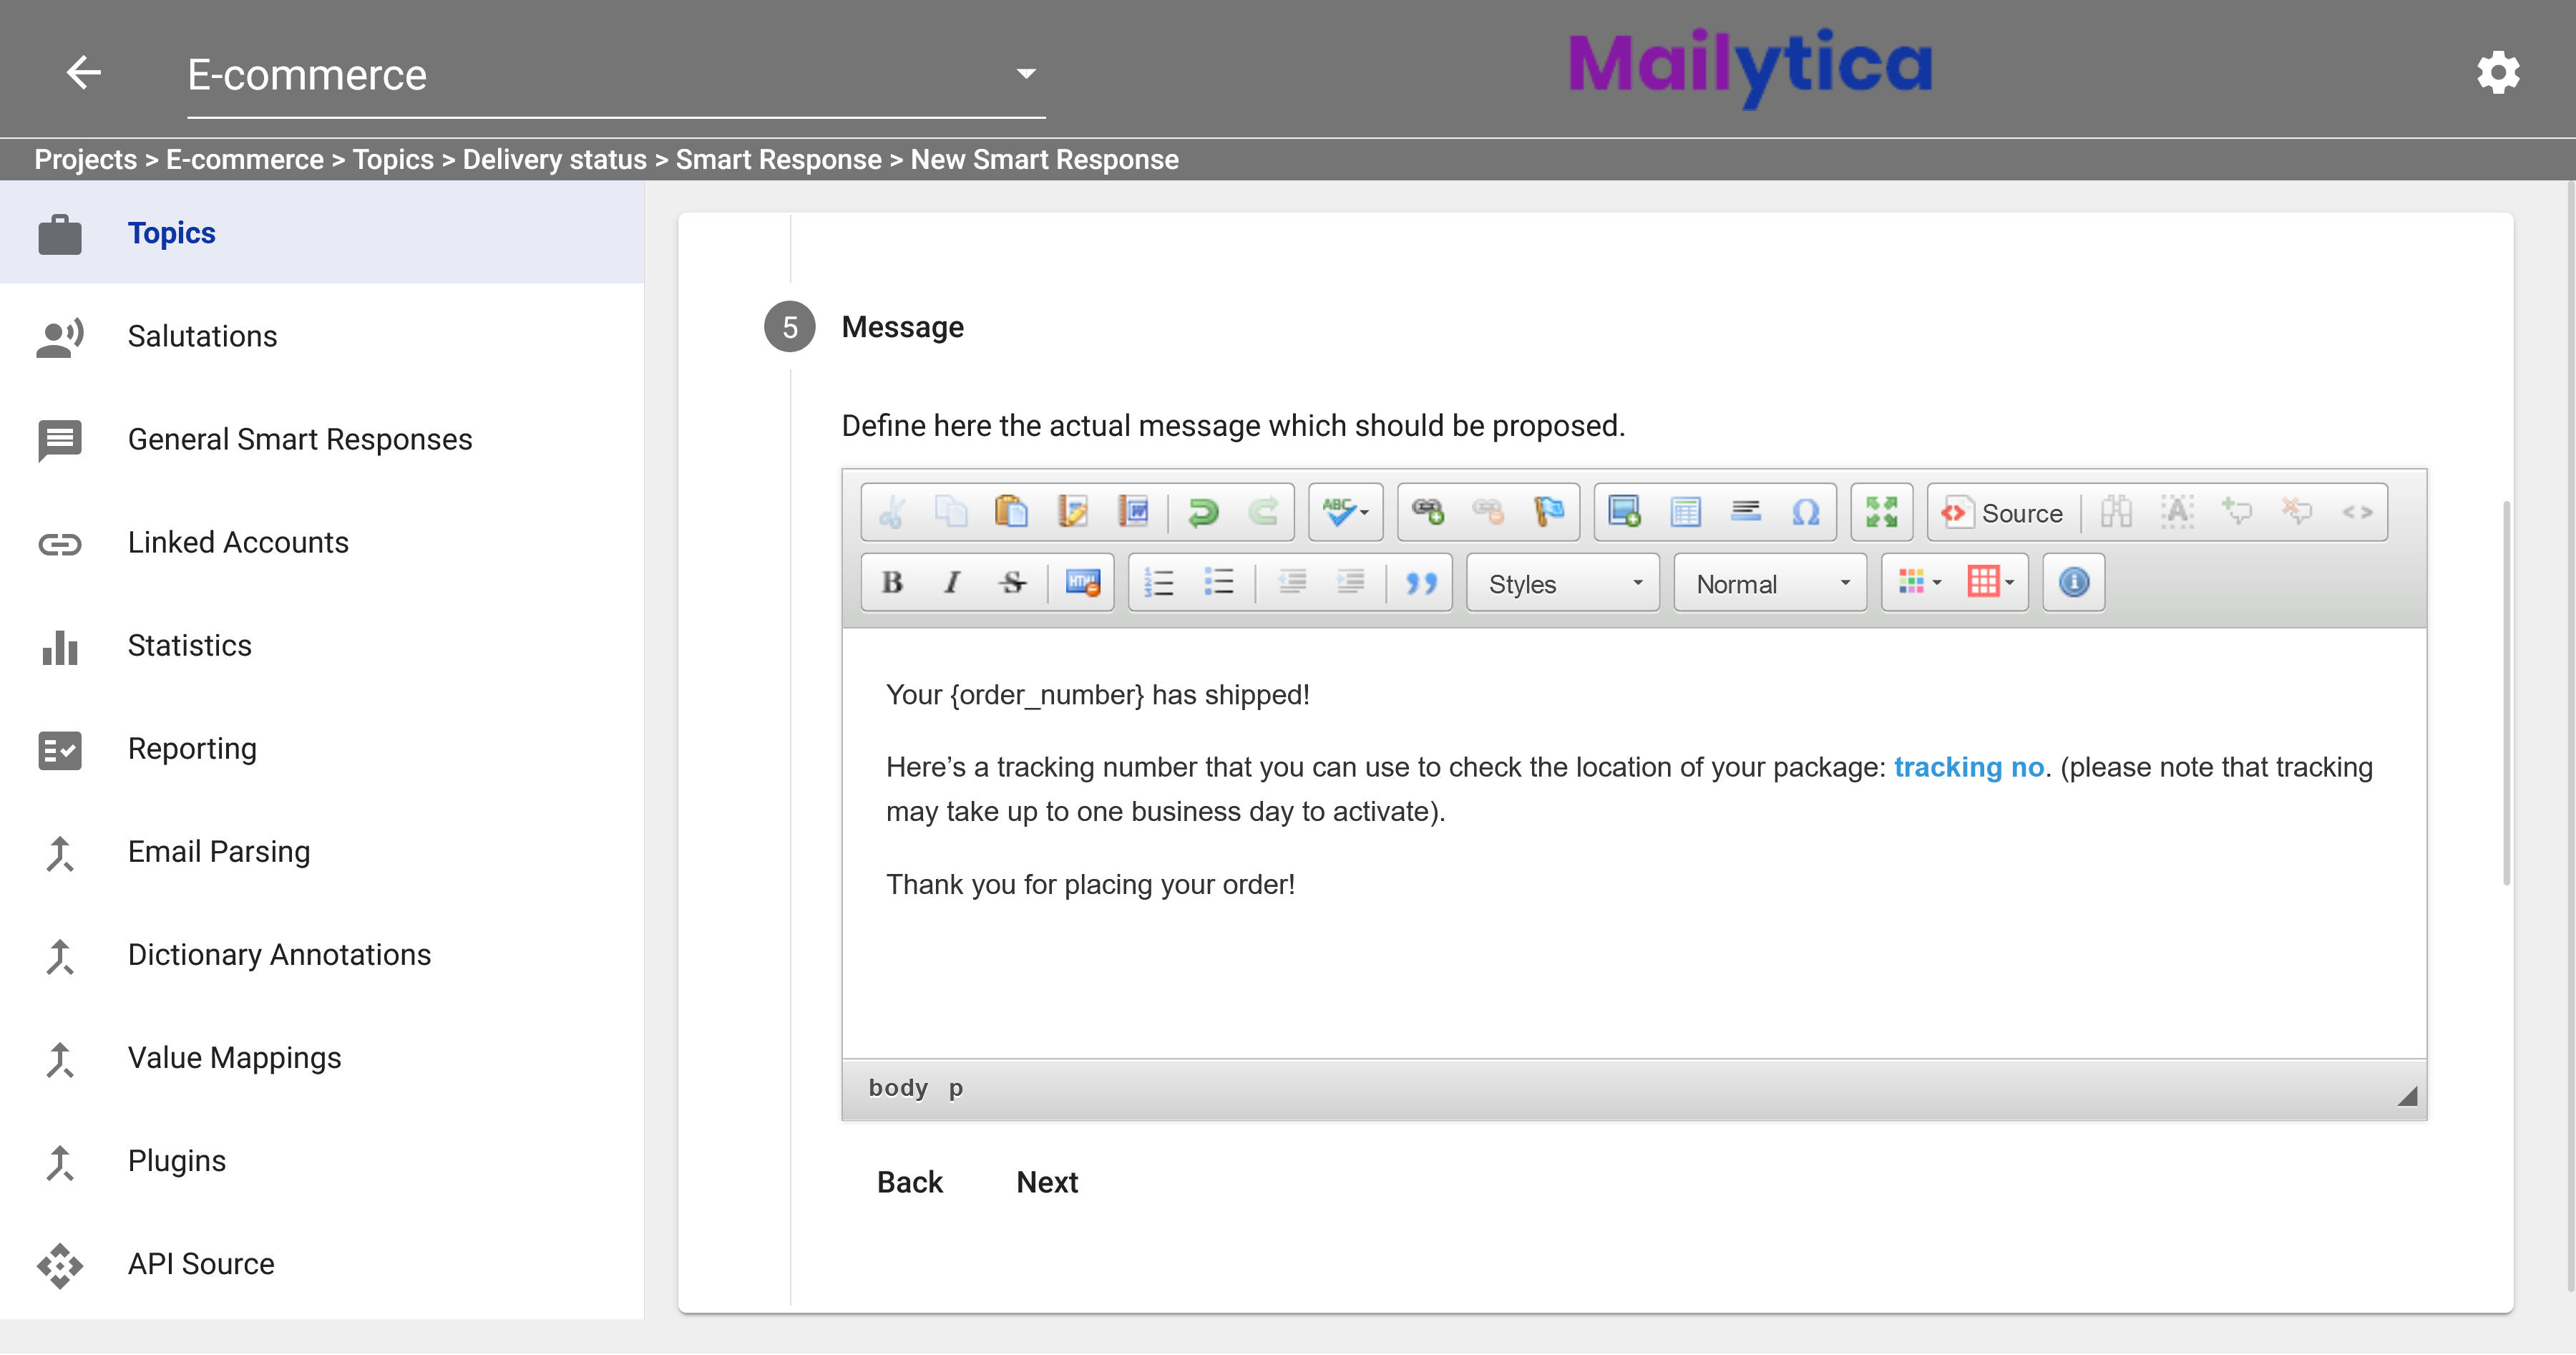
You will then be prompted to write the content of the Smart Response. In the text box, you can also customize the format of the message. For example, you can change the style and colour of the text, you can add links, images, tables, and more. Once you finish writing, click Next.
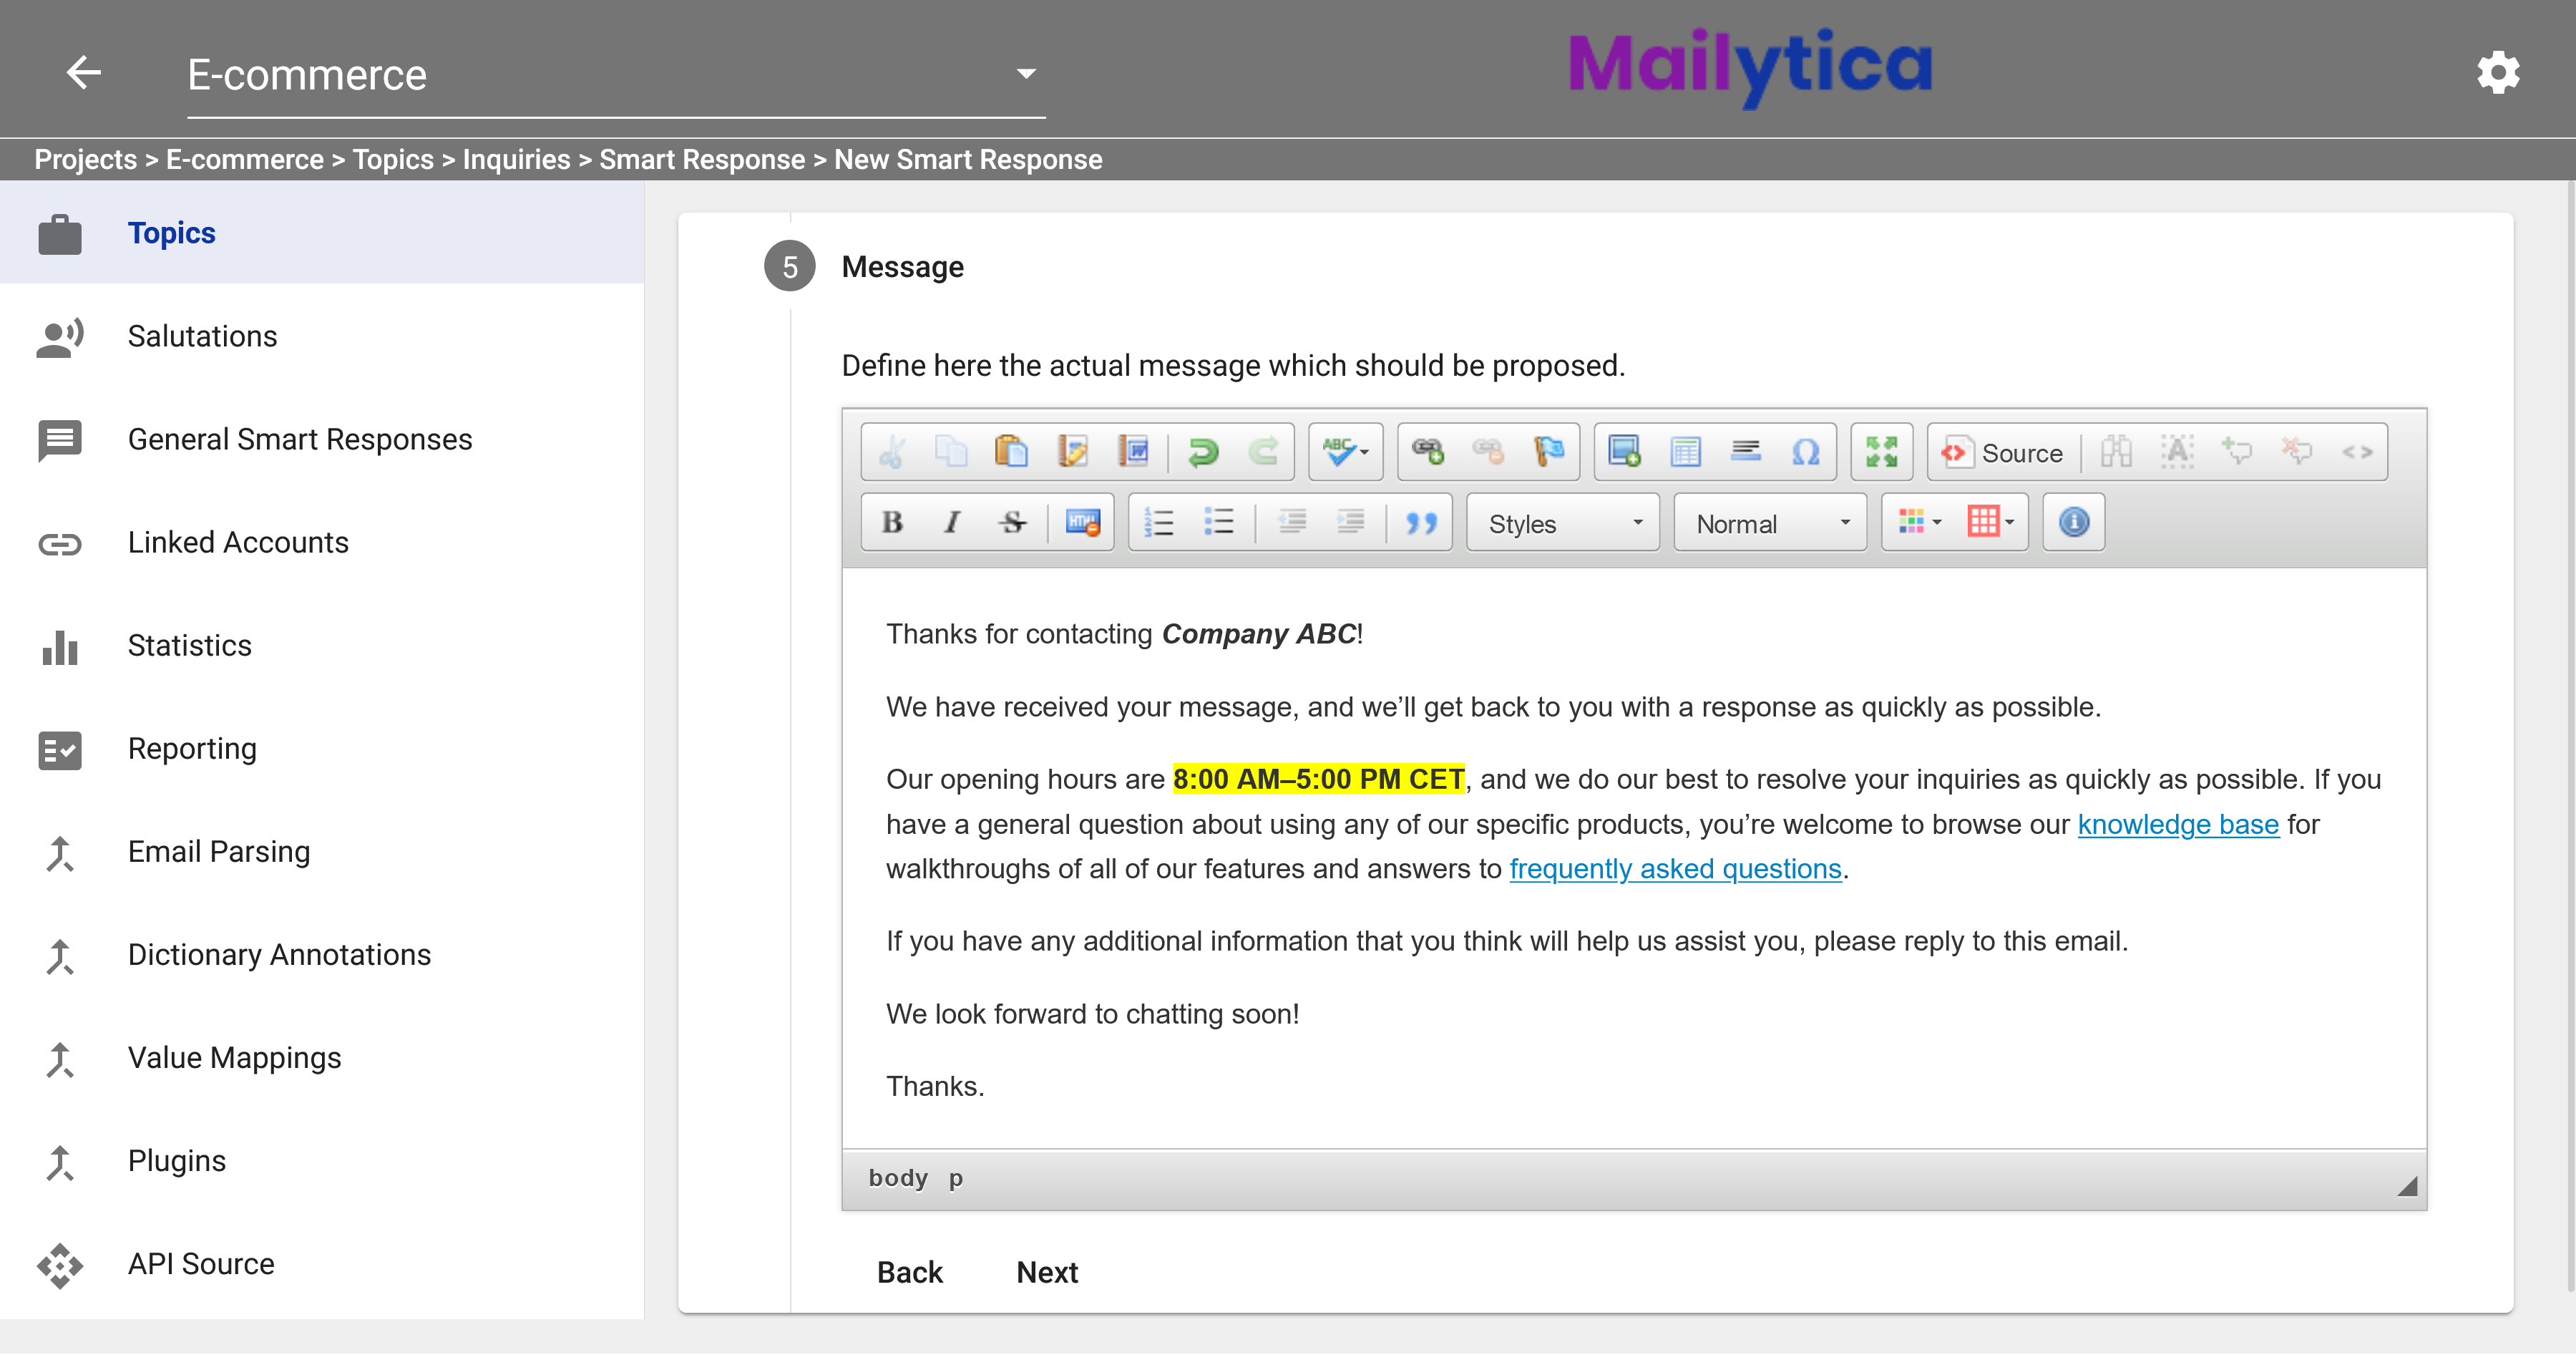
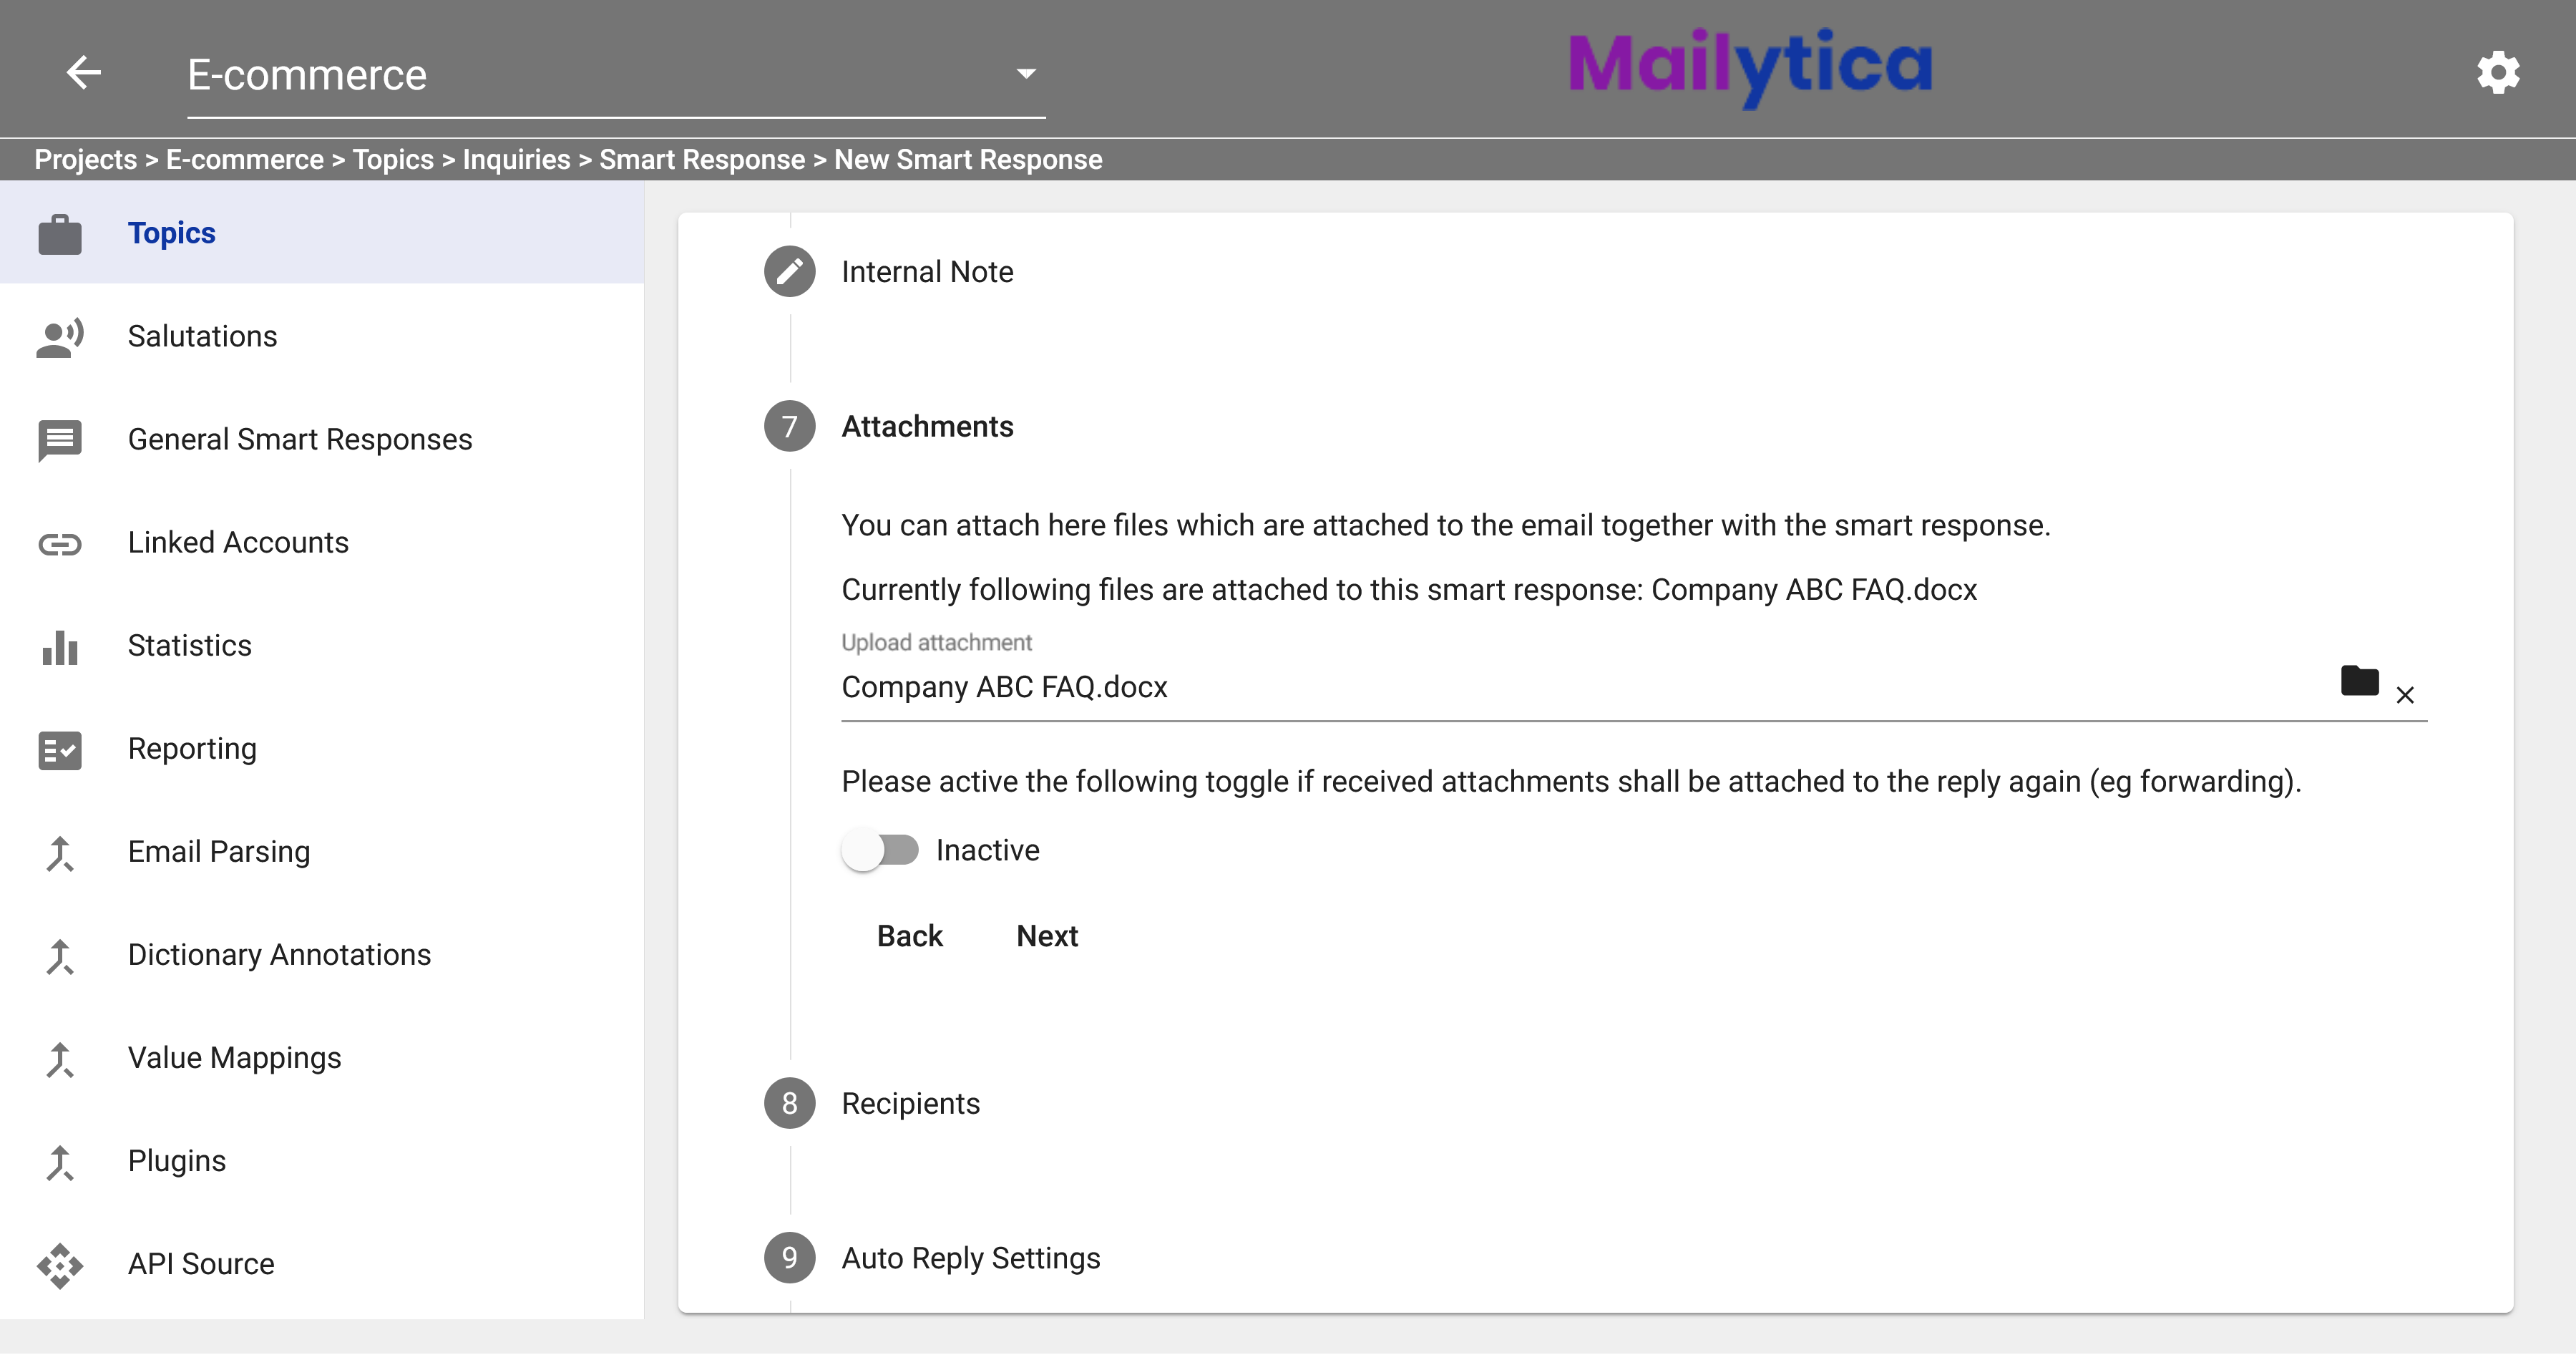
Next, in the Attachments section, you can add attachments to your Smart Response. Uploading files is a great way to make your email message more personalized and interactive. For instance, you can upload your company’s F.A.Q., brochures, presentations, graphics, catalogues, etc. To keep attachments from being sent with every response, you can set the toggle button to Inactive.
You can then add Recipients to your Smart Response. If you want to send the Smart Response to the same person who sent you the email message, leave the fields blank. If instead you want to send someone else a copy of the message, please enter their email address in the Recipient, CC Recipient, or BCC Recipient fields. Additionally, if you want to specify a reply to address, you can provide it in the Reply To Address field.
Then in Execution Times, you can select the days of the week and the times during which your Smart Response should be active. This feature is particularly useful if you’re using automatic Smart Responses and you want to ensure that auto-replies are not sent out during weekends or holidays.

Similarly, in the Execution Conditions section, you can define conditions based on metadata fields extracted from incoming emails. You might use Mailytica’s default data (such as sender address, email subject, as seen in Mailytica’s Email Data), or custom user-defined variables (as explained in Fields / Variables). For example, you could set a condition that the confidence level—a measure of how confident Mailytica is that an email has been classified correctly—must be 0.8 or higher for a Smart Response to activate.
Tip
Execution Times and Execution Conditions give you more control over automatic Smart Responses, ensuring that automated replies are not just correct but also contextually and temporally appropriate.
Execution Conditions Operators
EQ: Equal to. Checks if two numerical values or two strings are equal.
EQ_IGNORE_CASE: Equal to, ignoring case sensitivity. Compares two string values for equality, without considering case sensitivity (e.g., Urgent is considered equal to urgent).
LT: Less than. Determines if one numerical value is less than another.
LTE: Less than or equal to. Determines if one numerical value is less than or equal to another.
GT: Greater than. Checks if one numerical value is greater than another.
GTE: Greater than or equal to. Checks if one numerical value is greater than or equal to another.
NON_EQ: Not equal to. Determines if two string values are not equal.
CONTAINS: Checks if a string contains a specified sequence of characters.
NOT_CONTAINS: Opposite of CONTAINS. Checks if a string does not contain a specified sequence of characters.
STARTS_WITH: Determines if a string starts with a specified sequence of characters.
ENDS_WITH: Checks if a string ends with a specified sequence of characters.
Next, you can select the Auto Reply Settings of the Smart Response. If active, emails are replied to automatically without any user interaction. If inactive, they are suggested as a draft within the user interface. The recommended default value is Inactive.
Afterward, you can set the Default Status of your Smart Responses. If active, any email message that does not have a suitable Smart Response will automatically be assigned the default Smart Response.
To finish, toggle the Active button to activate your Smart Response. Now your new Smart Response will be ready to use in your Mailytica integration, as shown in the images below.
Tip
In addition, you can also import and export Smart Responses between Mailytica accounts.
Export: To export a Smart Response, navigate to your Smart Response list. Expand the title box of the Smart Response you want to export, then click on the Export button. The Smart Responses data will be immediately downloaded to your local computer as a .zip file.
Import: When you want to import the previously exported Smart Response, return to your list and click on the button at the top of the page next to Add Smart Response. Locate and select the .zip file you exported earlier. The Mailytica Smart Response, along with all its contents, will be imported into your new account. This feature makes it easy to transfer Smart Responses between accounts and collaborate with team members.
_
_
Smart Response Variables#
You can insert data variables in your Smart Response by enclosing them between curly brackets {} during Step 5 of the Add Smart Response section.
Any information that you extract with the help of Mailytica’s annotators can be used inside Smart Responses as a variable. Mailytica’s annotators are internal processes performed on incoming email messages, including extracting and converting email data, adding custom plugins, and accessing APIs. These annotators are the following:
Email Parsing Rules: Mailytica’s email parsing system can extract information from messages by creating filters and parsing rules using regular expressions.
Dictionary Annotations: Dictionary Annotations are similar to email parsing rules but instead of creating rules to extract data, they can be used to directly extract entities.
Value Mappings: Value Mappings can be used to transform data in a more straightforward way than using Email Parsing Rules.
Plugins: Custom business plugins to extract, process, or export data can be created by Mailytica’s dev team at the request of the user.
API Source: Mailytica has a diverse range of API (Application Programming Interface) sources which you can connect to, including FTP Source, REST API Source (GET), and REST API Source (POST).
API Data: Mailytica offers different options for extracting external data, ranging from CSV files to third-party integrations.
Important
When you configure an annotator, the Output Field will be your user-defined variable. Output Fields simply refer to the data that Mailytica will extract with the help of your annotators.
For example, inside our Topic Delivery Status, let’s create an Email Parsing Rule to extract order numbers from email messages.
And we’ll set the Output Field Id to order_number.
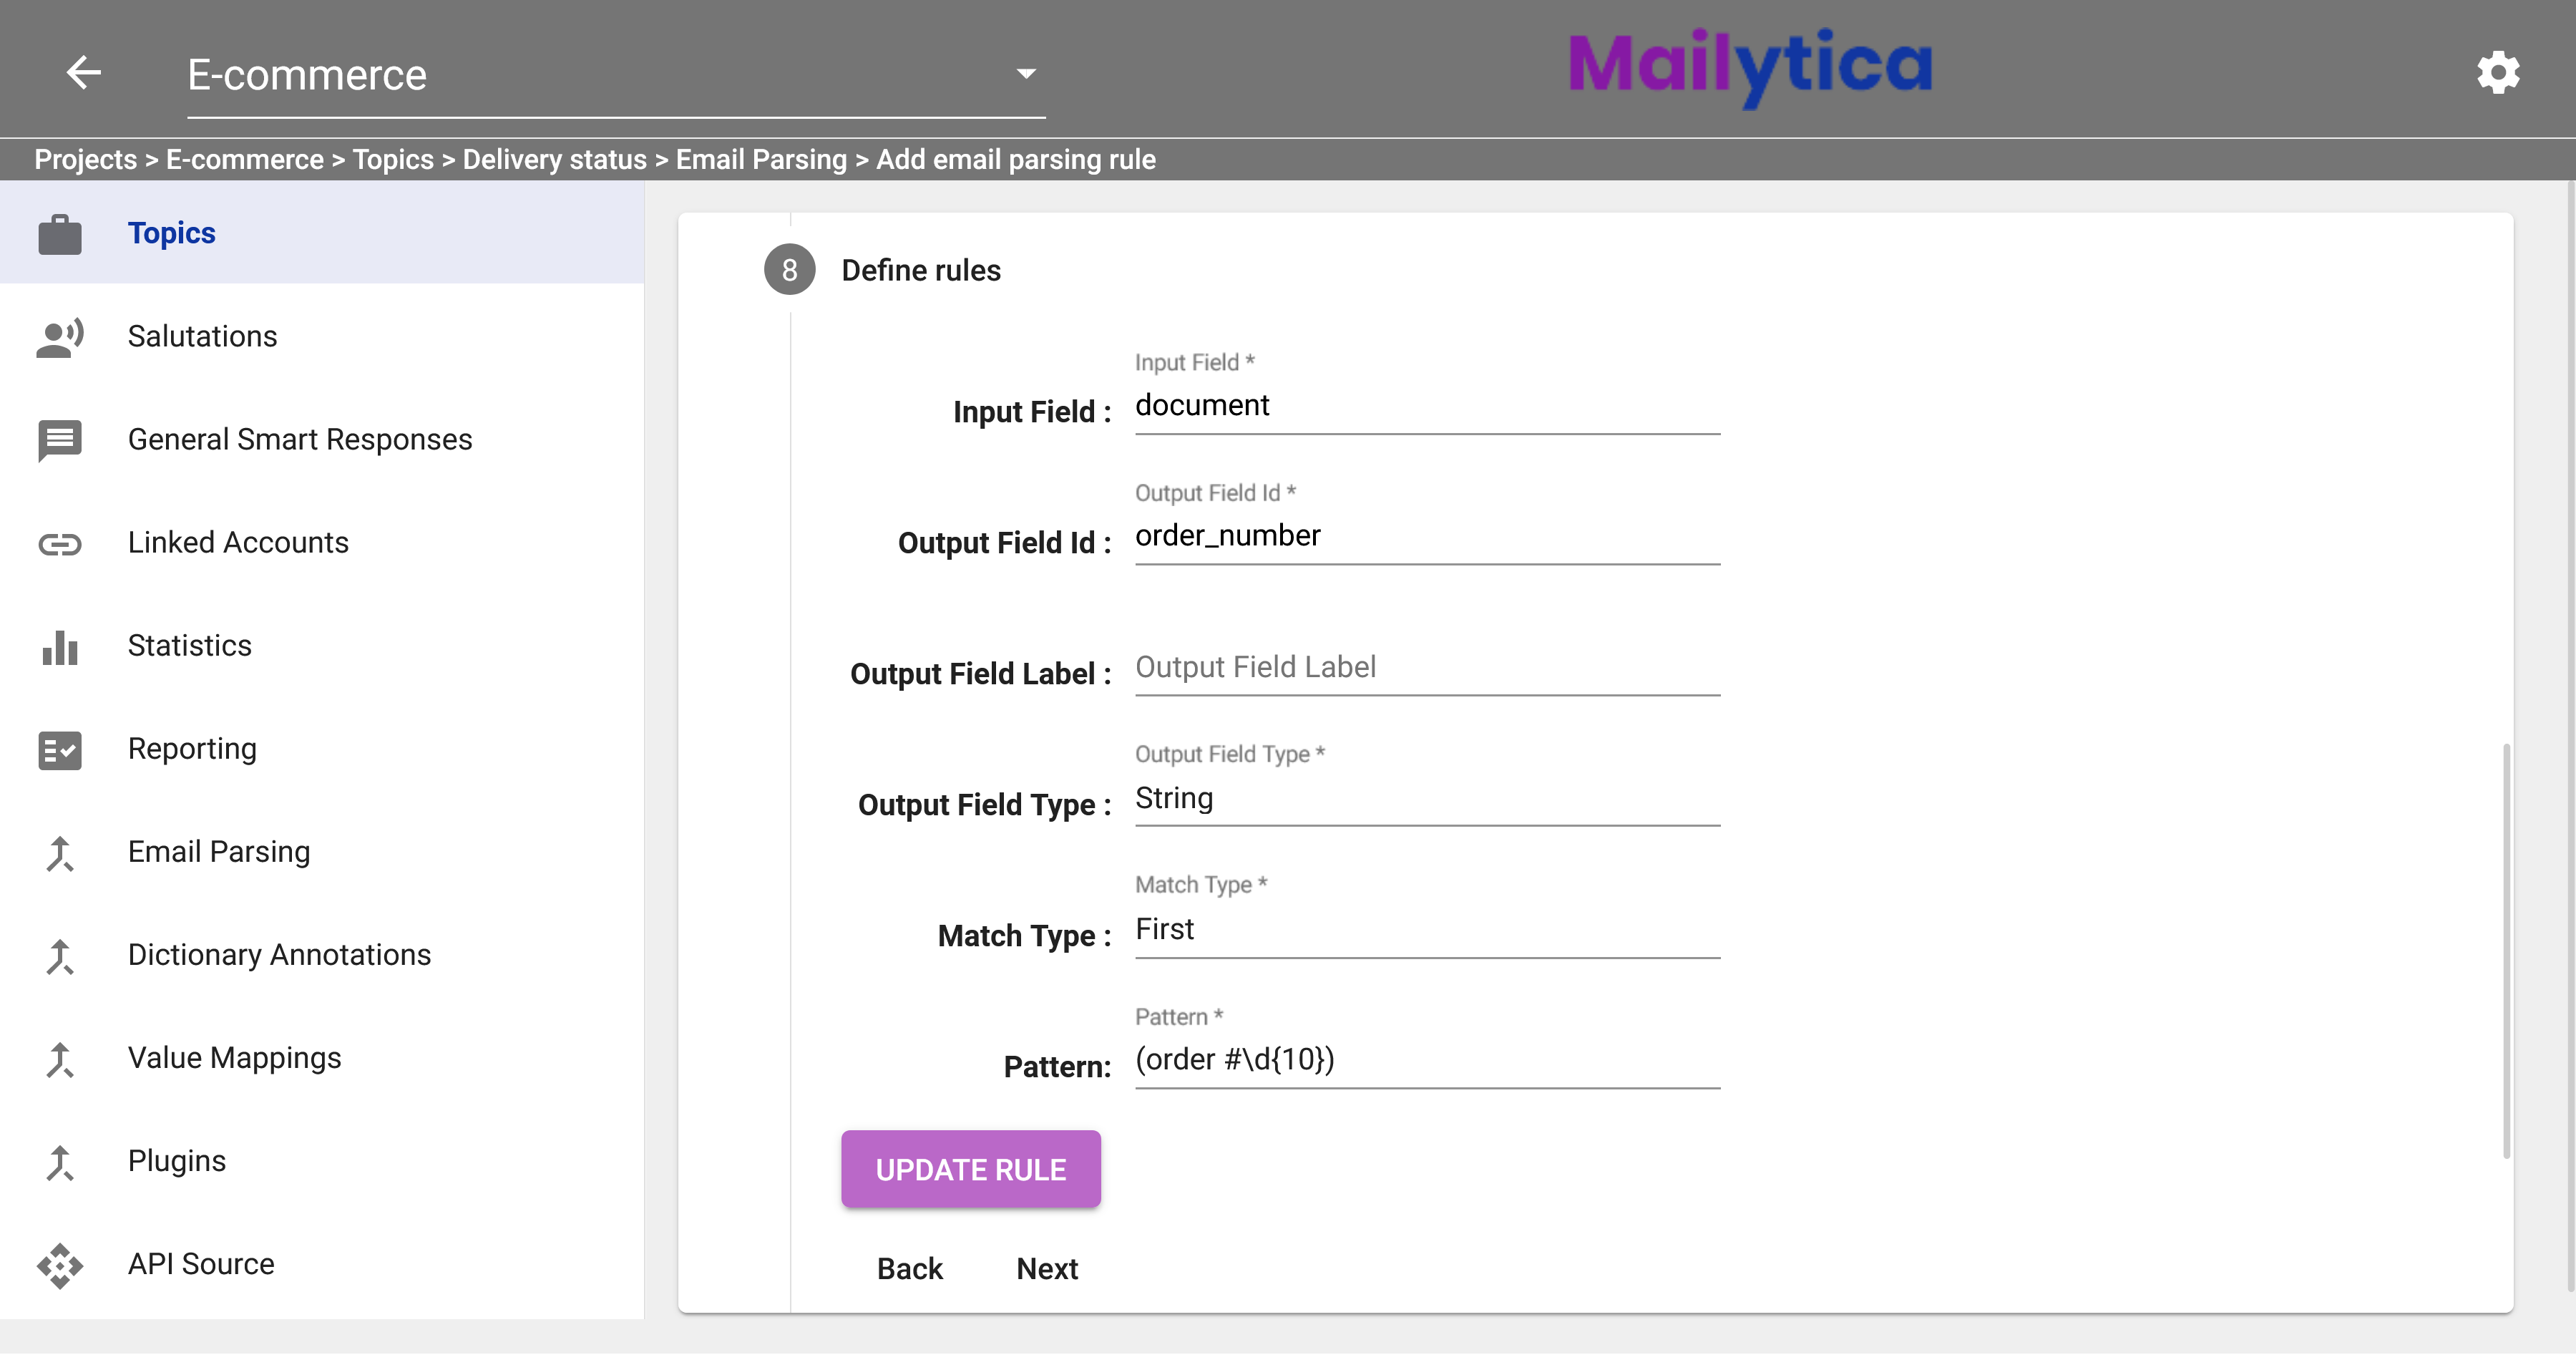
This means that if an email contains the text order # followed by 10 digits, then Mailytica will extract the information and store it in a variable called order_number.
Now that we have an Email Parsing Rule to extract data and store it in our user defined variable, using this information inside our Smart Responses is straight-forward. We simply have to include the name of the variable between curly braces when writing our Smart Response.
For example, if we want to include the client’s order number in our Smart Response, we just have to write {order_number}, as shown in the image below.