Freshdesk#
Freshdesk is a powerful customer service tracking tool that helps teams manage customer interactions and tickets, as well as provide support to customers through email and other communication channels.
Mailytica’s Freshdesk Integration brings Mailytica’s features straight into your Freshdesk ticketing system, so you don’t have to switch back and forth between apps.
For instance, you can reply to tickets using Smart Responses, classify tickets by topic, select the correct salutation for each client, and change the language in which you reply.
Mailytica’s Freshdesk Integration will help you reduce reply times in your customer service support team by streamlining repetitive interactions with your customers.
Freshdesk Installation Files#
You can easily download the necessary files to install Mailytica’s Freshdesk integration:
Installation files
Freshdesk Installation#
To install the integration, log into your account and go to Admin > Apps. In the search box, type Mailytica.
Once you find it, click on Install, and a Configuration screen will appear. In this screen enter your API Key and API URL.
To find your API Key, first go to your Profile Settings in Freshdesk and then go to the Your API Key section.
Your API URL is the domain name of your Freshdesk account, and you can find it directly in your browser’s navigation bar, for example, https://companyname.freshdesk.com/.
Once you have installed the Mailytica integration, it will be immediately available in your Freshdesk account.
Freshdesk Configuration#
Before using the integration, you first need to create an account on Mailytica’s Online Platform. Then go to mailytica.ai and enter your email and a password to register.
After that, choose from among our predefined templates the project most suitable for your business. For example, if you sell products online, you can pick the e-commerce project template. There are also templates available for insurance companies, utility providers, medical professionals, financial institutions, etc. Each project contains a set of pre-trained AI models, Smart Responses, and Topics.
To find the Mailytica integration in Freshdesk, simply go to Tickets, and select the ticket that you wish to reply to. On the bottom right side of the screen you can find the Mailytica Freshdesk Integration.
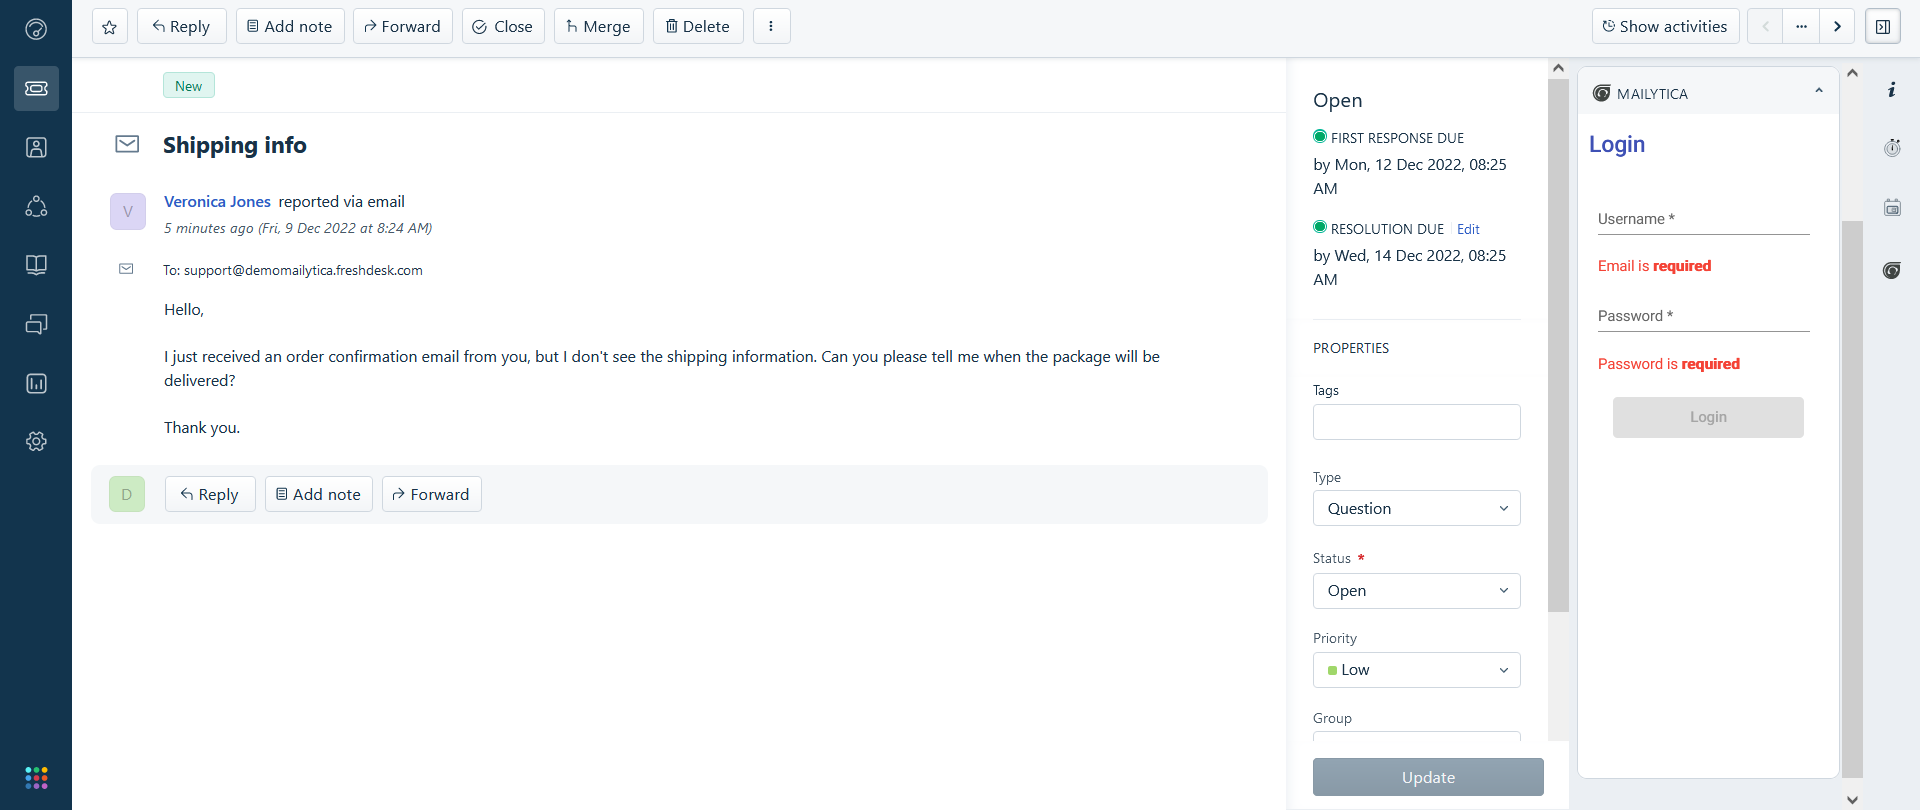
After opening the application, you will see a log in screen where you should type the same credentials that are associated with Mailytica’s Online Platform (mailytica.ai).

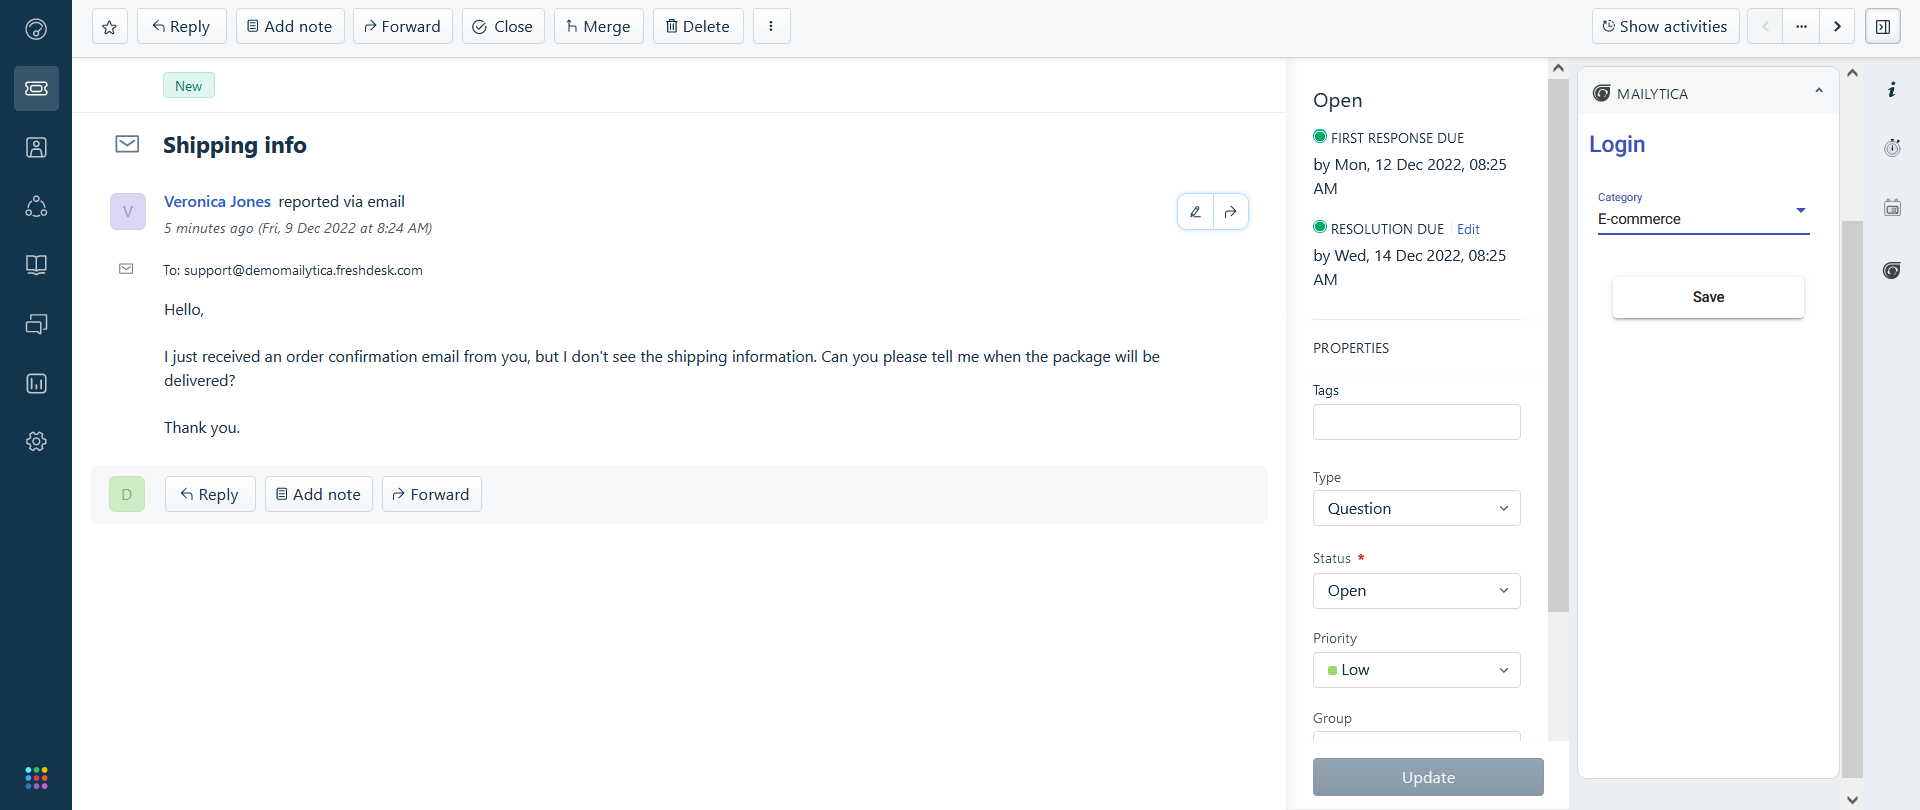
Next, in Category select the project that you wish to use with Freshdesk. We recommend creating a dedicated project to handle your customer service needs.
Important
Projects should be created beforehand in Mailytica’s Online Platform (mailytica.ai).
For more information on how to add and configure projects, please visit the Projects section.
After Mailytica is set up, it will be able to process tickets in your Freshdesk portal. If you’ve already created topics and models for the selected project, then Mailytica will automatically assign a topic to each ticket and propose an appropriate Smart Response based on that topic.
Tip
If you have not created topics, models, or Smart Responses in your project yet, you can create them by following the instructions in the Configuration section.
Using Mailytica’s Freshdesk Integration#
Draft Smart Responses#
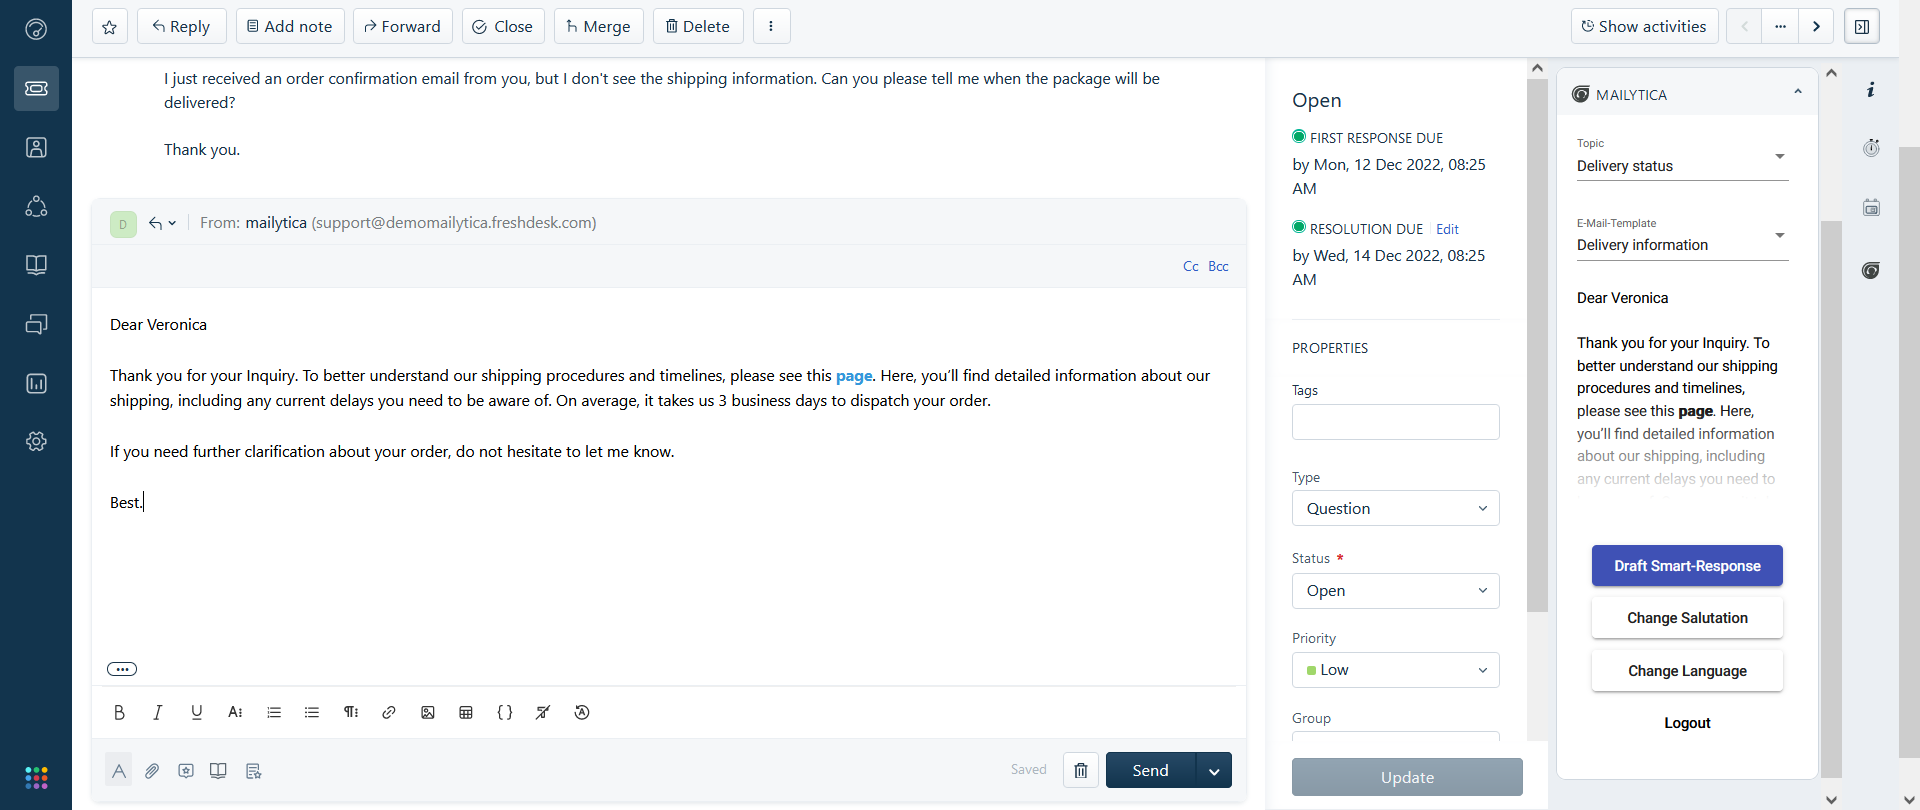
To use Mailytica’s Freshdesk Integration, first select a ticket in the Tickets section of your Freshdesk portal. Scroll to the bottom right-hand side of your screen and find Mailytica.
Under Topic, Mailytica will assign a topic to the ticket depending on its content. By using topics and the underlying AI classification, you can automate recurrent customer requests. For example, if you receive a ticket from a customer asking to make a return, then Mailytica will automatically classify it as Return requests. You can also classify your tickets manually by using the dropdown menu to choose a topic.
Important
Topics, models, and Smart Responses should be created beforehand in Mailytica’s Online Platform (mailytica.ai).
Depending on the topic, Mailytica will suggest a relevant Smart Response, which will be displayed in the integration. Smart Responses allow you reply to tickets with pre-defined messages. If you have multiple Smart Responses, simply select the one you need from the Email Template dropdown menu.
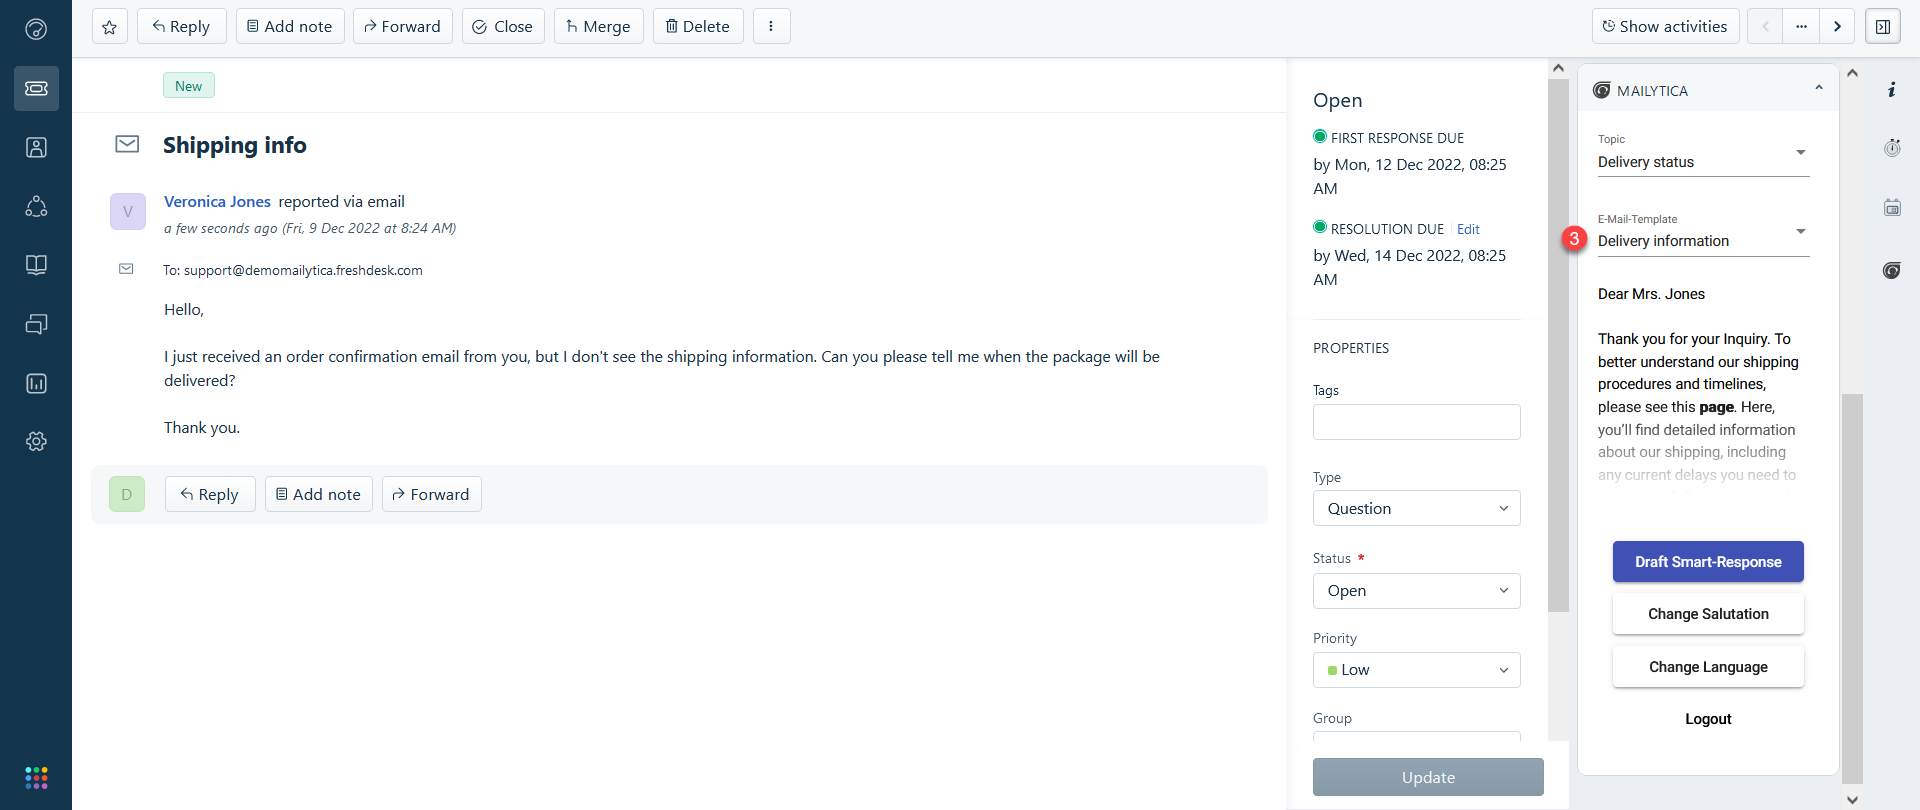
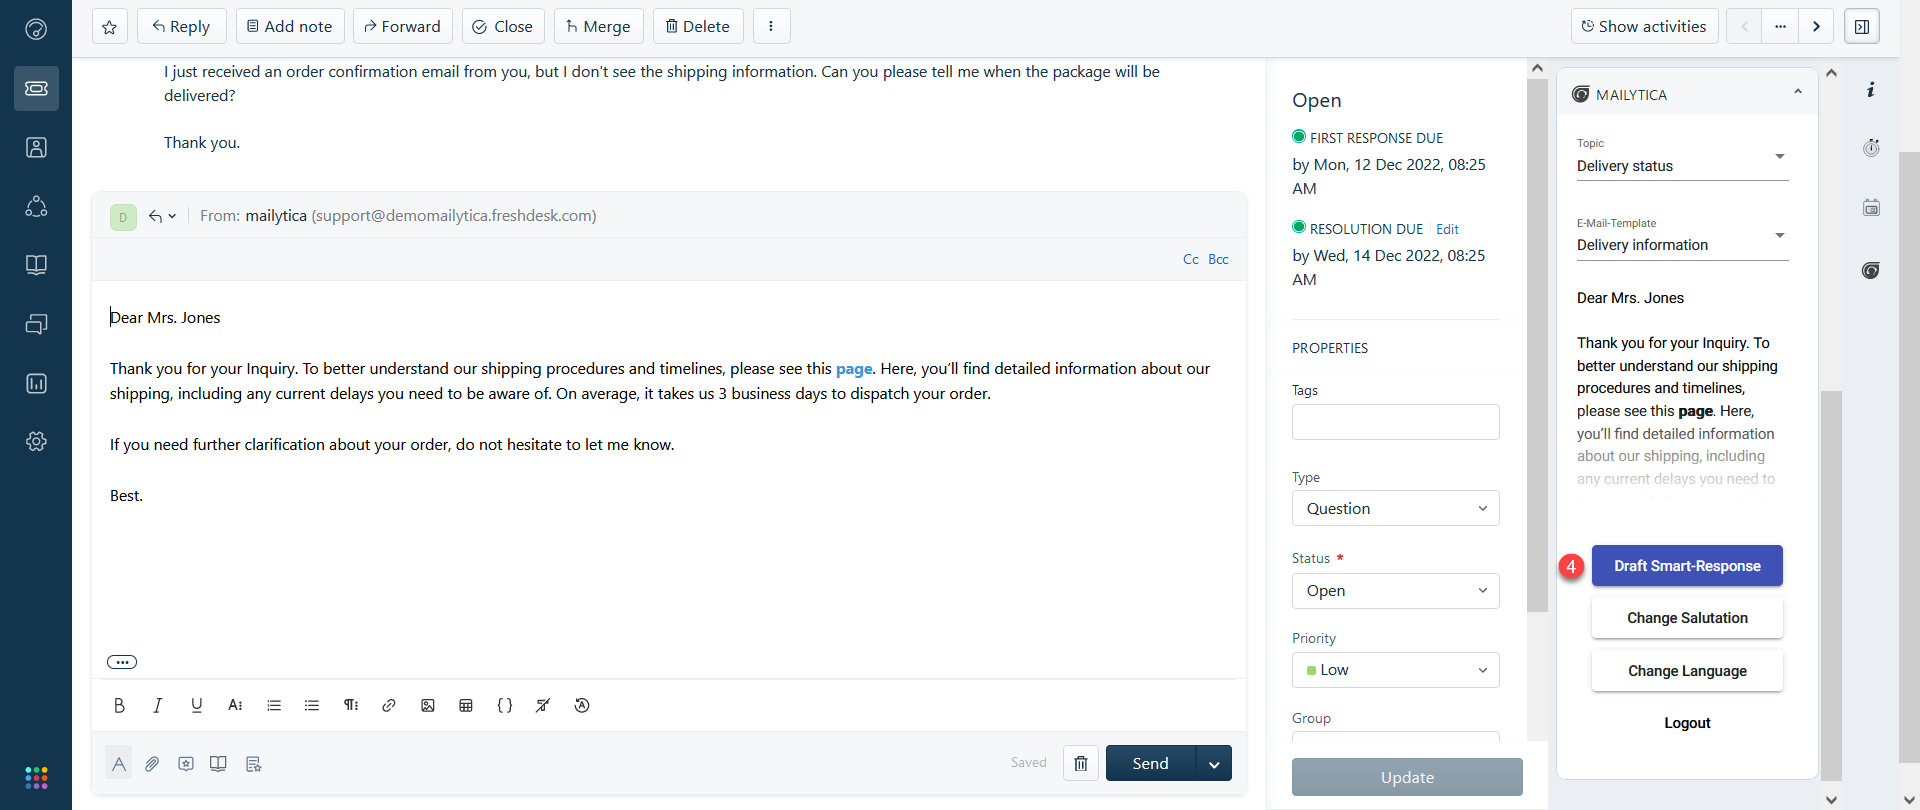
Click the Draft Smart Response button to reply to the ticket. If you need to adjust the message, simply add the necessary changes and then send it to your customer.
Change Salutation#
Mailytica assigns the correct salutation to incoming tickets based on the sender’s name and gender (Dear Mrs. Jones, Dear Mr. Jones). Usually the salutation will be automatically provided by Mailytica, however you can also customize it directly from the Freshdesk integration.
To change the salutation assigned to a particular customer, first select a ticket in the Tickets section of your Freshdesk portal. Scroll to the bottom right-hand side of your screen and find Mailytica.
Click on the Change Salutation button. This will open a pop-up field where you can write the new preferred salutation.
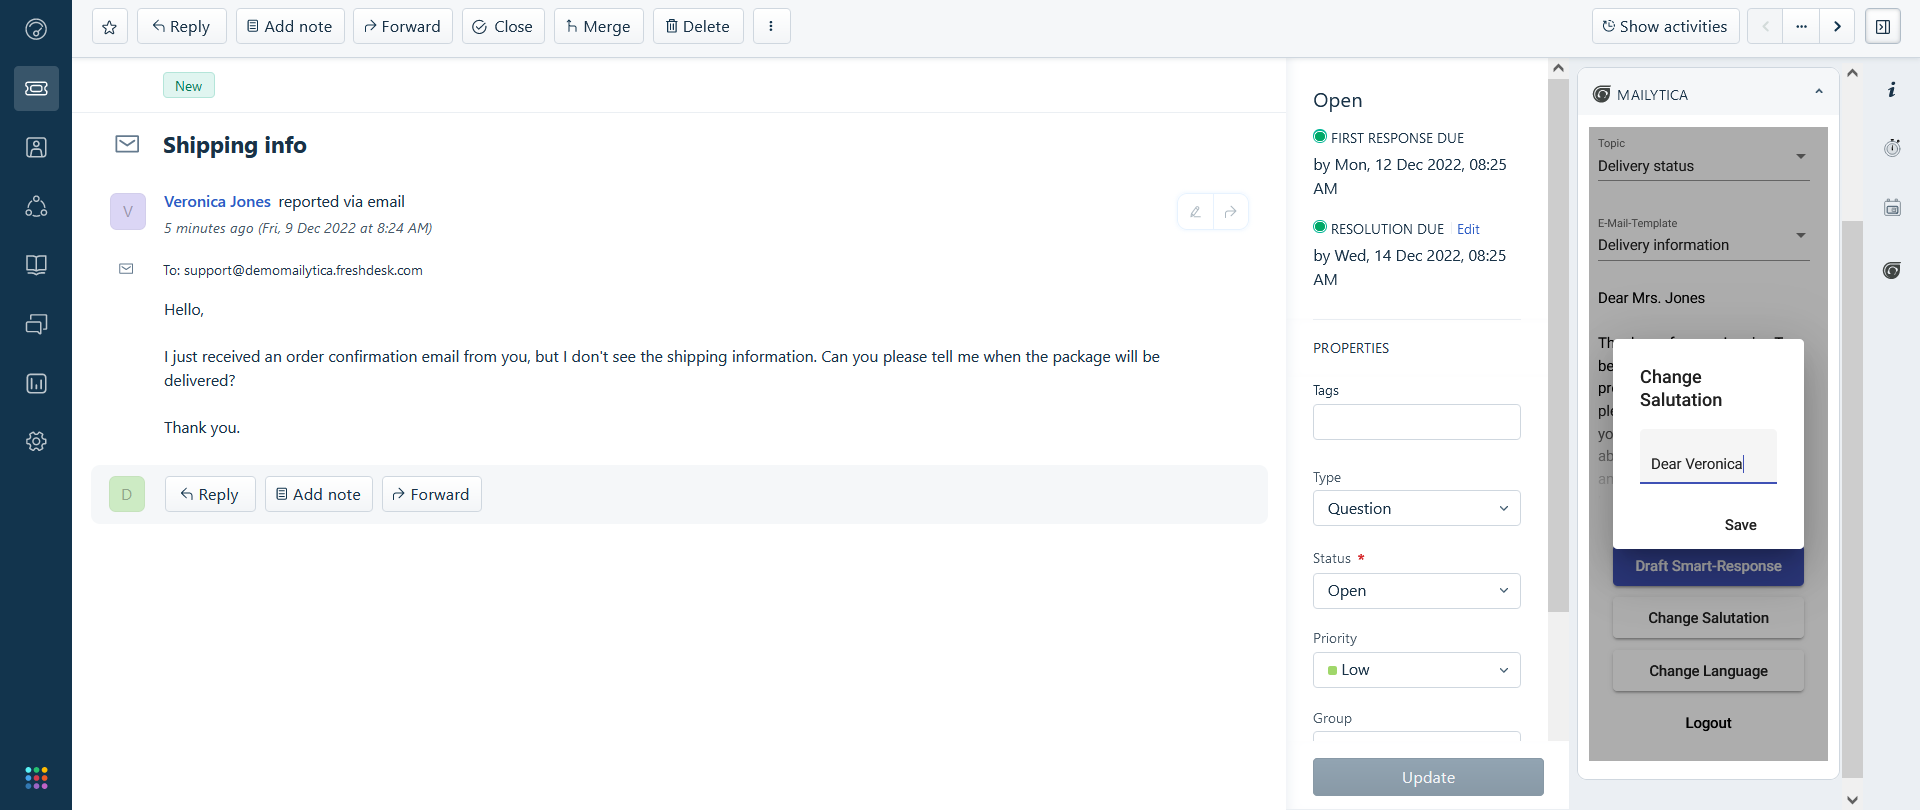
Once you have written it, click Save and your new salutation preferences will be stored for that customer.
Change Language#
Mailytica automatically assigns the correct language to incoming tickets based on their contents.
Mailytica will provide a Smart Response that fits the detected language and topic, but you can also customize it directly from within your Freshdesk account.
If Mailytica doesn’t recognize the correct language for a given contact, or if you simply want to reply in another language, follow these steps:
First, select a ticket in the Tickets section of your Freshdesk portal. Scroll to the bottom right-hand side of your screen and find Mailytica.
Click on the Change Language button. This will open a pop-up field where you can select your preferred option from the dropdown menu.
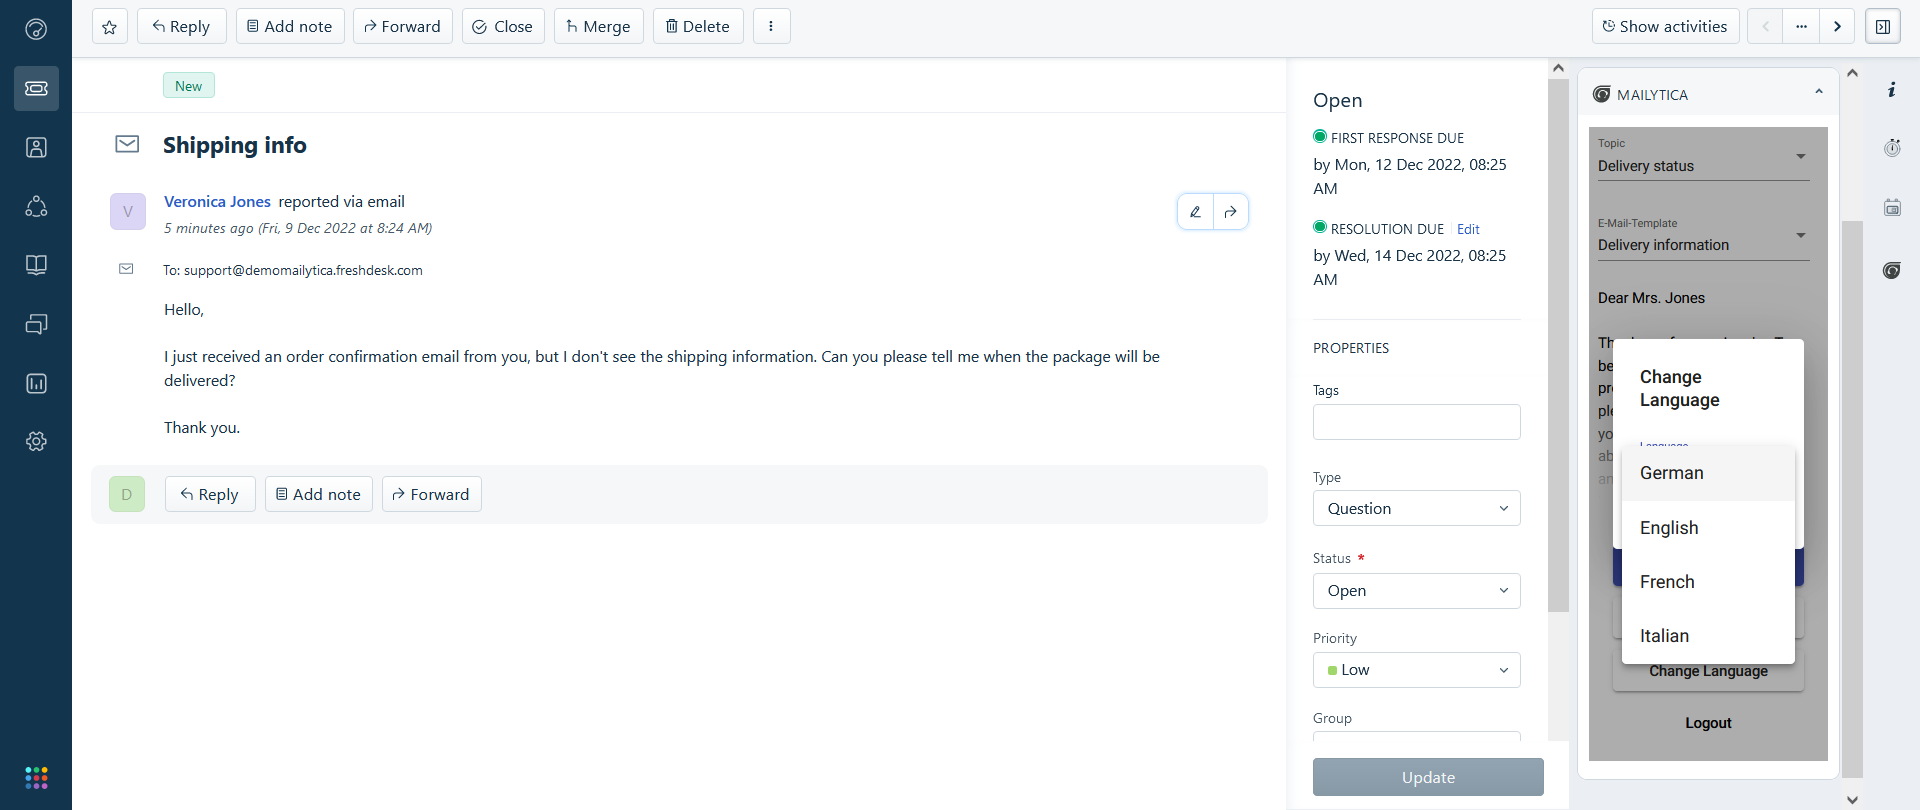
Click Save and your new language preferences will be stored for that customer.
Note
Mailytica’s Freshdesk Integration currently supports German, English, French, and Italian.
Adding Custom Fields in Mailytica’s Freshdesk Integration#
In Mailytica, you have the ability to incorporate custom data directly into your messages through the use of fields or variables. Fields act as containers for data, allowing you to dynamically include or extract information from your emails.
Custom fields provide the ability to insert dynamic content, such as names, dates, or prices, into your emails without the need for manual editing.
Mailytica offers flexible options for sourcing data for your fields:
Email Data: Use email parsing rules to extract data directly from the email itself. For example, you can extract information from the subject line, body, or headers of an email.
Manual Data: Set the value manually in Mailytica’s Freshdesk Integration. This allows you to input specific information that is relevant to the message.
External Data Sources: Connect Mailytica to external data sources through APIs. This enables the extraction of data from third-party systems such as CRMs, ERP systems, or databases. You can retrieve and utilize this data within your fields.
Important
For more detailed instructions on how to create fields in Mailytica’s Online Platform, please visit the Fields / Variables section.
To add a custom field to Mailytica’s Freshdesk integration, simply follow these steps:
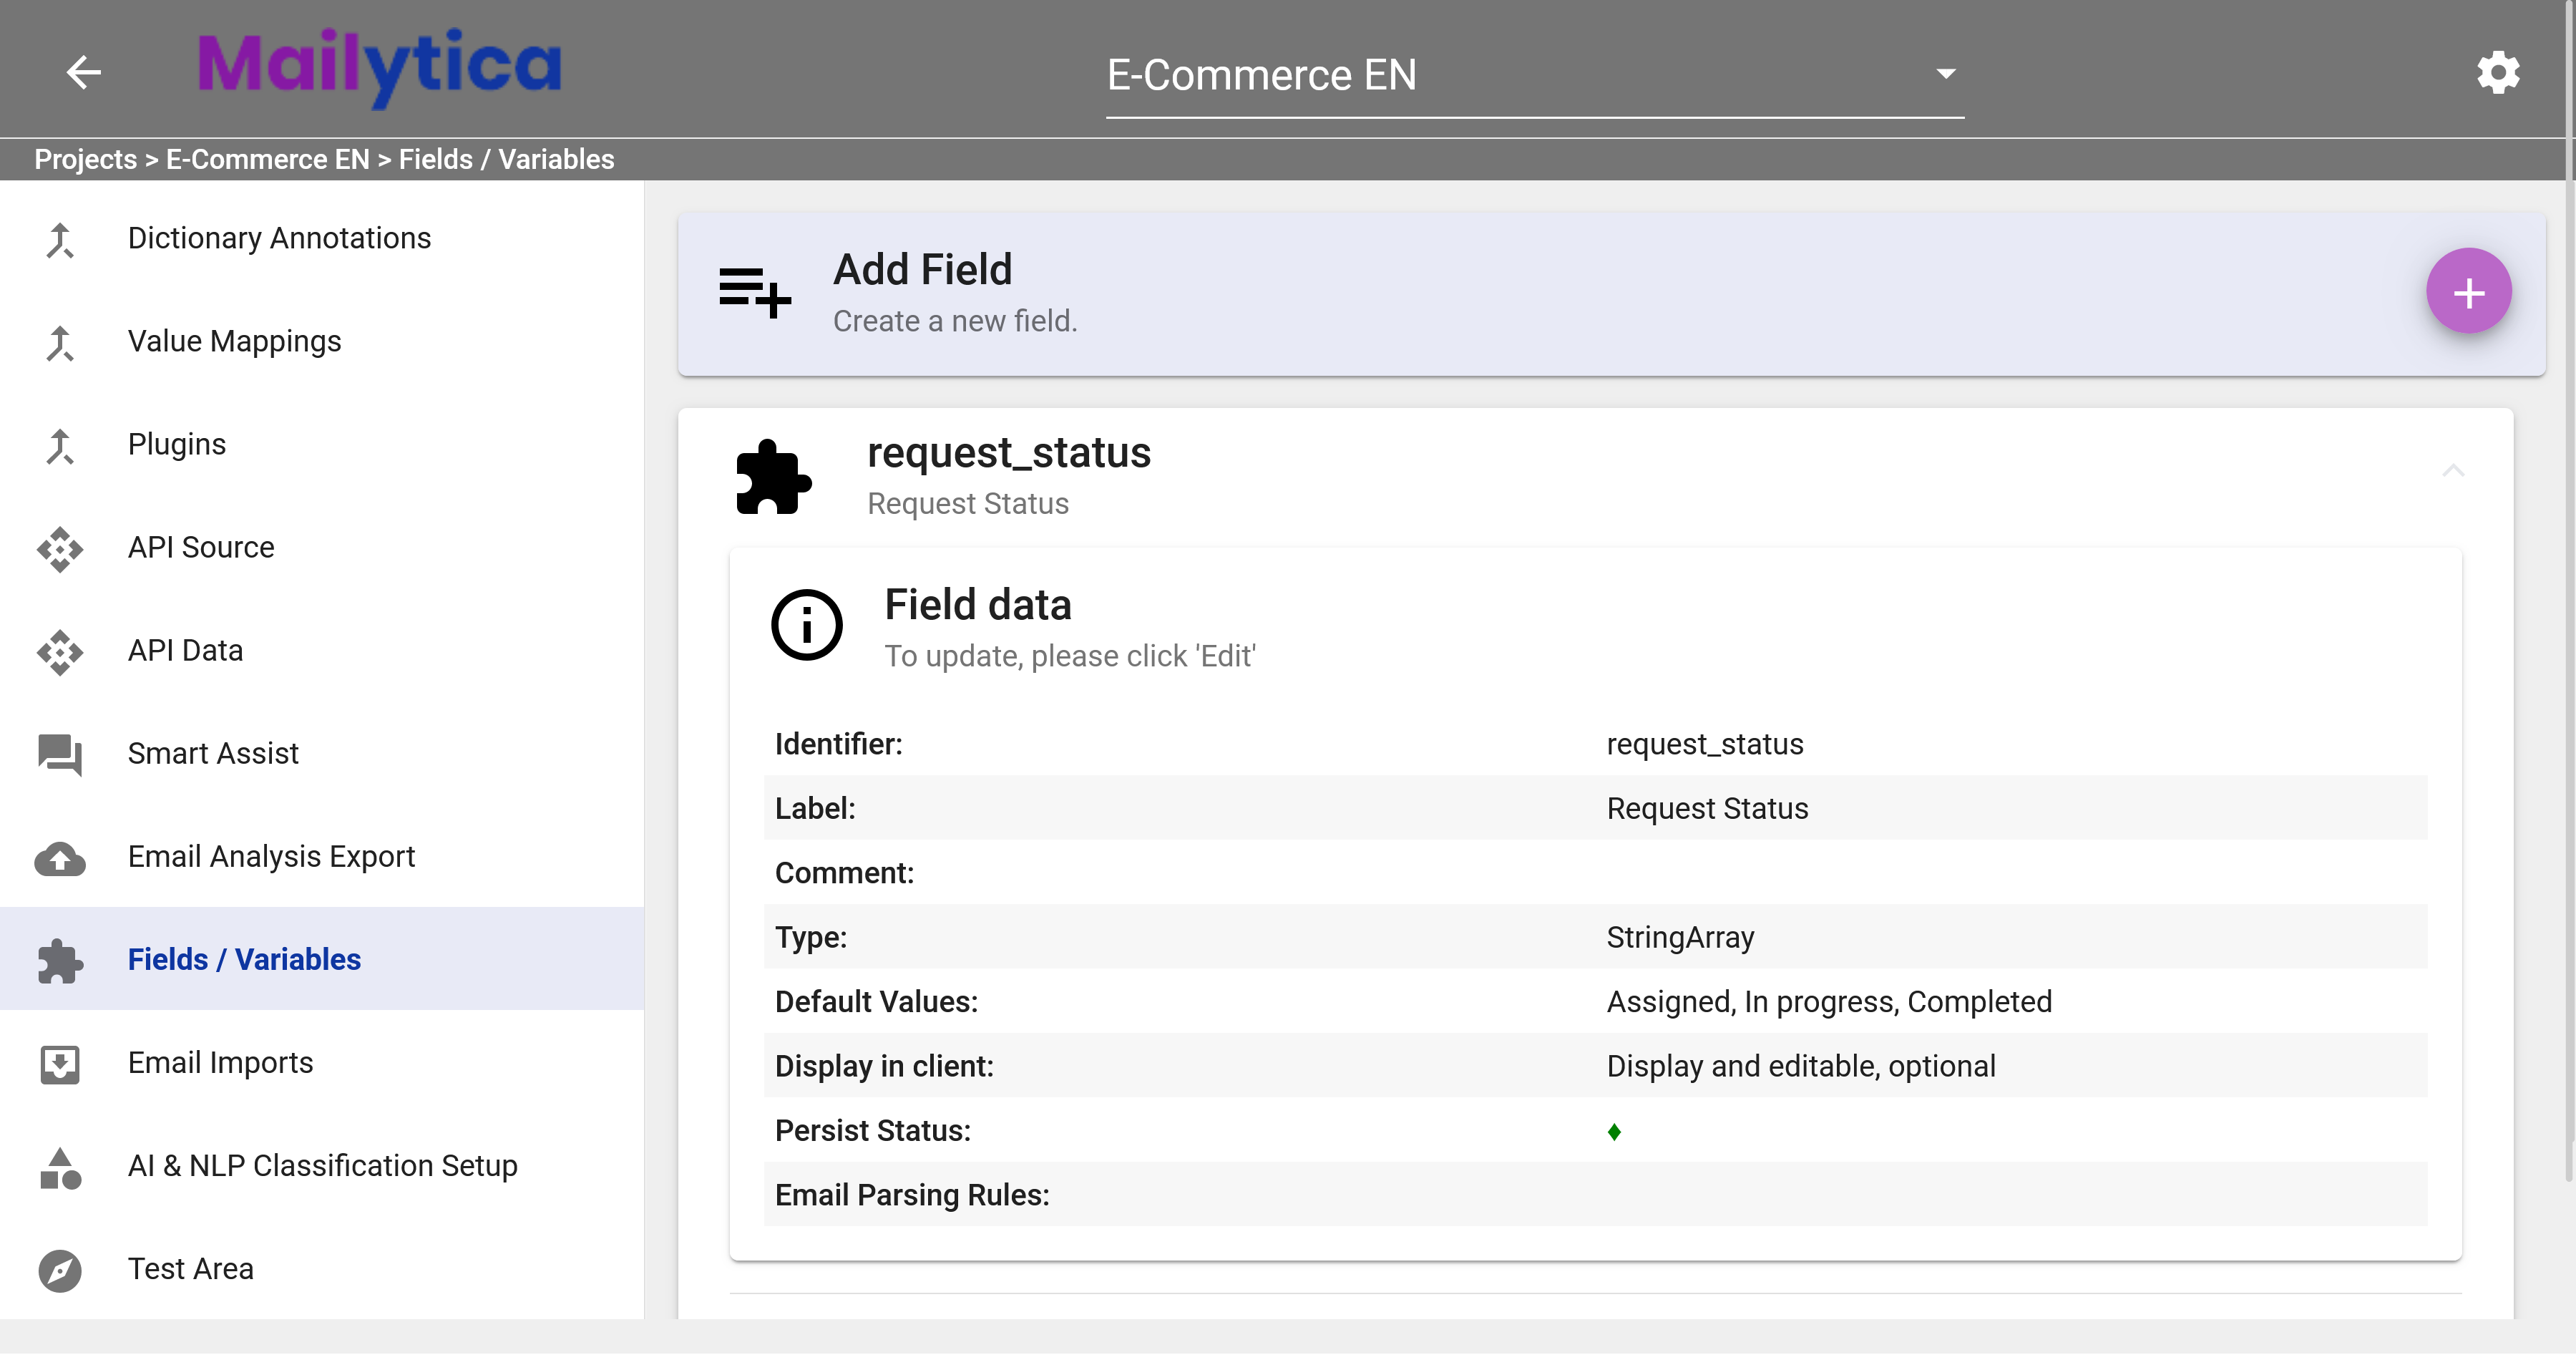
Open Mailytica’s Online Platform at mailytica.ai and navigate to the Fields / Variables section.
Click Add Field and then in Field Identifier enter a name for your custom field, such as
request_status.Next, from the drop-down menu in the Type section, select String Array as the field type.
Set the Display in Client option to Display, editable, and mandatory. This will ensure that the field is visible in Outlok and mandatory to agents when they view the message.
Attention
In order to ensure that the field is correctly displayed in Mailytica’s Freshdesk integration, the Display in Client option must be set to a value such as Display or Popup Window.
Finally, set the Persist Status option to Active. This will allow the status of the field to persist even when the message is opened by other agents. Click Add.
Note on Field Options
Once your field has been created, it will appear in your Freshdesk integration.
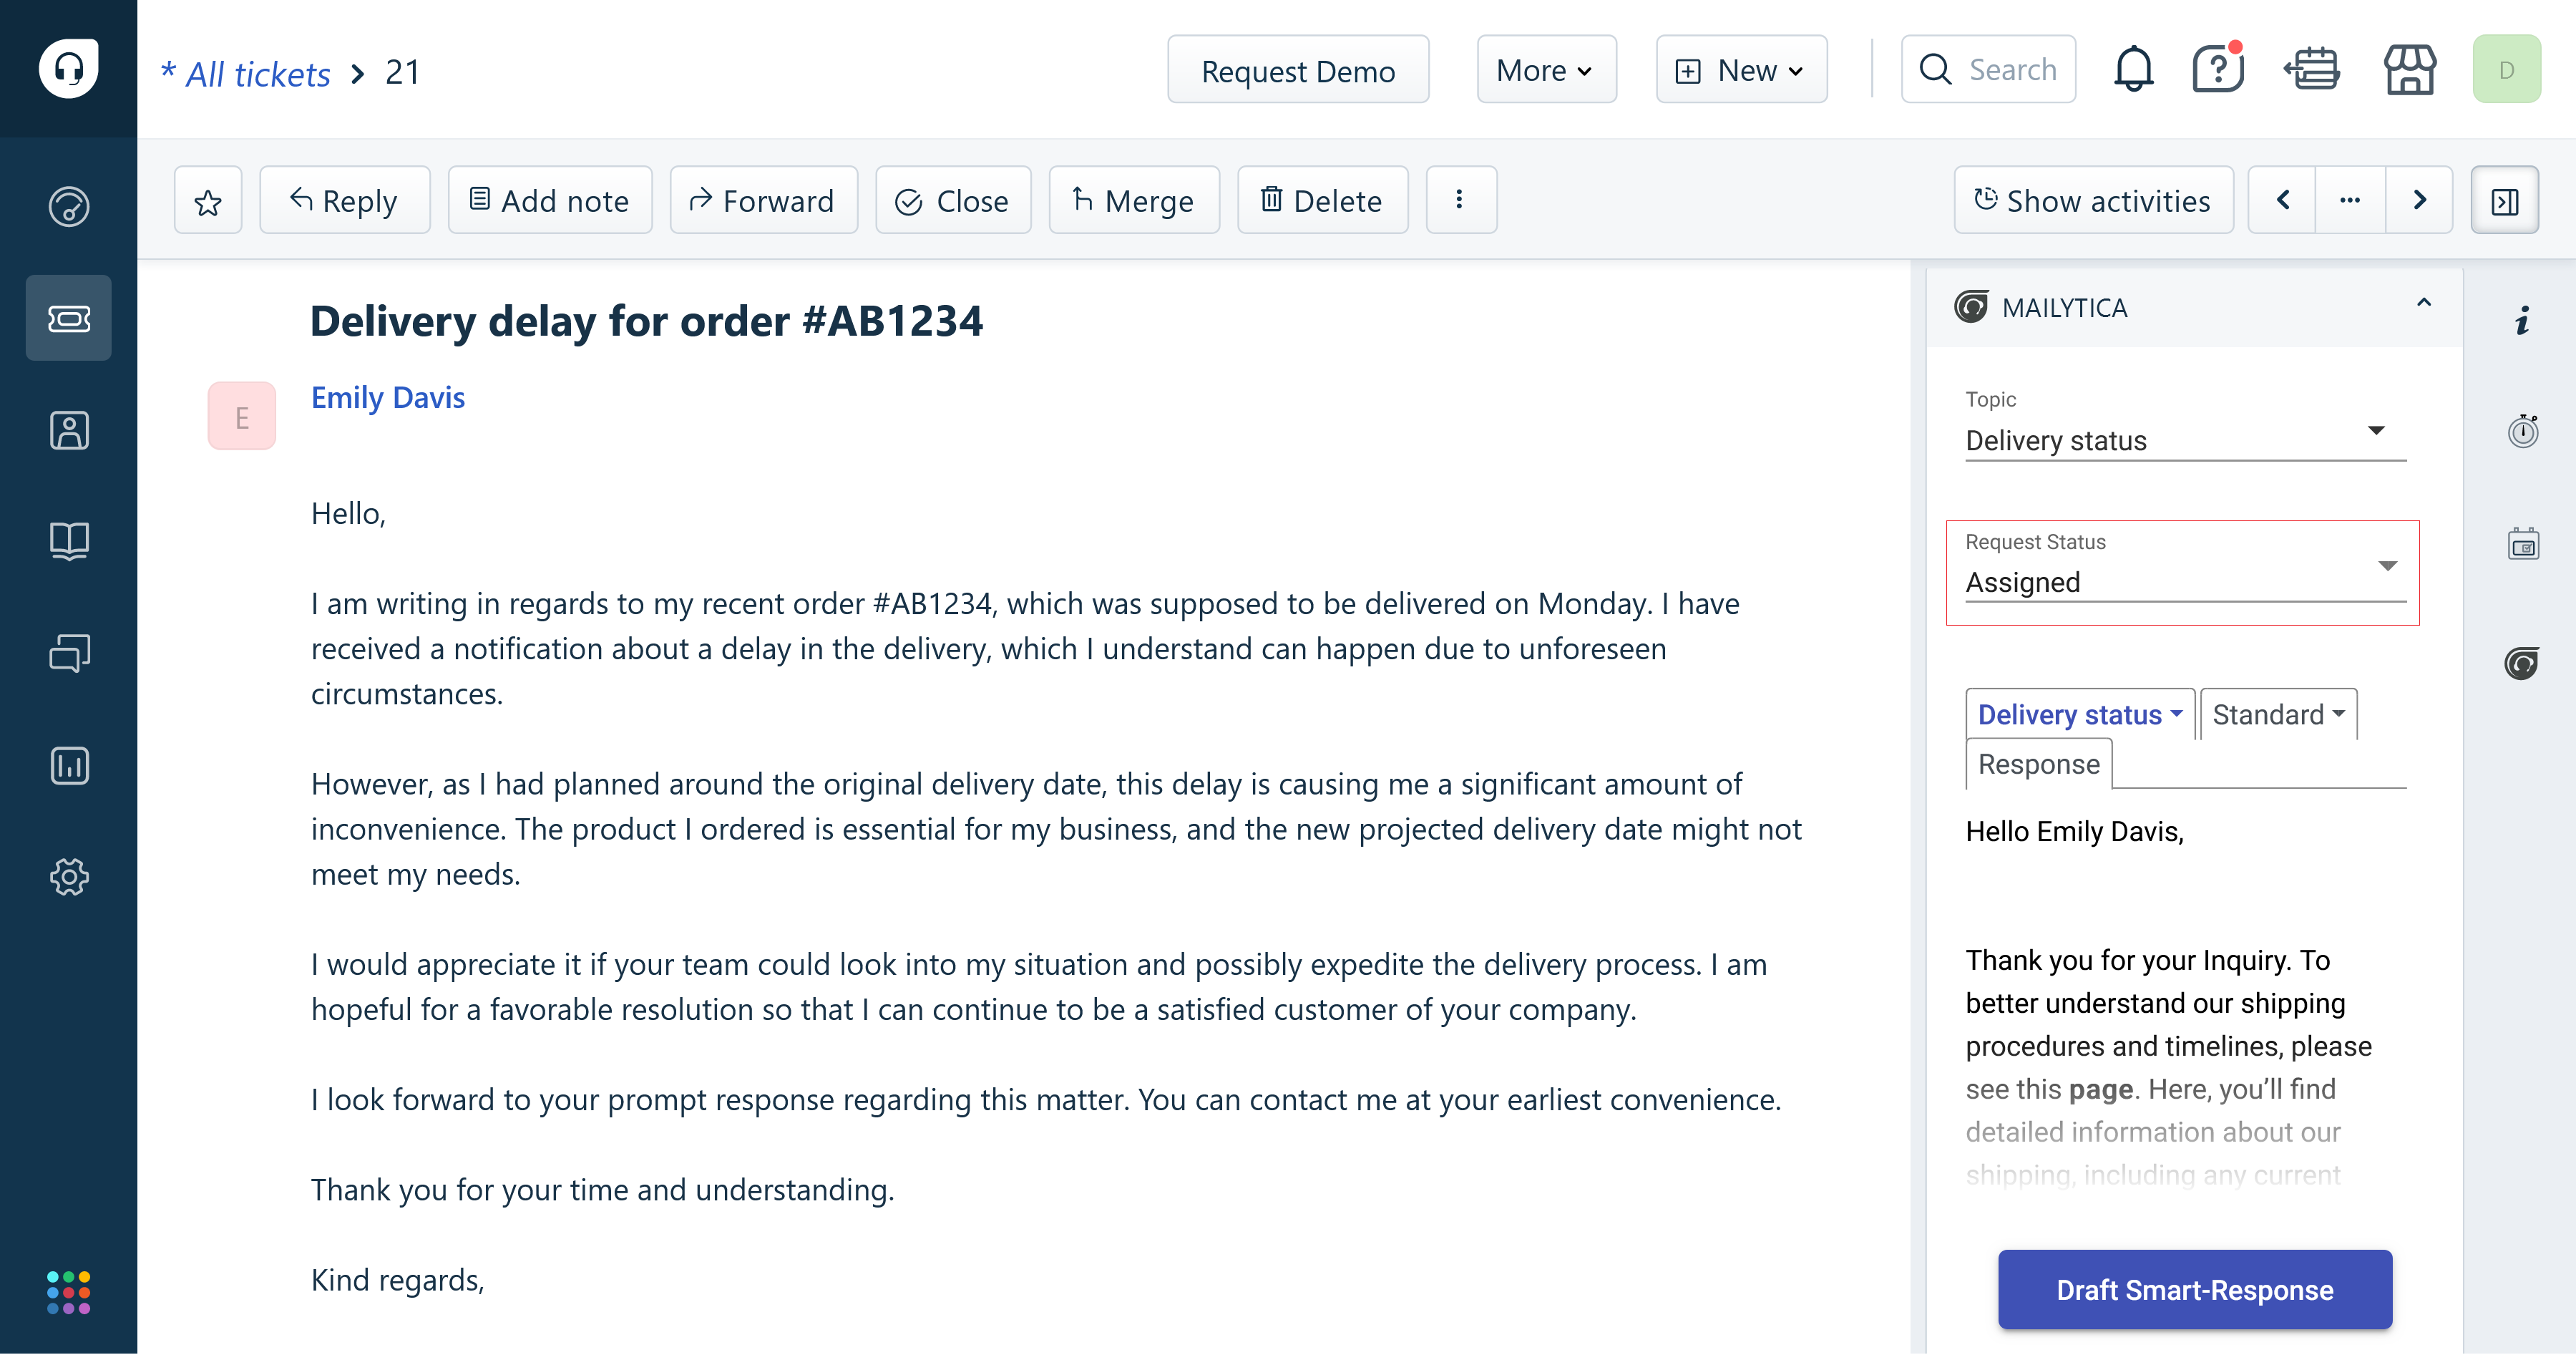
In this example, you can select whether the request is Assigned, In progress, or Completed. This status will be visible to all agents who access the message, thanks to the Persist Status option set earlier.