Third-Party APIs#
APIs Overview#
One of the key features of Mailytica is its ability to integrate with various third-party APIs, including CRM systems, helpdesks, ticketing platforms, and more (such as Shopify, Monday.com, and many others).
This type of integration allows Mailytica to access data from external platforms, and then incorporate relevant information into automated Smart Responses, Email Parsing Rules, Email Forwarding, and more.
Key Benefits
Personalized Emails: Using APIs together with Mailytica helps you to create automated emails that are tailored to individual recipients, resulting in improved user experience.
Up-to-Date Information: With real-time access to data from external platforms, Mailytica ensures that your automated emails contain the most current information available.
Streamlined Workflow: Mailytica’s integration capabilities eliminate the need to manually search for data in other apps, allowing you to manage everything from your email client of choice.
In this documentation section, we will begin with an overview of the types of API requests supported by Mailytica. We will then discuss the essential factors to consider when creating API requests and highlight the diverse use cases where API integrations can prove beneficial for enhancing your email communication processes.
API Requests#
Mailytica supports two primary types of API requests: GET and POST. These request types allow you to access information, manipulate data, and automate workflows. Understanding the differences between GET and POST requests is essential for using them to their full potential.
GET Requests#
GET requests are primarily used to retrieve data from an API. These requests allow you to access information from external platforms such as Shopify, Jira, Monday.com, etc. For example, you might use a GET request to access customer details from a CRM system or obtain the status of a support ticket from a helpdesk platform.
Although GET requests are powerful in terms of data retrieval, the data returned by a GET request cannot be modified. It is like viewing a web page in your browser: you have access to its content but not the ability to change it.
GET requests are the most common type of API request that you’ll use in Mailytica due to their ability to fetch external data. They let you access information, adapt it for Smart Responses, and add dynamic variables to your email templates—all within Mailytica’s Online Platform. This simplifies creating personalized email responses for better customer support and email communication.
Important
Use GET requests when you need to extract data from an external source to integrate it into Mailytica.
POST Requests#
POST requests are designed to send data to an API. These requests enable you to create or update records, trigger specific actions or workflows, and perform other tasks that require sending data to Mailytica’s API or third-party APIs.
For example, you could use a POST request to create a new support ticket in a helpdesk system or update a customer’s order status in Shopify.
Since POST requests modify data in a third-party system, you must be careful when using them. Inaccurate use can lead to data conflicts or other challenging issues to resolve. Therefore, it’s highly recommended to test your API requests beforehand or reach out to our support team for guidance if you’re not sure about setting up an API POST request.
Important
Use POST requests when you want Mailytica to update or modify data in an external system.
API Integration Guidelines#
Mailytica’s API integrations enable seamless interaction with various third-party platforms, allowing you to access and manipulate data efficiently. However, to make the most of these integrations, consider the following factors:
Review Third-Party API Documentation#
Before integrating with a third-party API, review its documentation to understand the available endpoints, data formats, authentication methods, and usage limits. This information is essential for correctly structuring your API requests and ensuring seamless communication between Mailytica and the third-party platform.
Define Your Data Extraction Objectives#
Identify the specific data you need to extract from the third-party platform to achieve your desired outcome. This may include customer details, support ticket information, or order status updates, depending on your use case.
For different cases, the specific data to be extracted may vary. For instance in a Shopify integration, you might want to extract customer details like name, email, and order history to later include in your Smart Responses.
This information will probably be stored in predefined variables with specific names. To locate these variables, refer to the third-party’s documentation, which should provide clear guidance on accessing the relevant data.
Collect the Right Data#
To optimize Mailytica’s performance when using APIs, it’s essential to collect the necessary data without overloading your requests with irrelevant information.
You can follow these guidelines to ensure efficient data collection:
Be Selective: Choose the data you extract wisely to minimize processing time and resource usage. Extracting excessive amounts of data can slow down your workflow and make it more challenging to identify the relevant information. You might also run the risk of encountering API limits.
Focus on Relevant Data: Concentrate on data that is directly related to your objectives and provides the most value for your specific use case. For example, if you’re using Mailytica to automate customer support, prioritize extracting customer details, support ticket information, and relevant email content. In this case, avoid extracting unnecessary data, such as product inventory or unrelated customer interactions.
Manage API Data Sources#
Understand which information the external API needs to make a successful API call. For instance, to access a customer’s current orders from a CRM or helpdesk system, you might need to provide their name or email address. Mailytica can extract this information from your emails using Email Parsing Rules or Dictionary Annotations.
Use the Extracted Data#
After successfully making an API call to an external system, you have to tell Mailytica how to use that information. In Mailytica’s Online Platform you can use data extracted from external APIs to personalize your Smart Responses, refine Email Parsing Rules, automate specific Email Actions, and more.
For example, let’s say you’ve connected Mailytica to a helpdesk API and extracted data about the status of customers’ support tickets. You can use this information to automate actions in your email workflow, like forwarding high-priority support messages to a specific team member.
API Integration Process#
API integrations allow Mailytica to seamlessly connect with external systems, enabling you to use third-party data and improve your email automation process.
In this section, we’ll explain the process of integrating external APIs with Mailytica’s Online Platform, how to extract data from APIs, and how to use that data to enhance some of Mailytica’s features such as Smart Responses, Email Parsing Rules, and Email Actions.
Important
Keep in mind that Mailytica offers flexibility when configuring external APIs. You can set them up globally (or at the project level) by choosing API Source or API Data from the left-side menu.
Alternatively, you can configure external APIs at a more local (or topic) level by first creating a topic and then customizing your API call within that specific topic.
API Source#
To connect an API, you’ll need to specify the source within Mailytica’s Online Platform. This process involves specifying the details of the thirdparty API, such as its endpoint and authentication details, so that Mailytica can establish a connection with the external system.
REST API Source (GET)#
To extract data from an external API, you’ll need to make a GET request. With Mailytica, configuring an API source that accepts GET requests is a straightforward process.
Follow these steps to set up an API source for GET requests:
Start by selecting your project and clicking on API Source in the left-side menu. To configure the API for a specific topic only, click the Edit button next to the topic you want to modify, choose API Data from the top tab bar, and then click Add API Source.
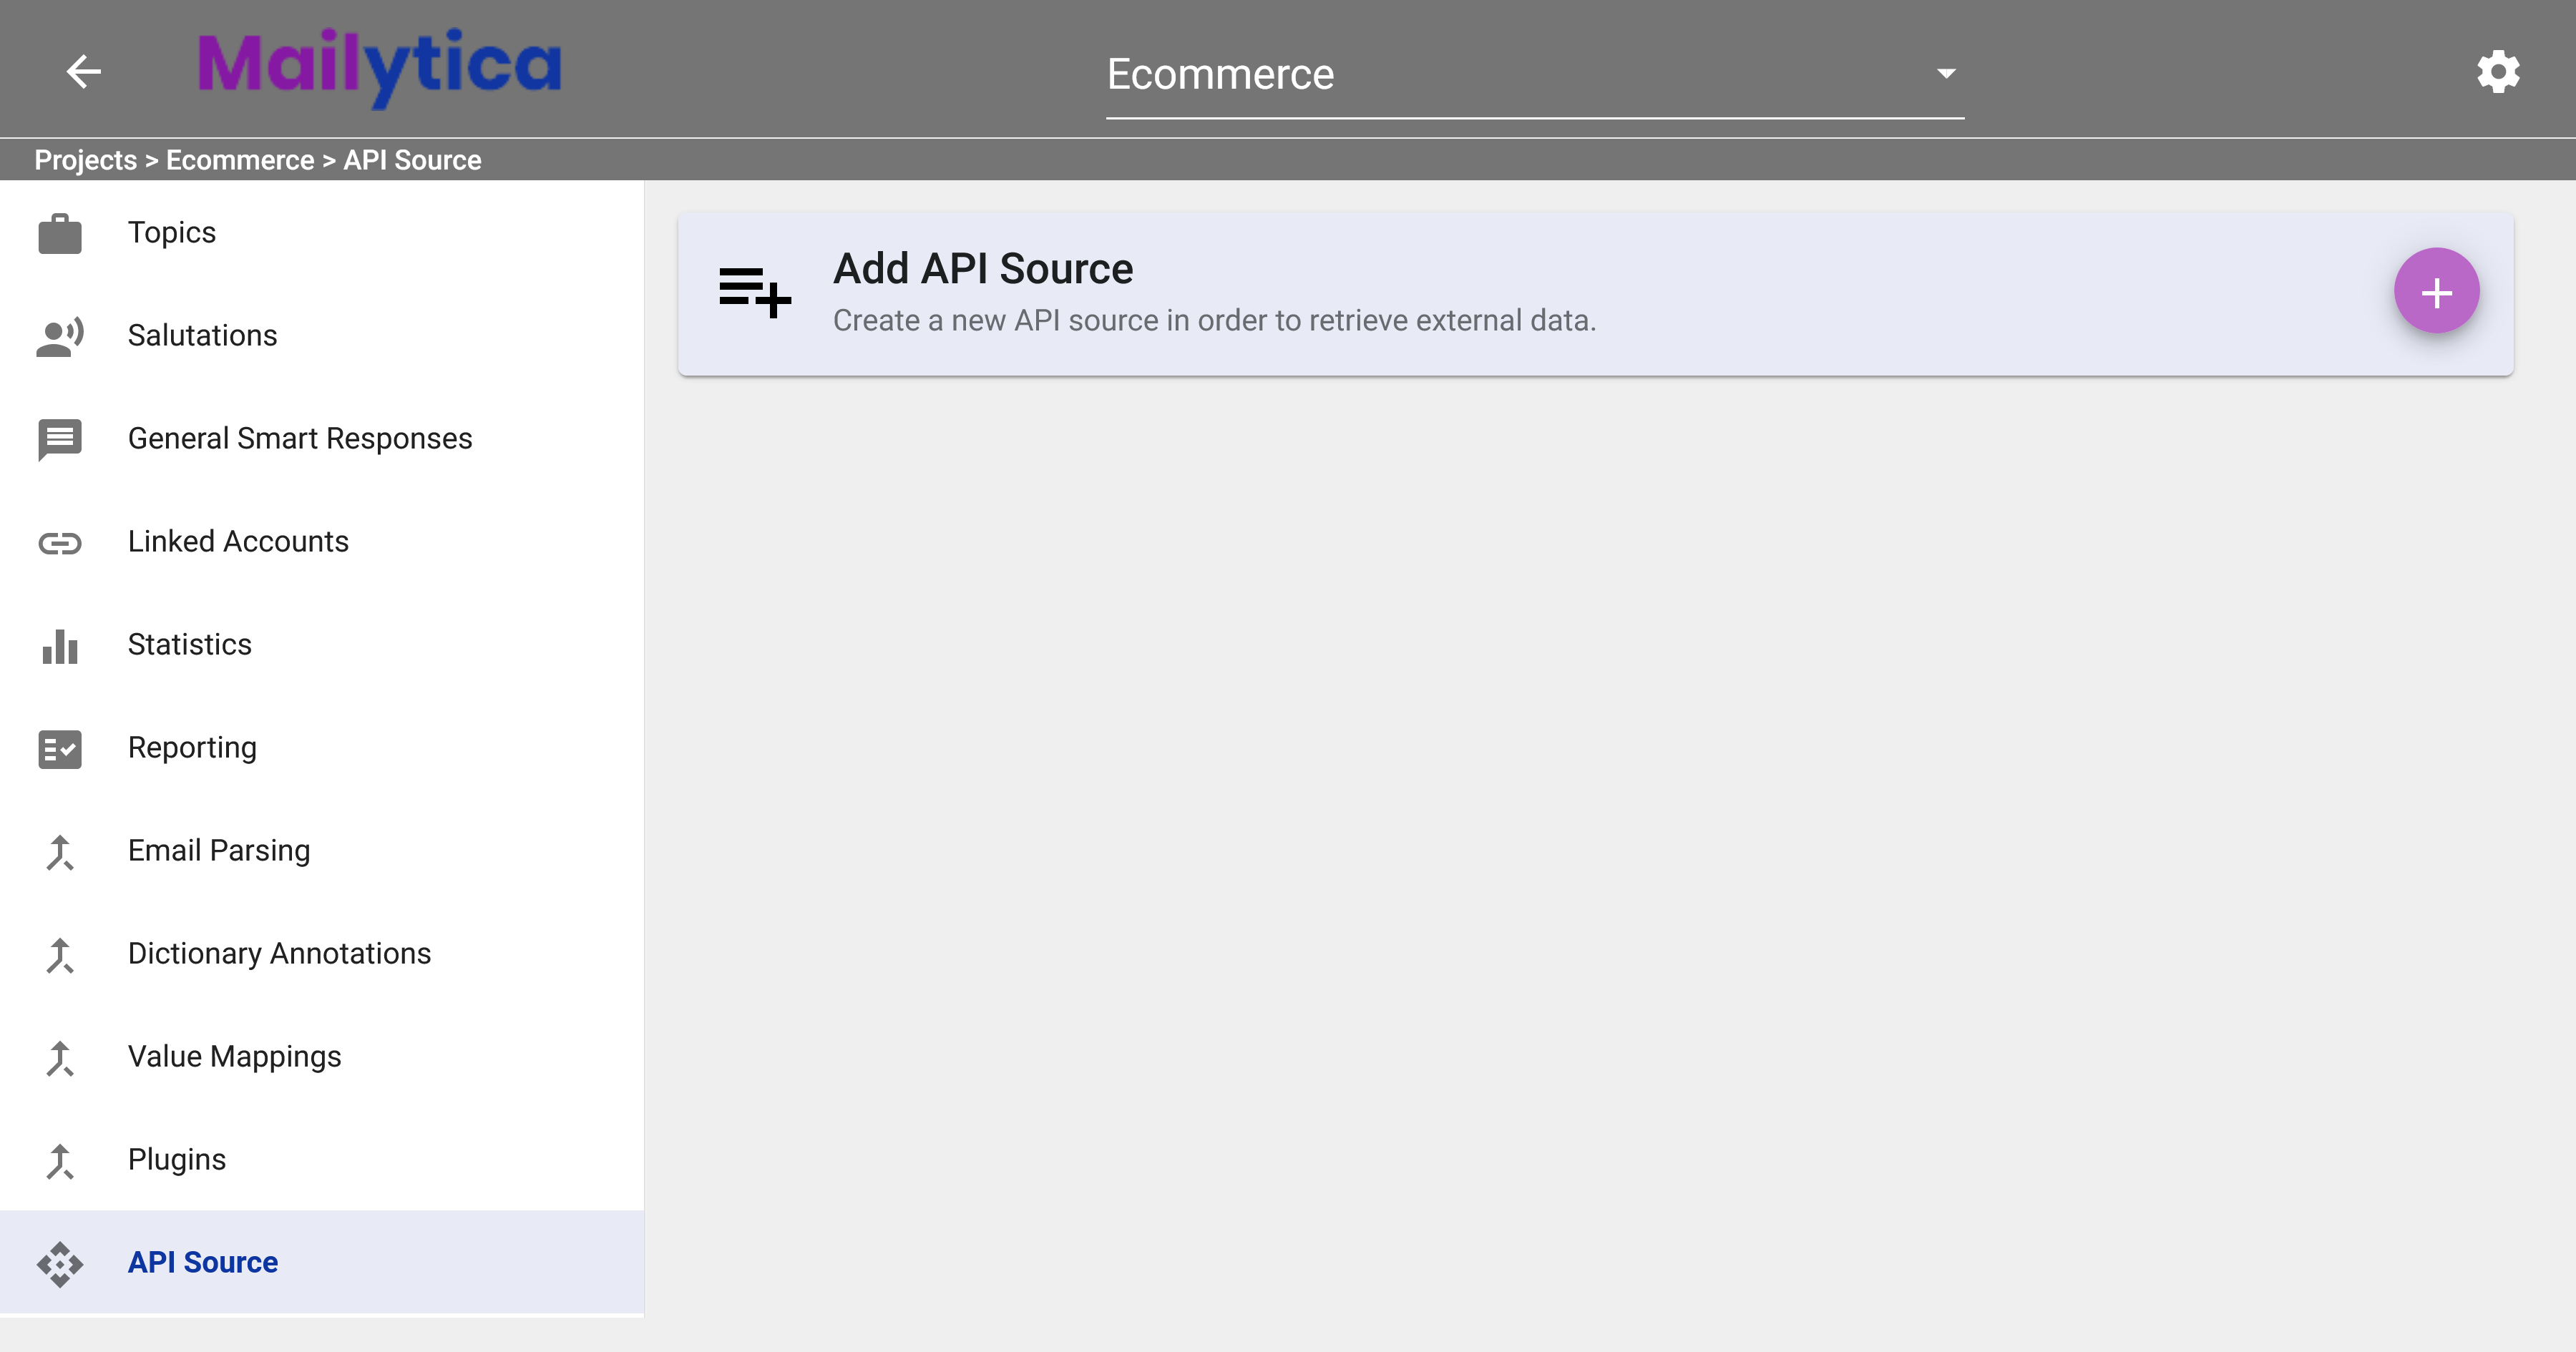
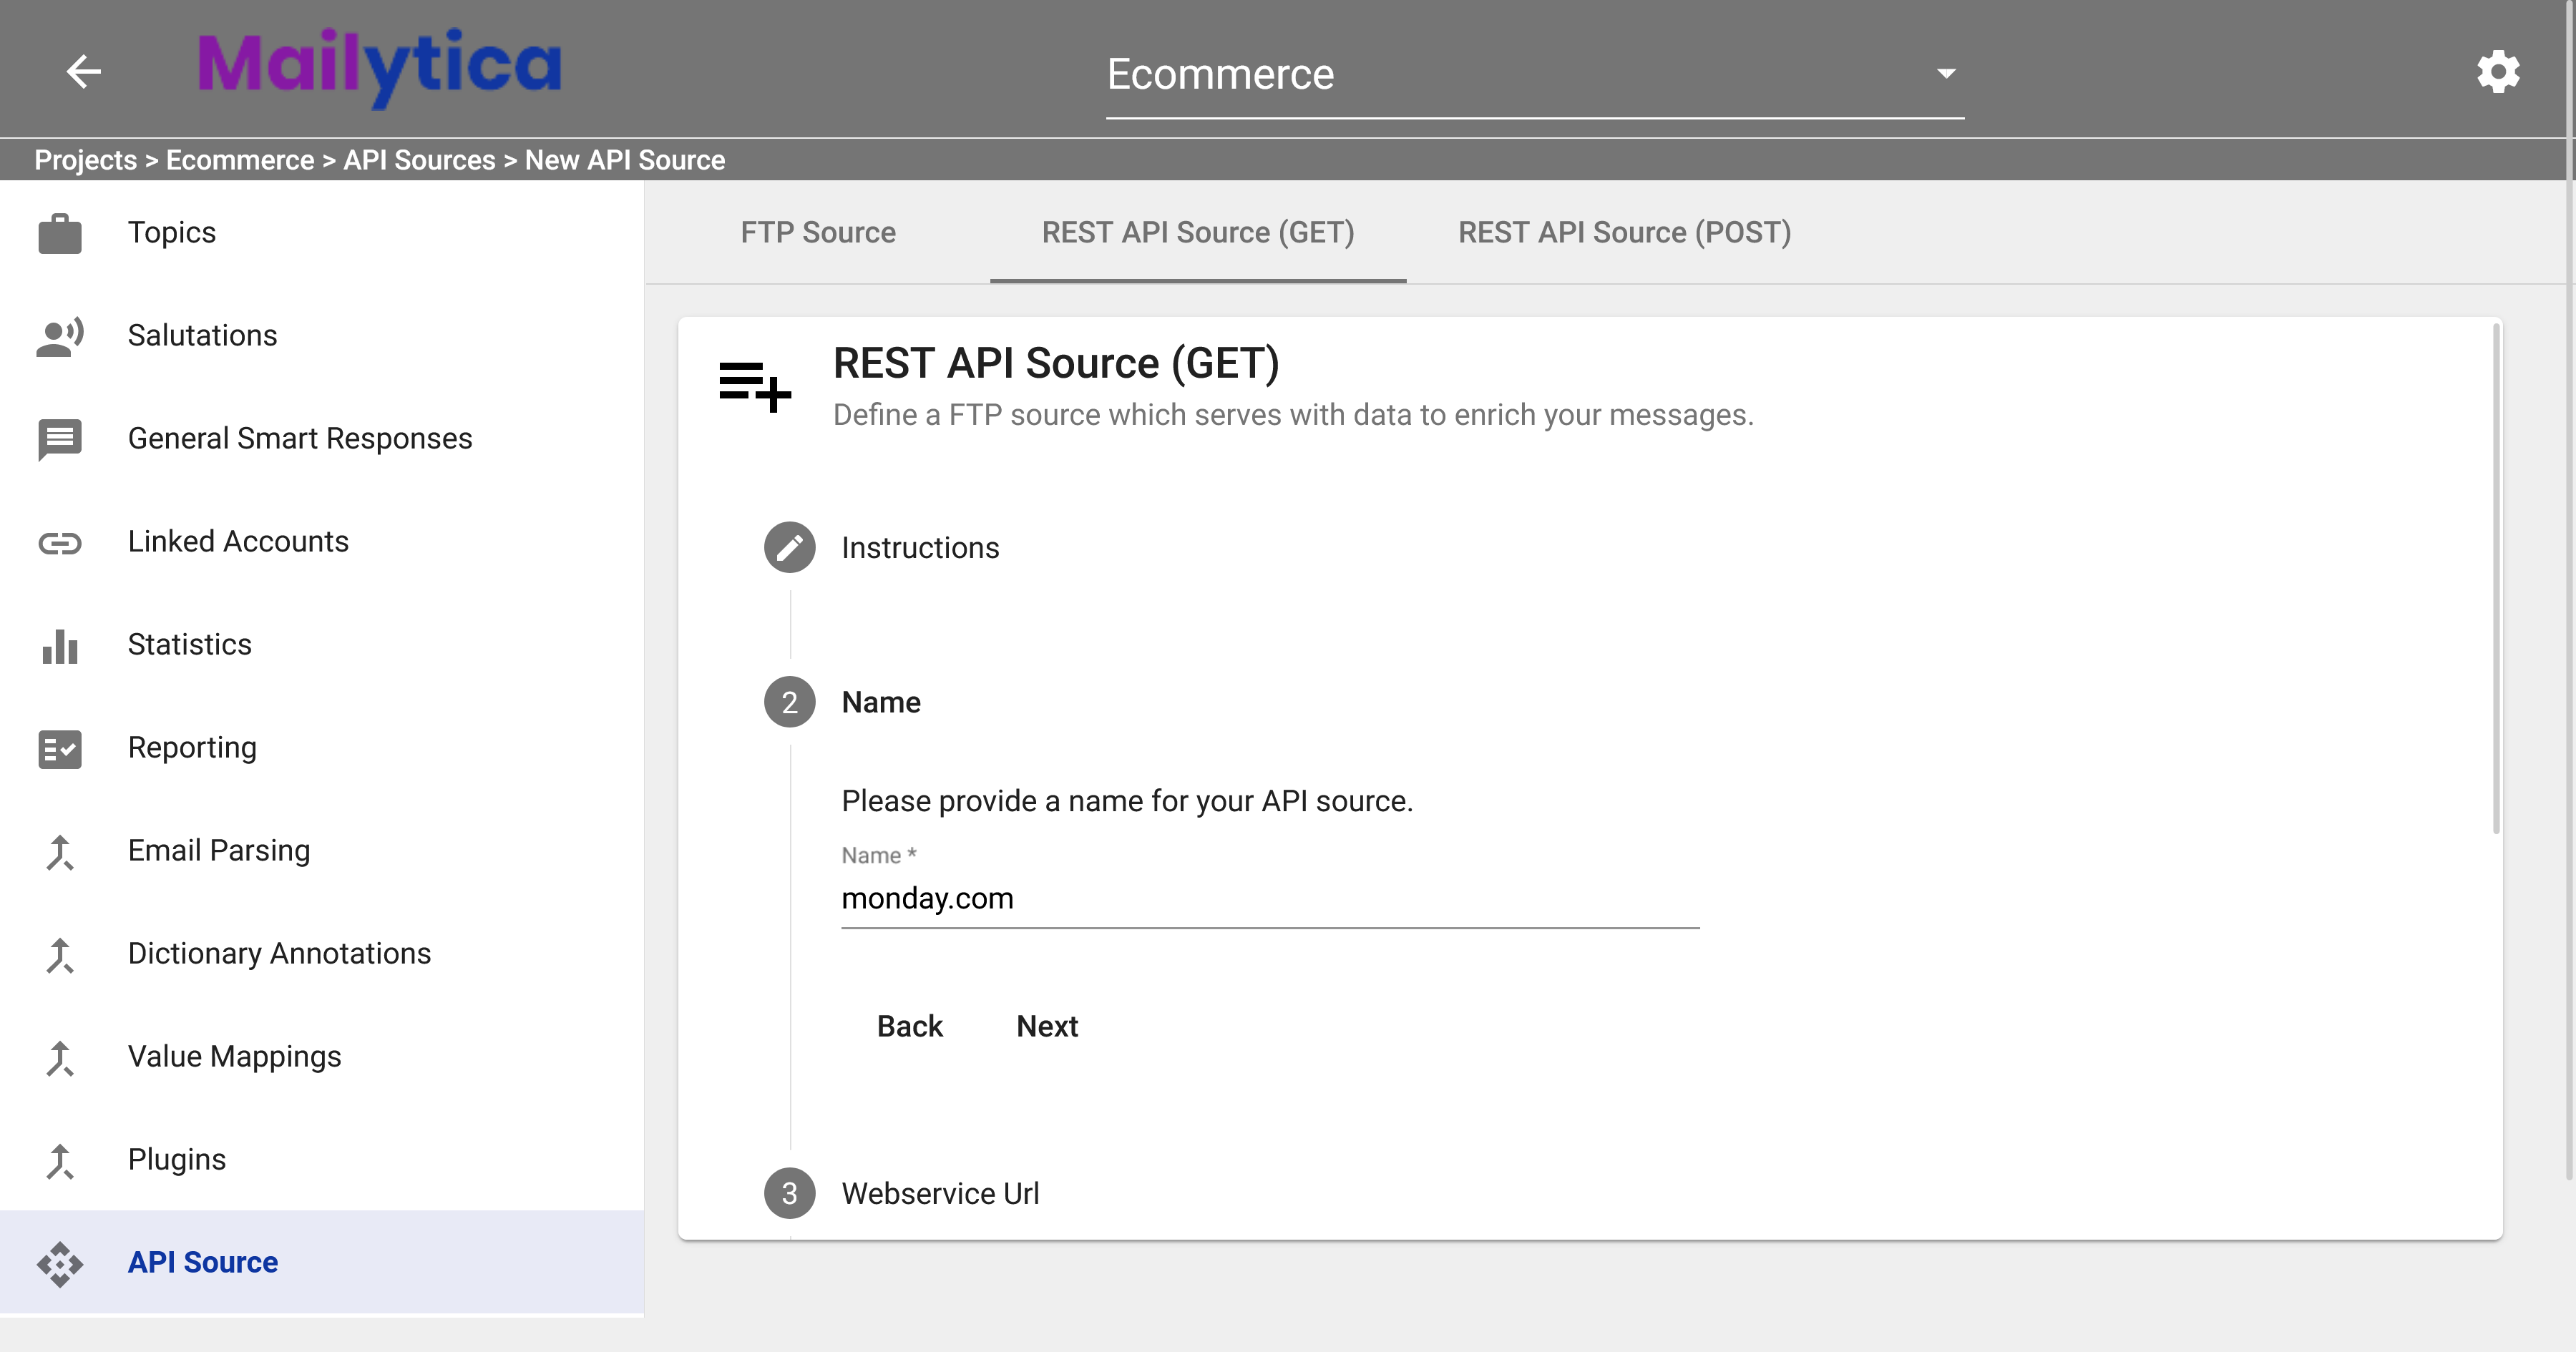
Choose REST API Source (GET) from the top tab bar. The REST API Source (GET) screen will display the instructions for setting up your API connection.

Next, provide a descriptive name for your API source in the Name field. This name should clearly indicate the API connection you’re configuring. For instance, when establishing a connection with monday.com’s API, you might simply name it “monday.com”. monday.com is a project management platform that supports team collaboration and workflow automation. By integrating monday.com’s API, you gain access to data such as task assignments, project deadlines, and team progress. With Mailytica, you can leverage this information while composing emails or even update your monday.com details directly from your email client.
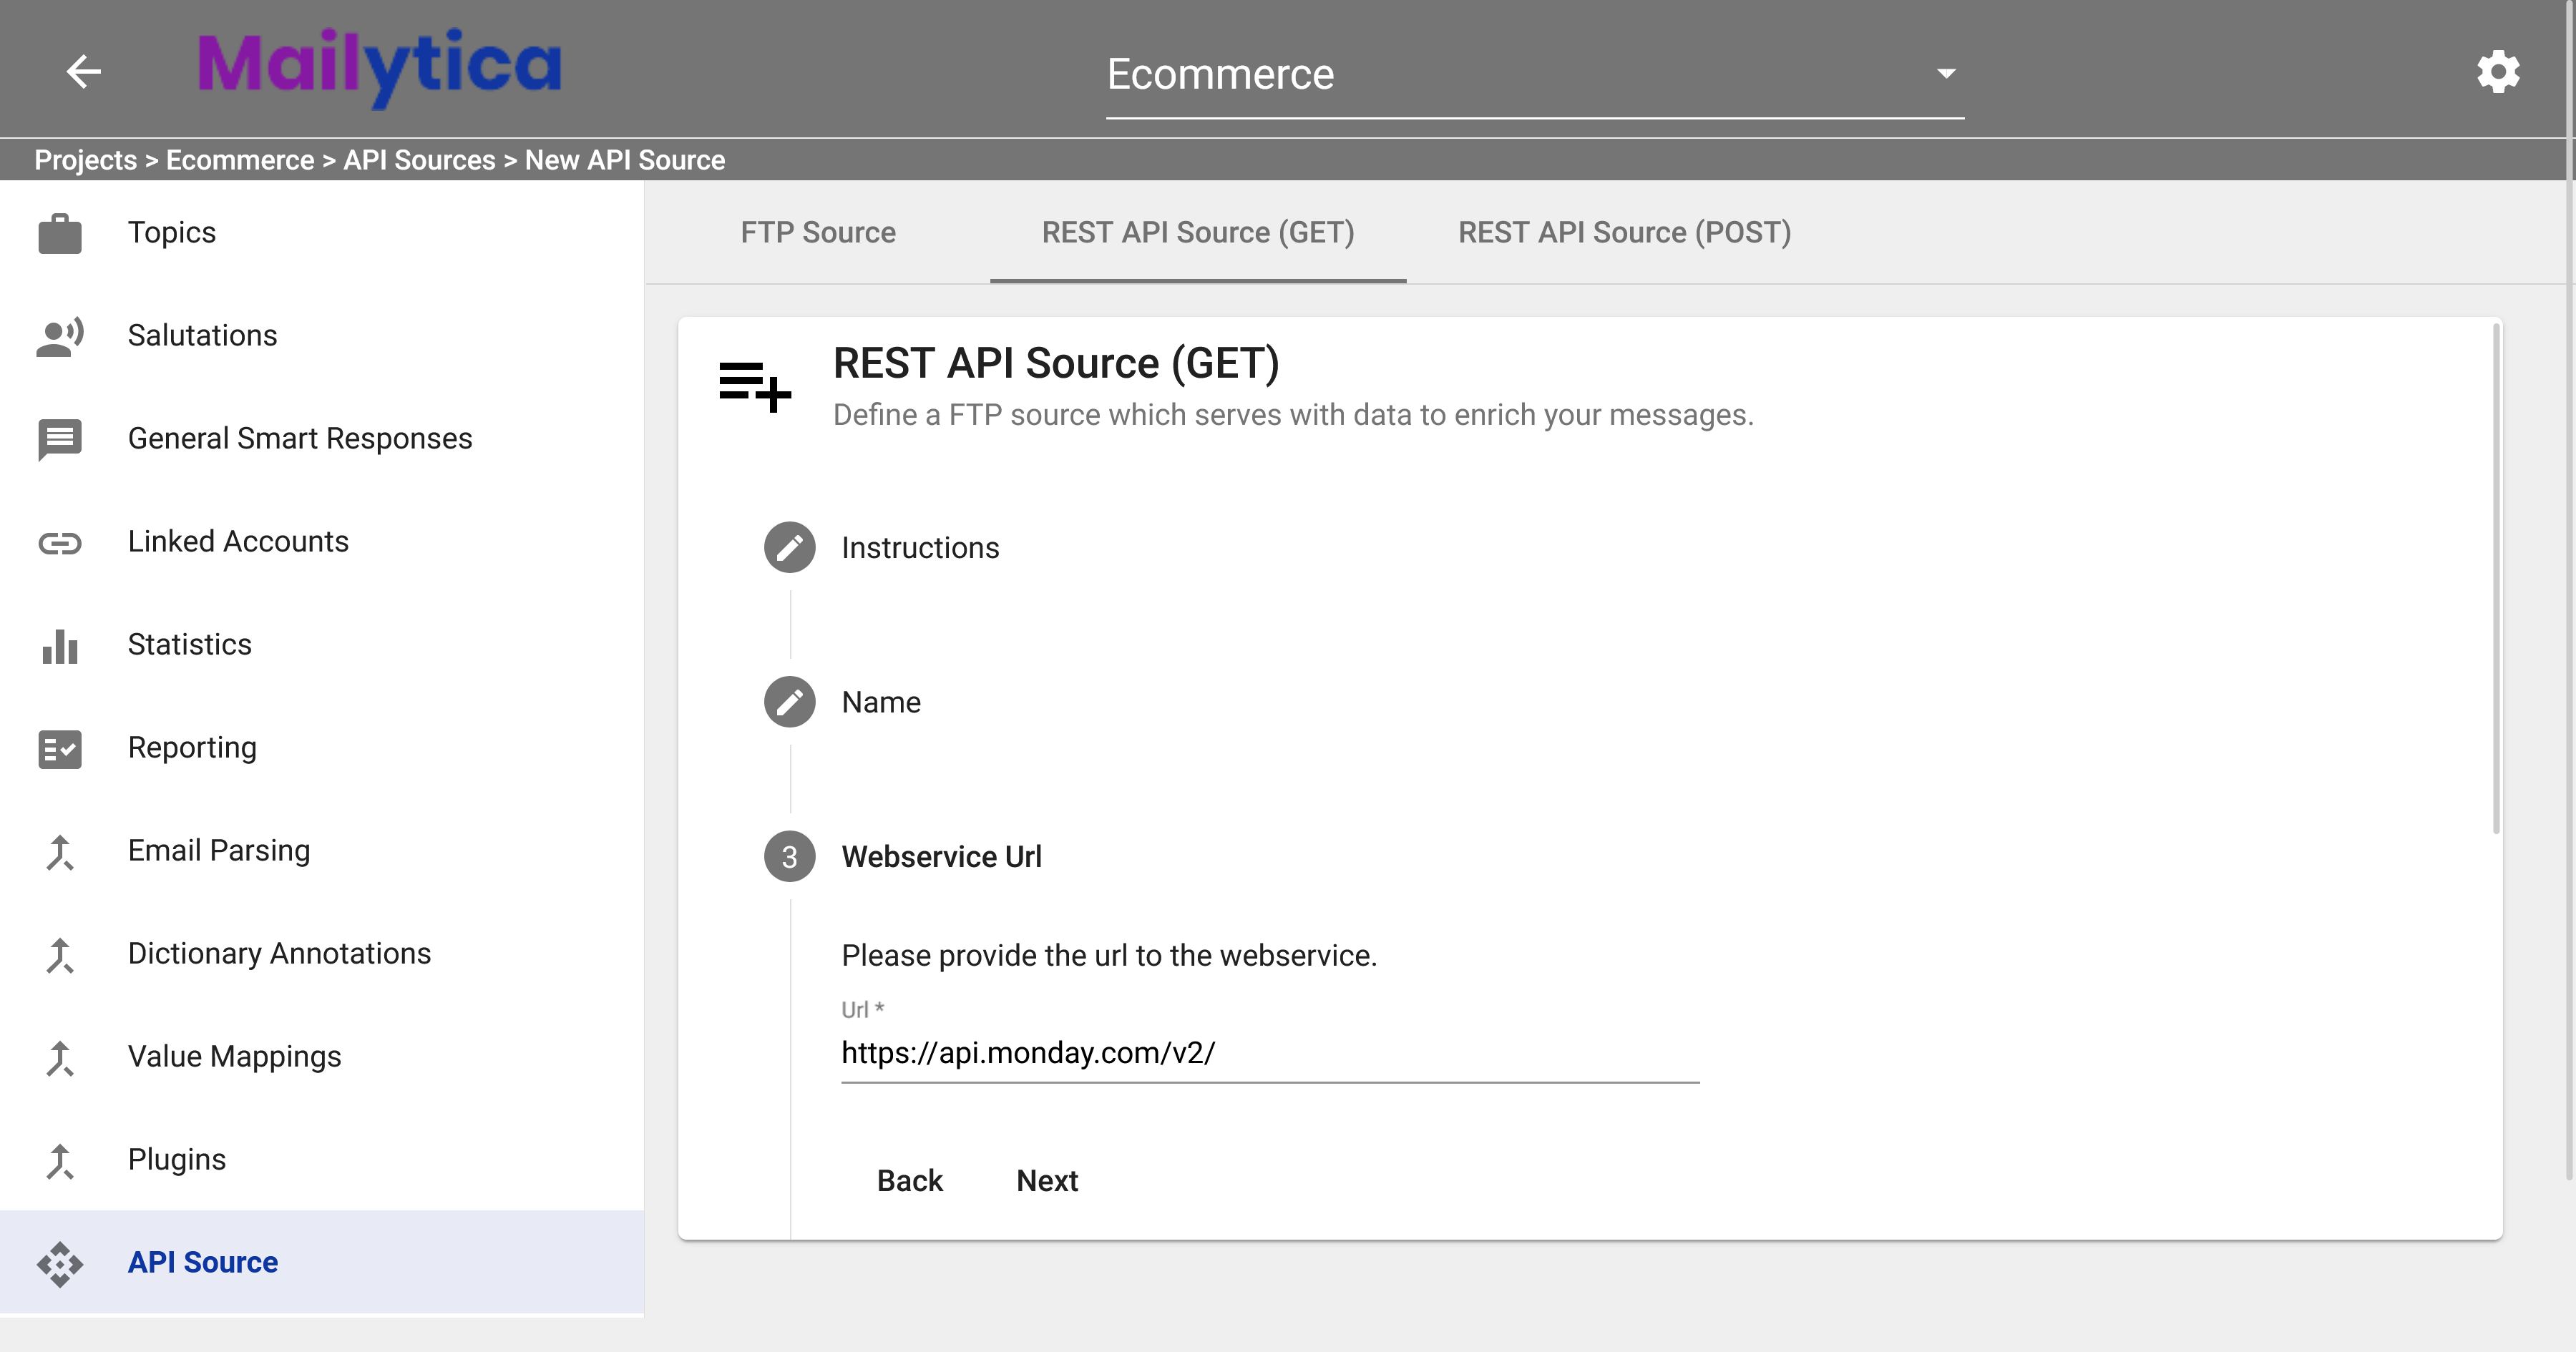
Then, enter the API’s URL or endpoint in the Webservice Url field. You can find this information in the external system’s API documentation. For our example, we’ll use monday.com’s API URL: https://api.monday.com/v2/.
Following, in the Timeout field specify an API timeout in milliseconds. The recommended default value is 1000.
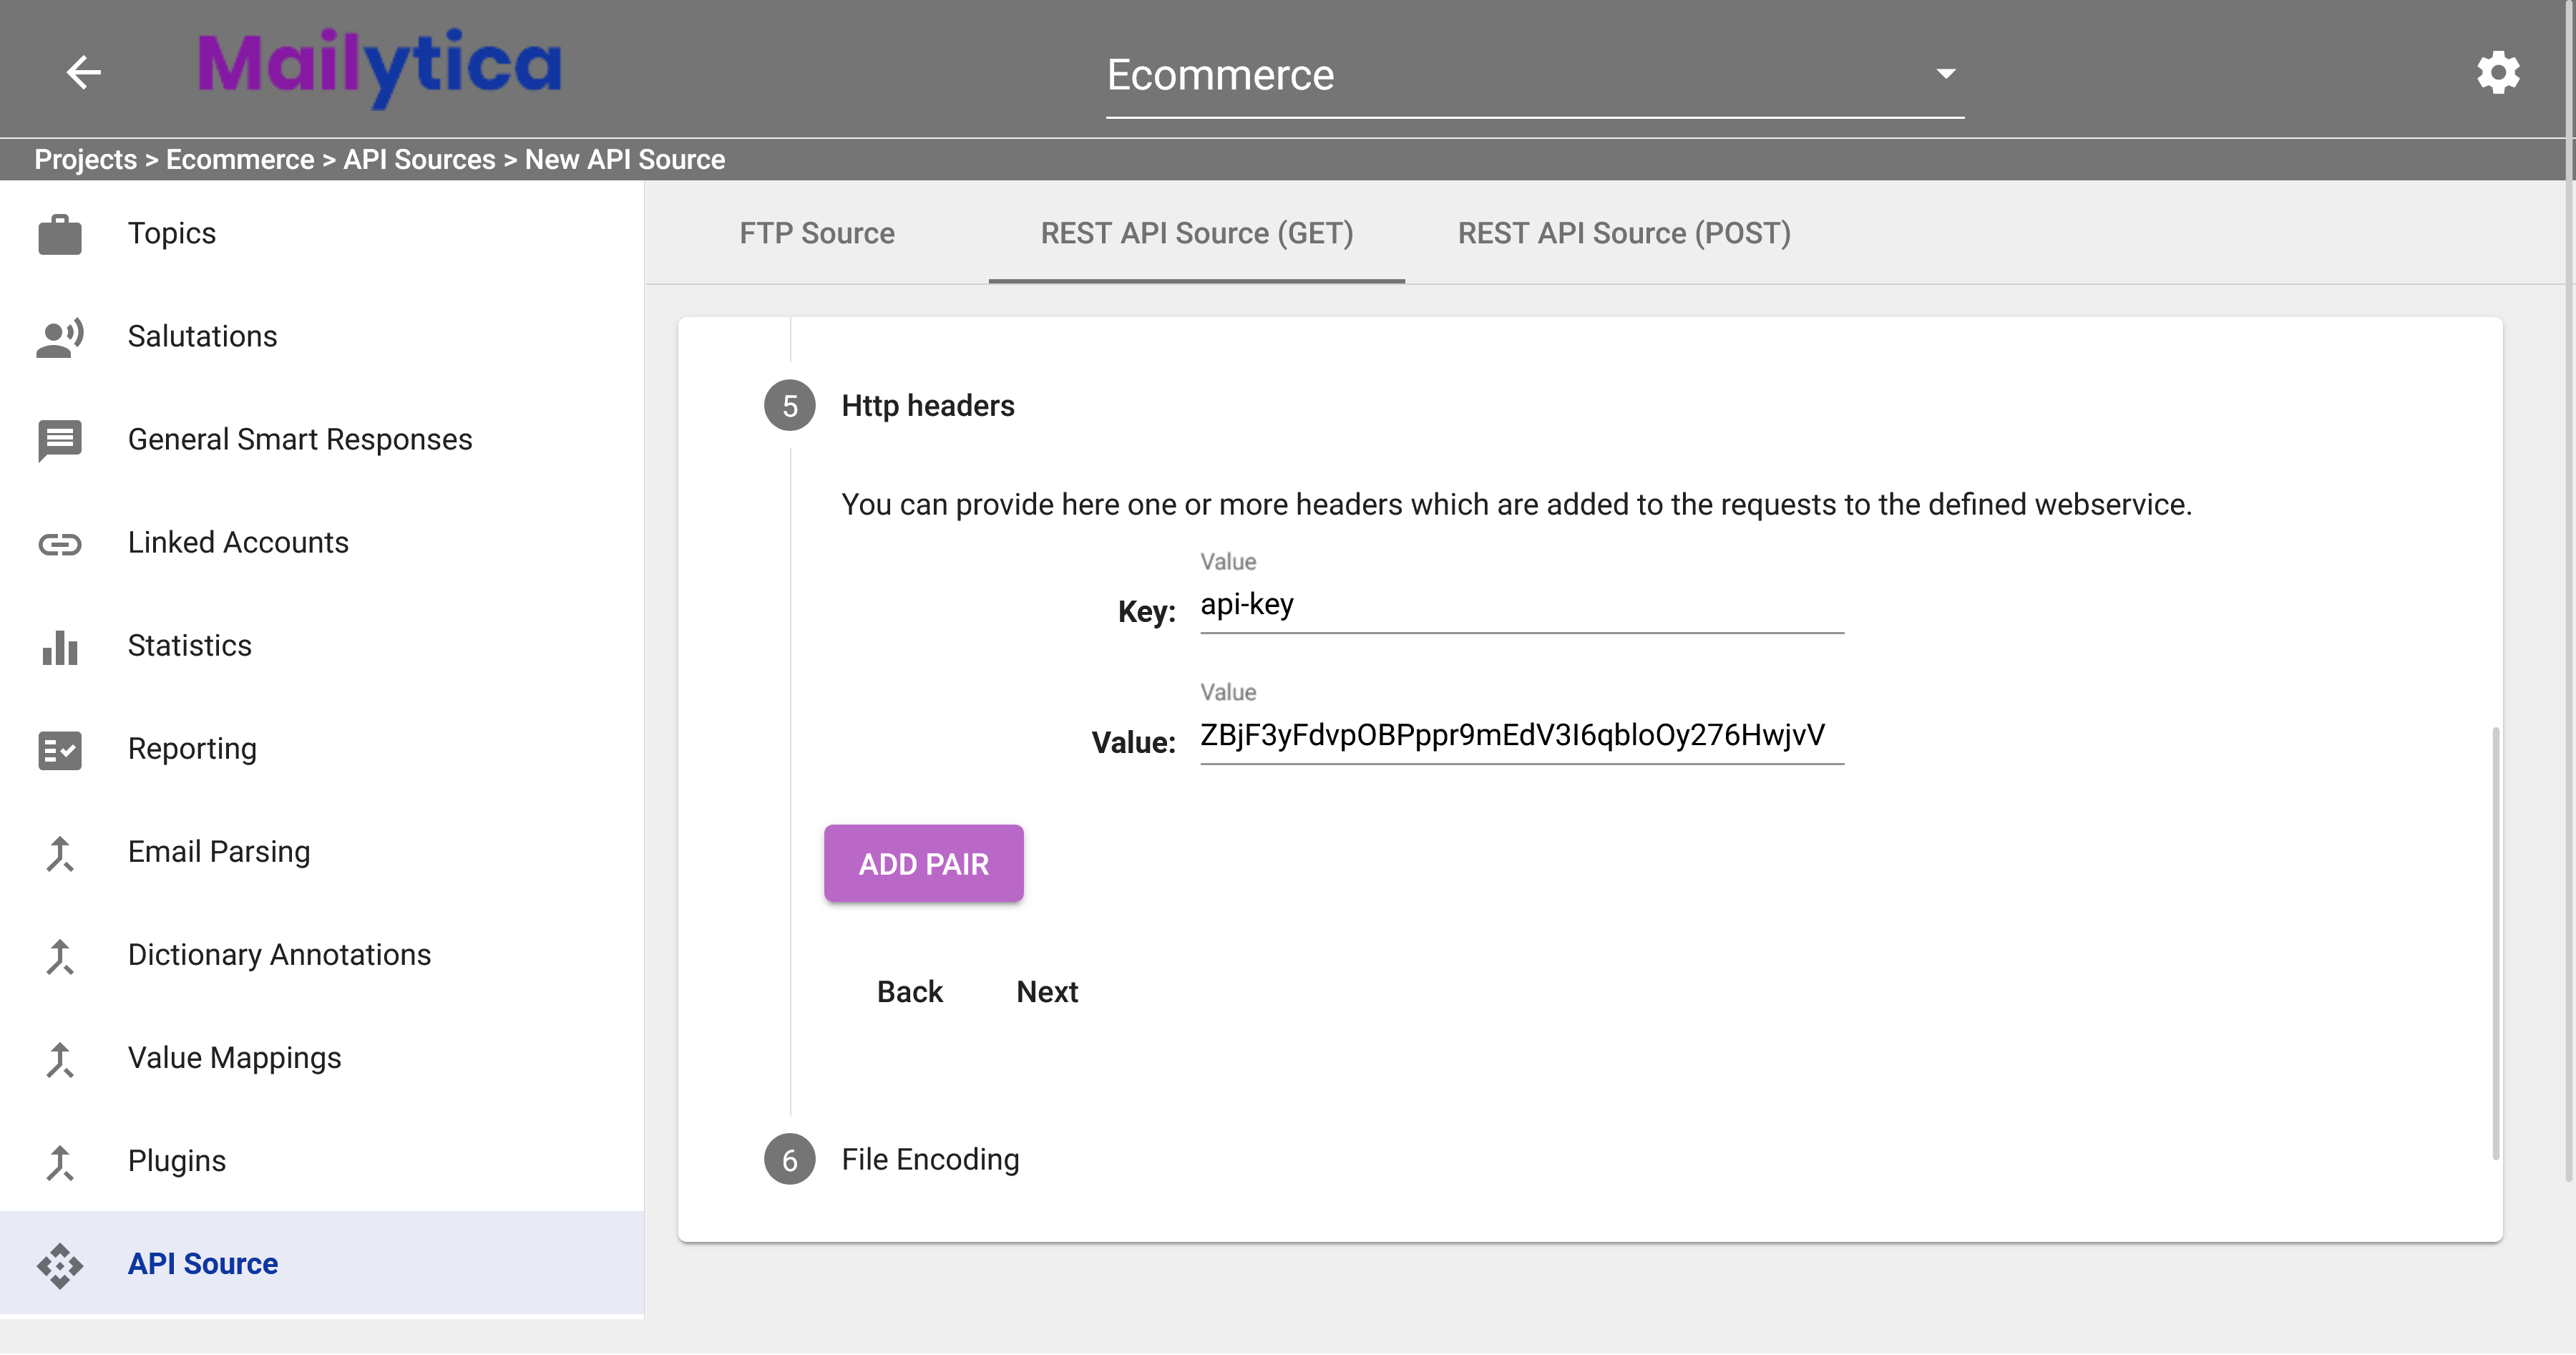
In the Http Headers section, provide the authentication details for the external API. Typically, the third-party system will give you an API Key and an API Value once you have an API account. Insert those details in this section and the click the Add Pair button. If you need to remove your API headers after adding them, simply click the button, otherwise if you want to edit them you can click the button.
Important
HTTP headers are key-value pairs sent in an HTTP request or response to provide additional information about the request or response. They play a crucial role in API communication, as they can convey metadata, authentication details, and other essential information.
In the context of Mailytica, you need to provide specific HTTP headers for authentication purposes when connecting to an external API.
For more information about HTTP headers, visit the Mozilla Developer Network’s HTTP Headers documentation.
Finally, in File Encoding, specify the encoding for your source files. We recommend leaving the default value of UTF-8, as it’s more likely to work work on most systems without errors or problems.
Click the Add button to connect your new API source to Mailytica.
REST API Source (POST)#
If you want to modify data in an external source using Mailytica, you’ll need to make a POST request. To do this, you must configure an API source that accepts POST requests.
Follow these steps to set up an API source for POST requests:
Start by selecting your project and clicking on API Source in the left-side menu and then selecting Add API Source. To configure the API for a specific topic only, click the Edit button next to the topic you want to modify, choose API Data from the top tab bar, and then click Add API Source.
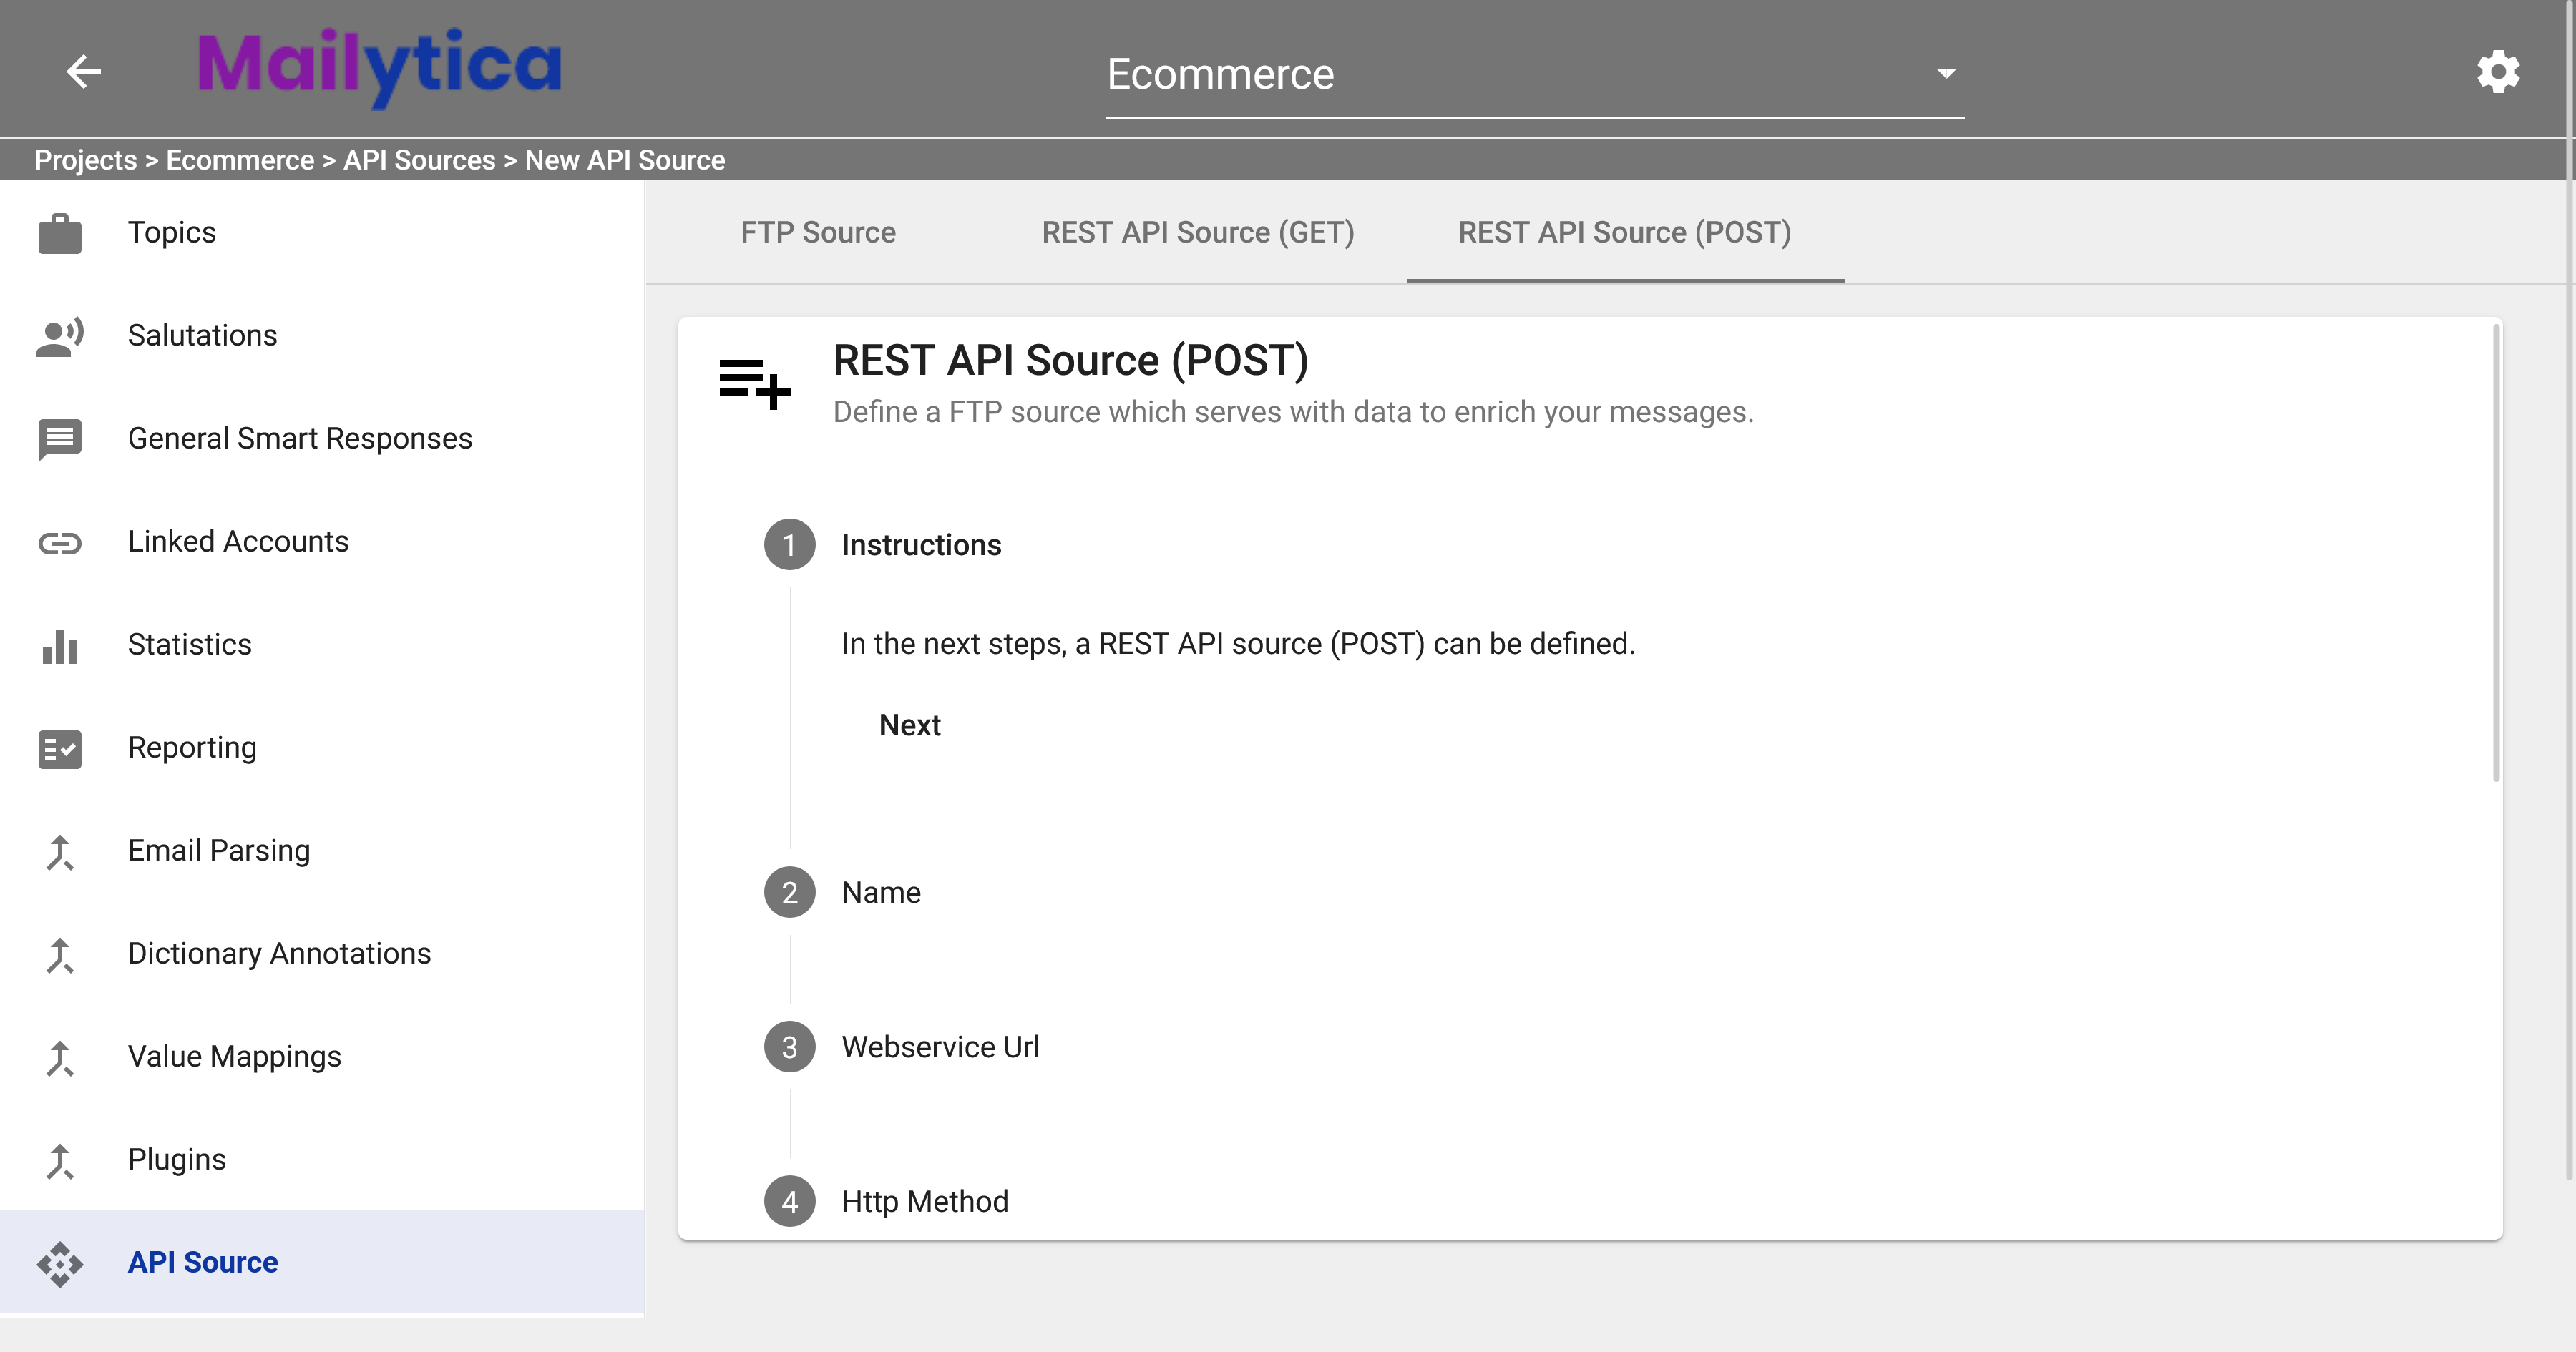
Choose REST API Source (POST) from the top tab bar. The REST API Source (POST) screen will display the instructions for setting up your API connection.
Next, provide a descriptive name for your API source in the Name field. This name should clearly indicate the API connection you’re configuring. For example, if you’re setting up a connection with monday.com’s API, you could name it “monday.com”.
Then, enter the API’s URL or endpoint in the Webservice Url field. You can find this information in the external system’s API documentation. For our example, we’ll use monday.com’s API URL: https://api.monday.com/v2/.
In the Http Method field, specify the type of request you want to establish. The available options are POST, PUT, and PATCH. Each method serves a different purpose when interacting with external APIs:
POST: Creates new resources or submits data to be processed by the server.
PUT: Updates an existing resource by replacing its entire content with the provided data.
PATCH: Updates an existing resource by modifying only the specified parts of the content.
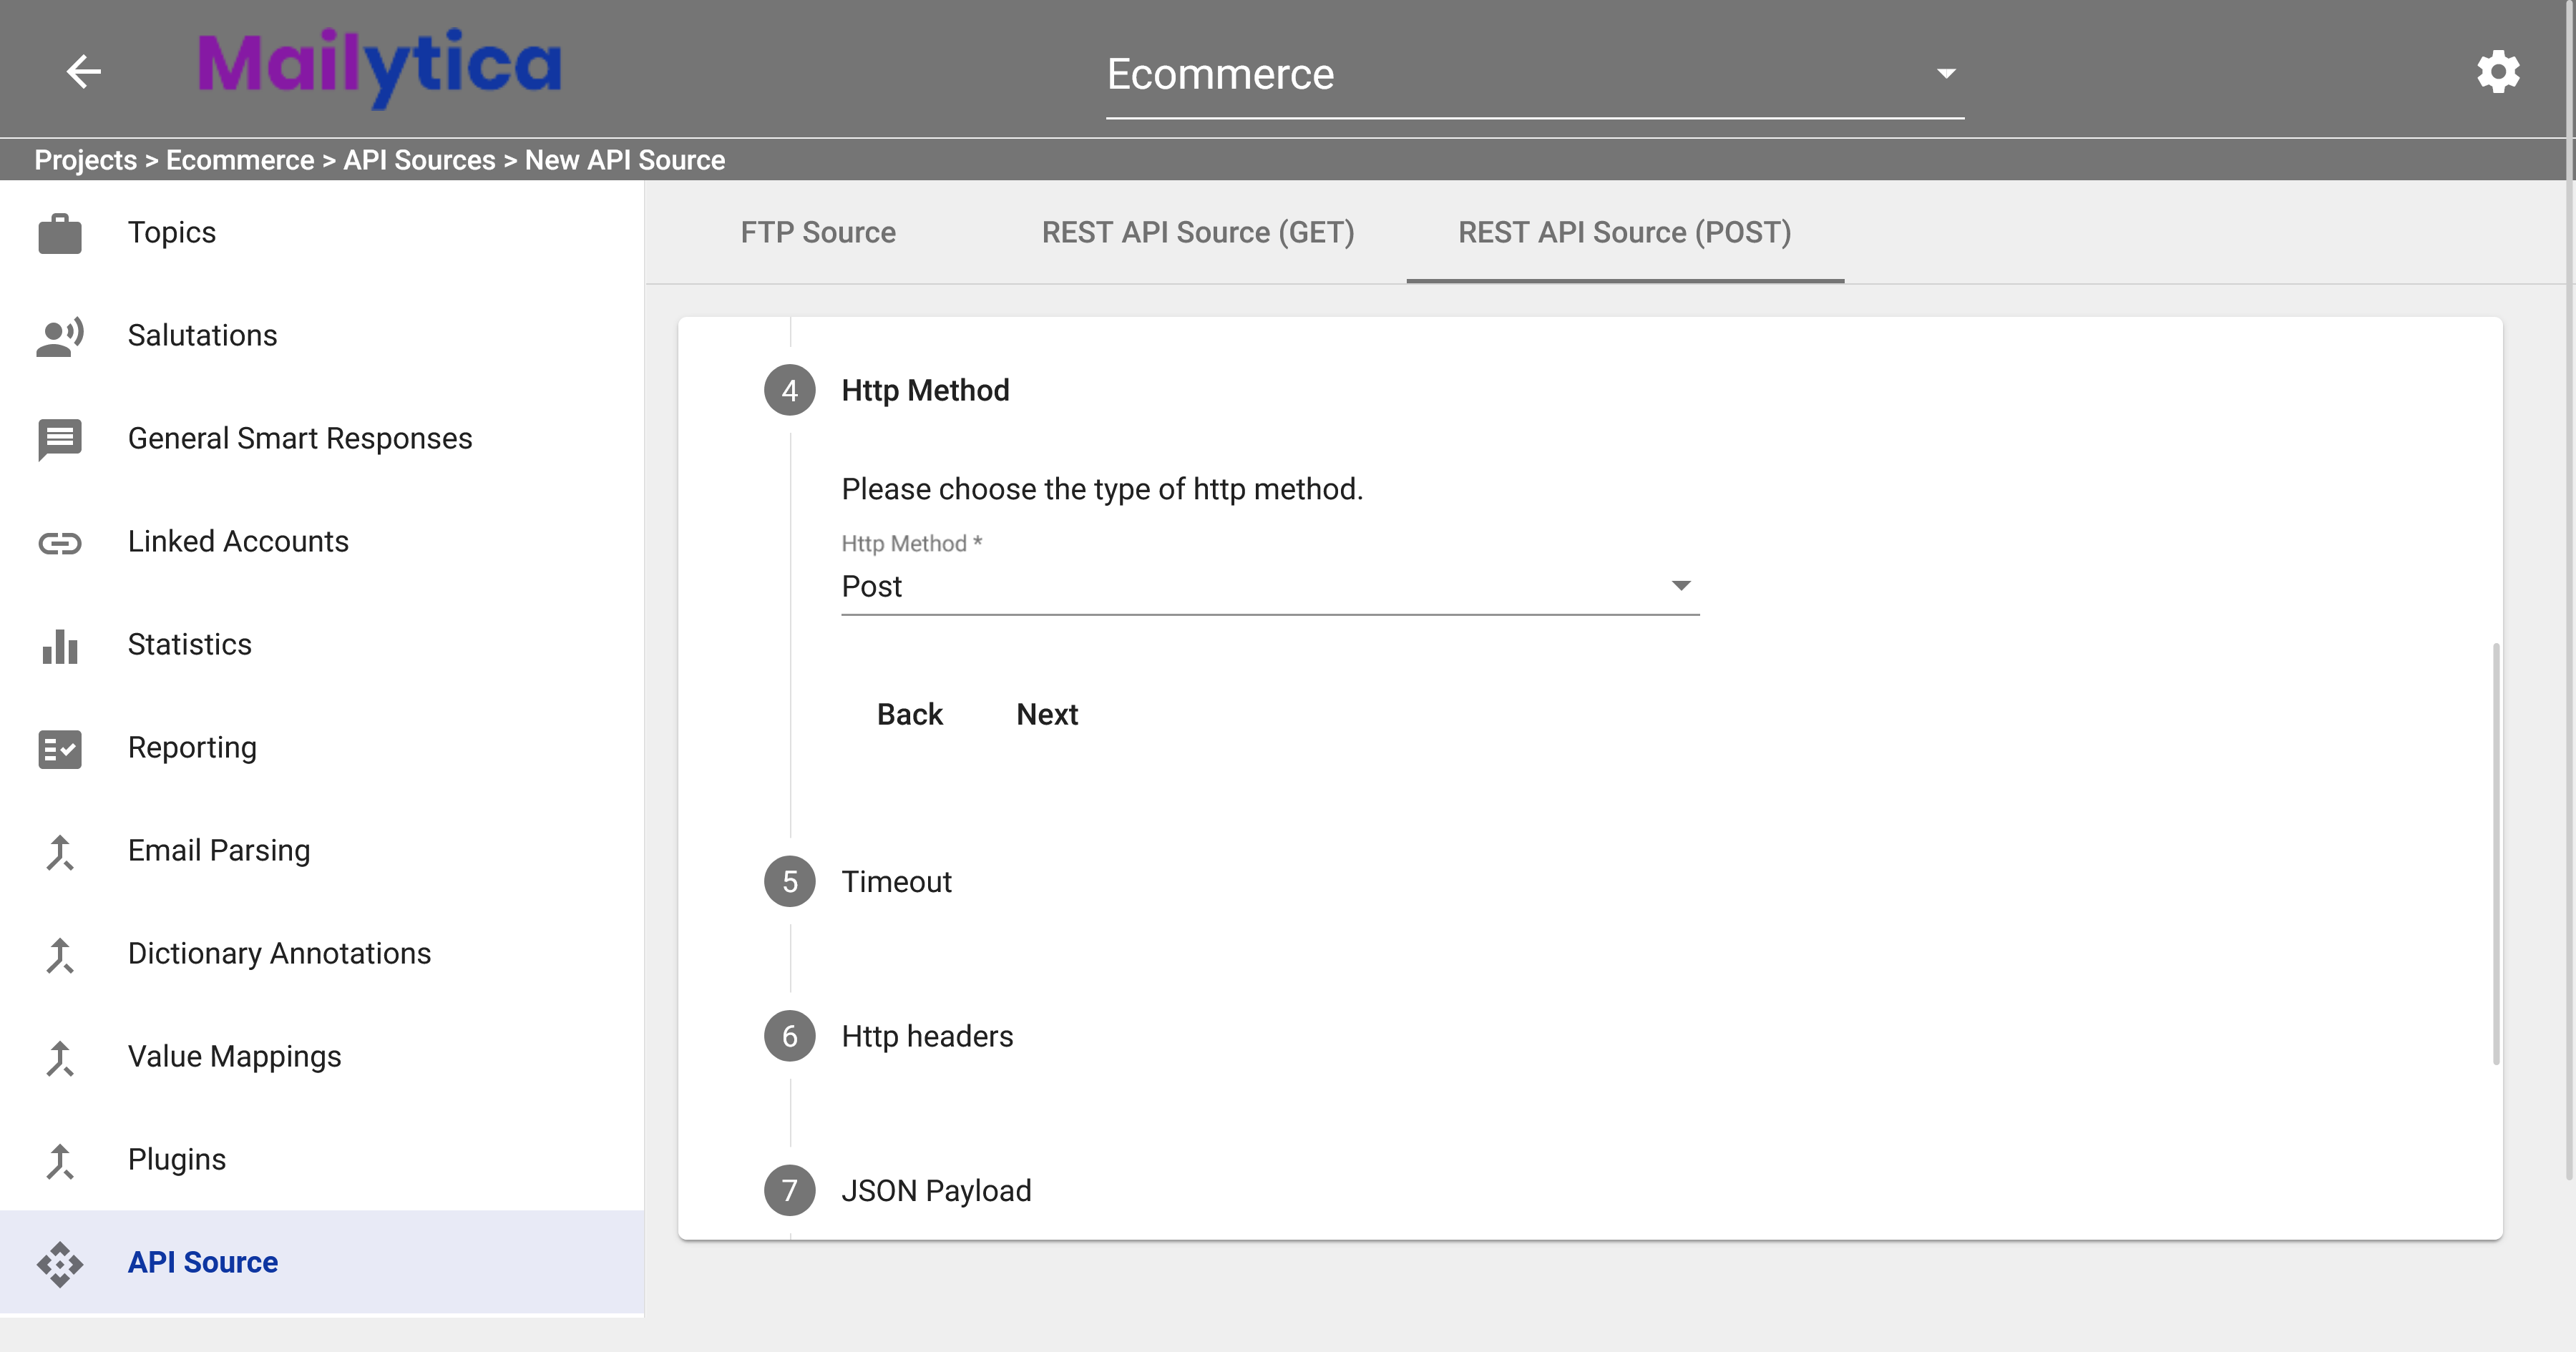
Following, in the Timeout field specify an API timeout in milliseconds. The recommended default value is 1000.
In the Http Headers section, provide the authentication details for the external API. Typically, the third-party system will give you an API Key and an API Value once you have an API account. Insert those details in this section and the click the Add Pair button. If you need to remove your API headers after adding them, simply click the button, otherwise if you want to edit them you can click the button.
Important
HTTP headers are key-value pairs sent in an HTTP request or response to provide additional information about the request or response. They play a crucial role in API communication, as they can convey metadata, authentication details, and other essential information.
In the context of Mailytica, you need to provide specific HTTP headers for authentication purposes when connecting to an external API.
For more information about HTTP headers, visit the Mozilla Developer Network’s HTTP Headers documentation.
Next, in the JSON Payload field, provide a JSON payload template that includes placeholders for the metadata you want to use in the HTTP request. To insert metadata into the payload, use curly braces
{}with the metadata variable name inside. These placeholders will be replaced with the actual metadata values during execution time.For example, if you want to create a new item in an external system and include the customer’s email address, you can use the following JSON payload template:
{"email": "{emailAddress}"}.During execution time,
{emailAddress}be replaced with the actual email address. This approach allows you to dynamically include email metadata in your API requests.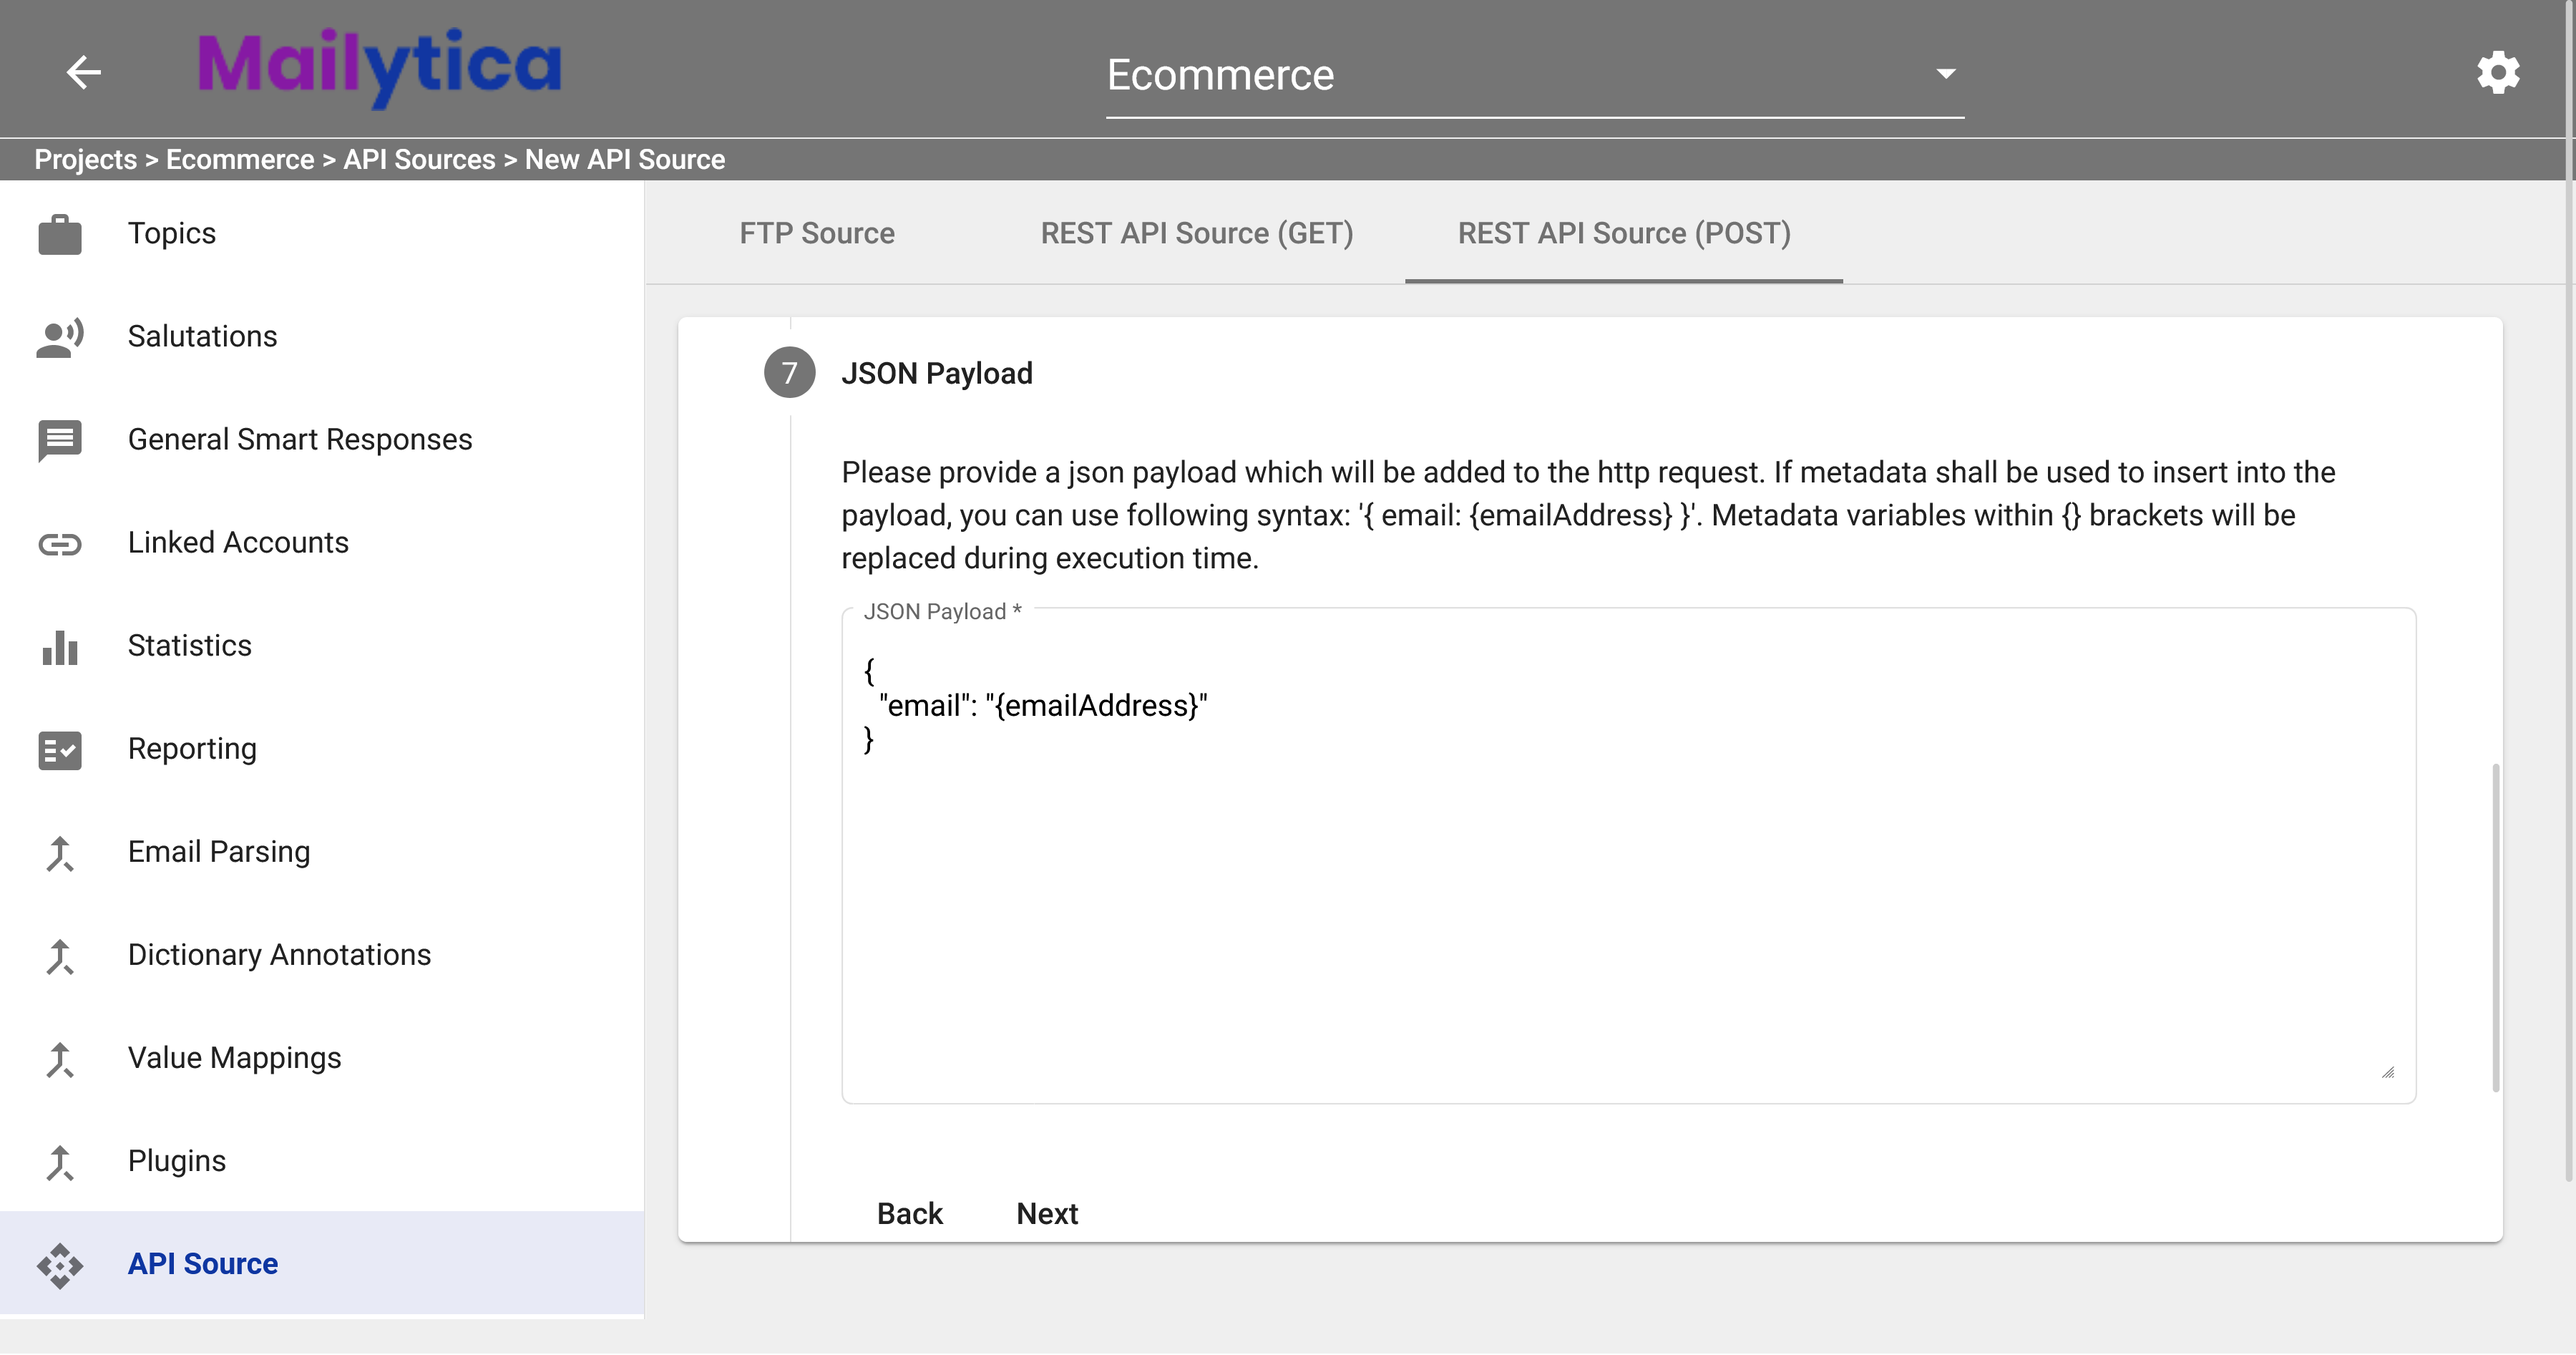
Finally, in File Encoding, specify the encoding for your source files. We recommend leaving the default value of UTF-8, as it’s more likely to work work on most systems without errors or problems.
Click the Add button to connect your new API source to Mailytica.
API Data#
Once you have successfully established an API connection as outlined in the API Source section above, it’s time to configure Mailytica to access and manipulate external data.
To do this, follow these steps:
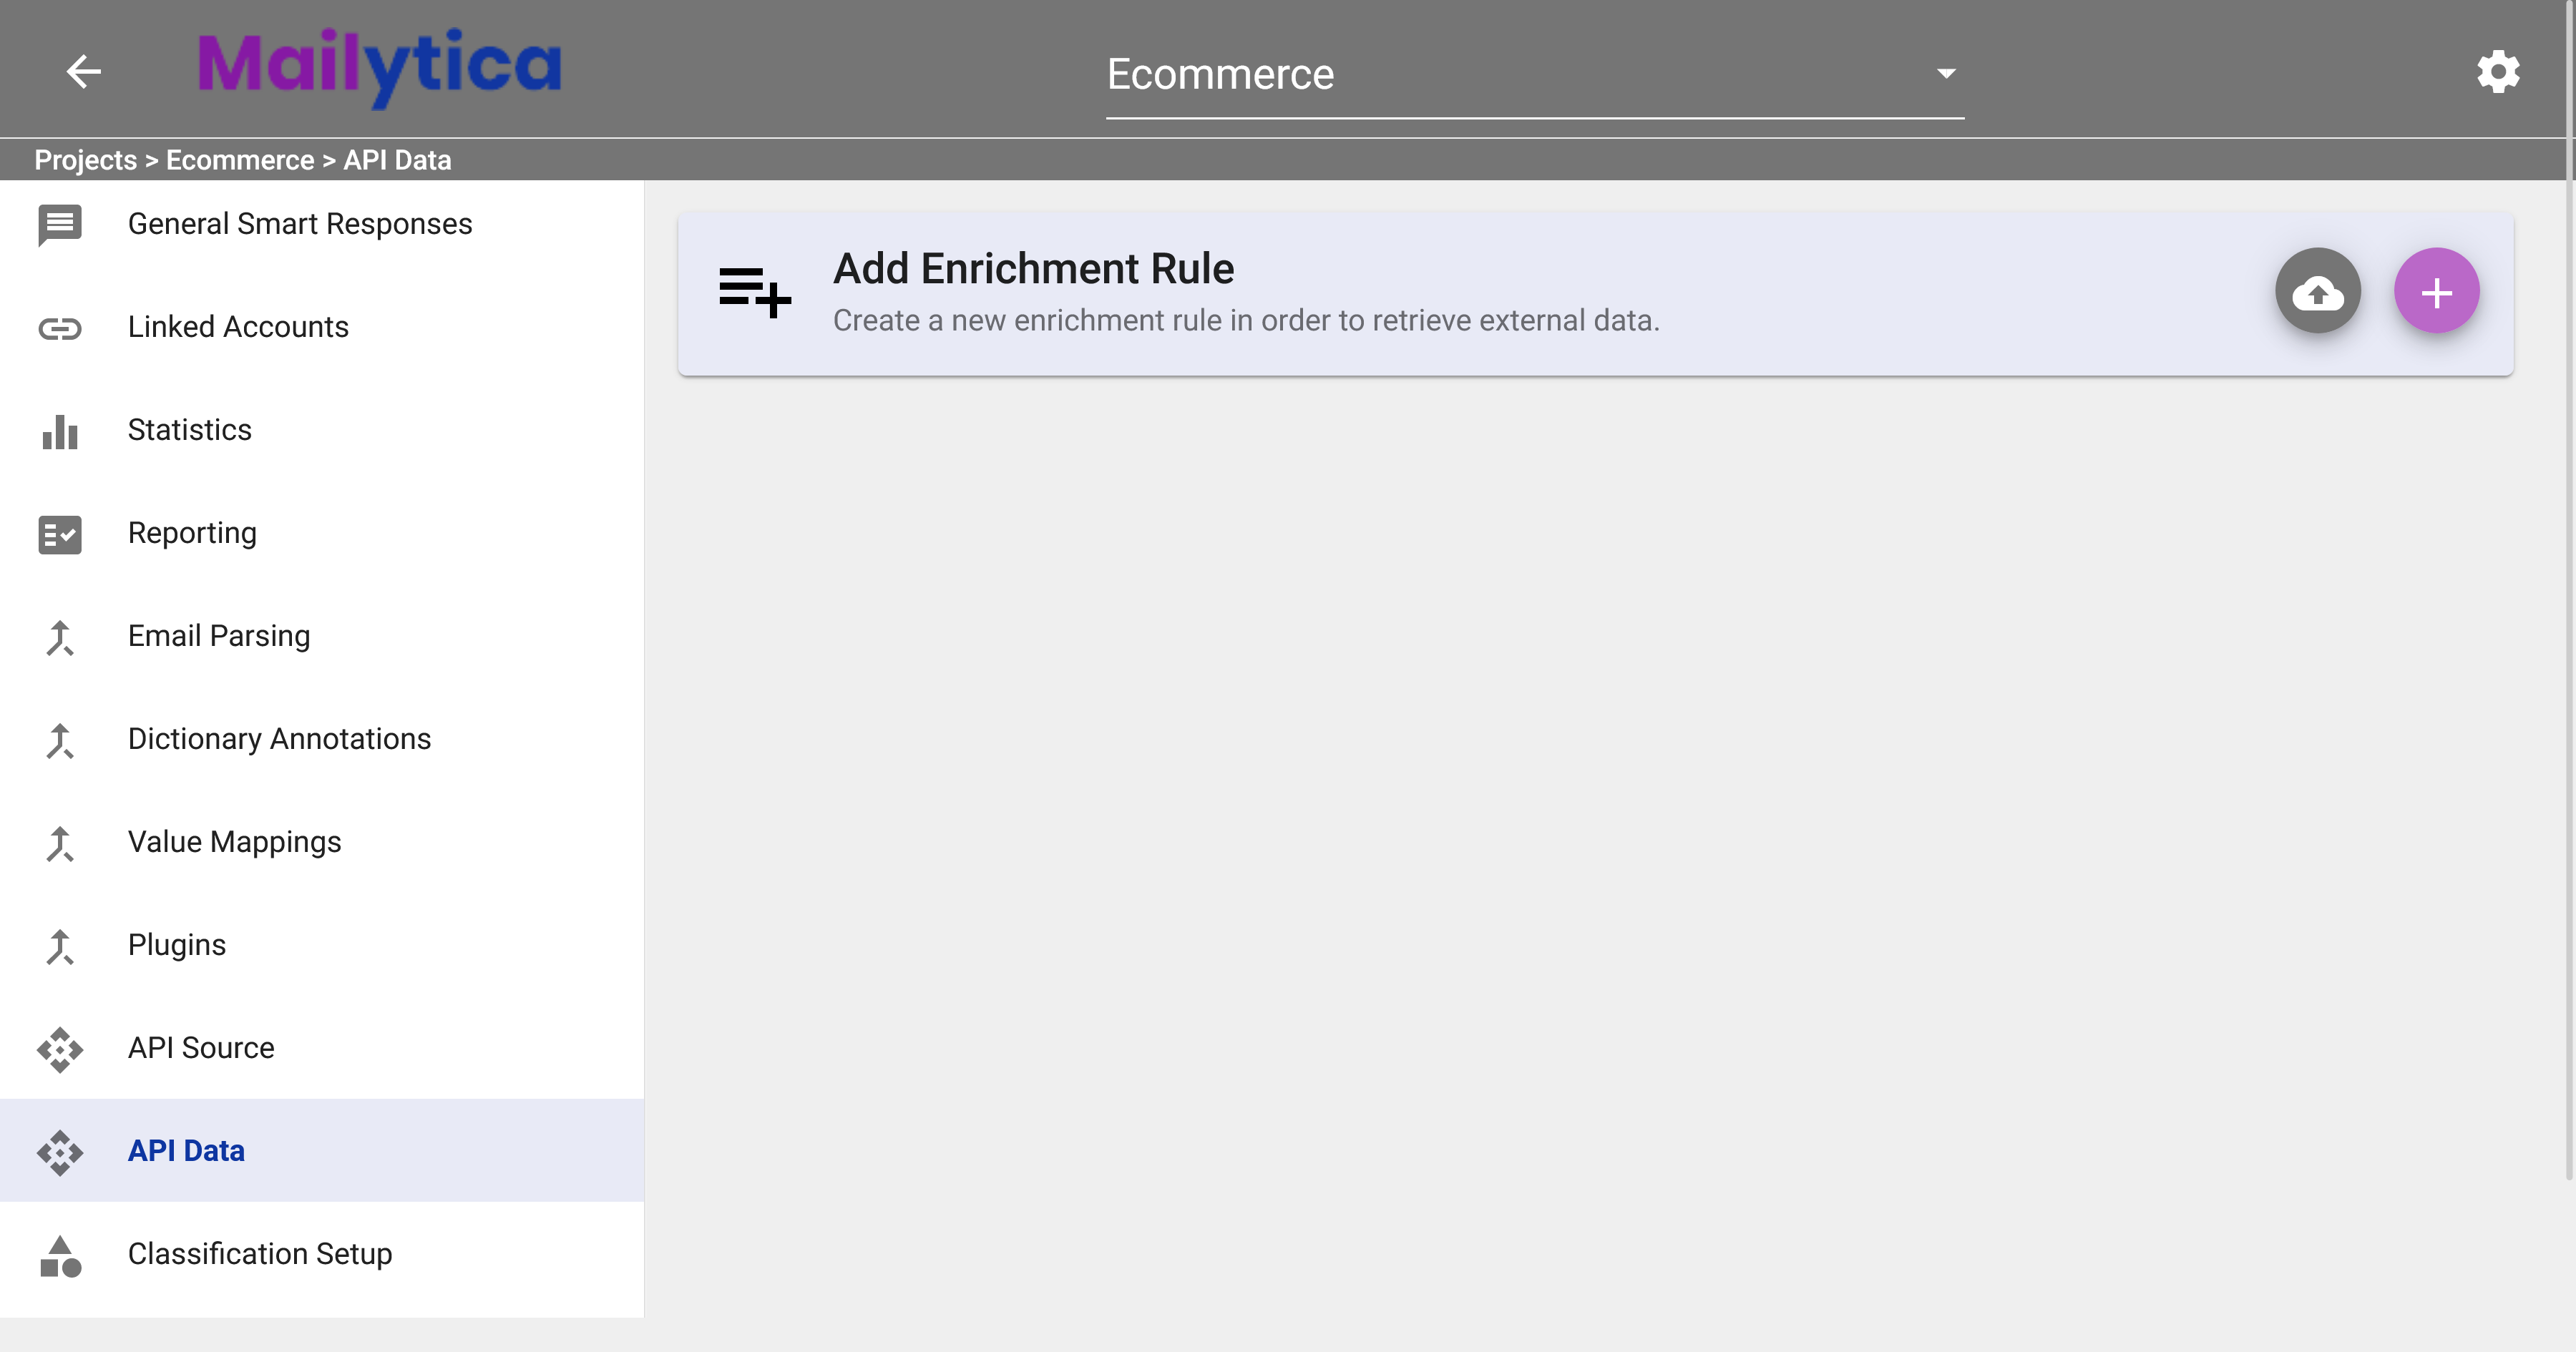
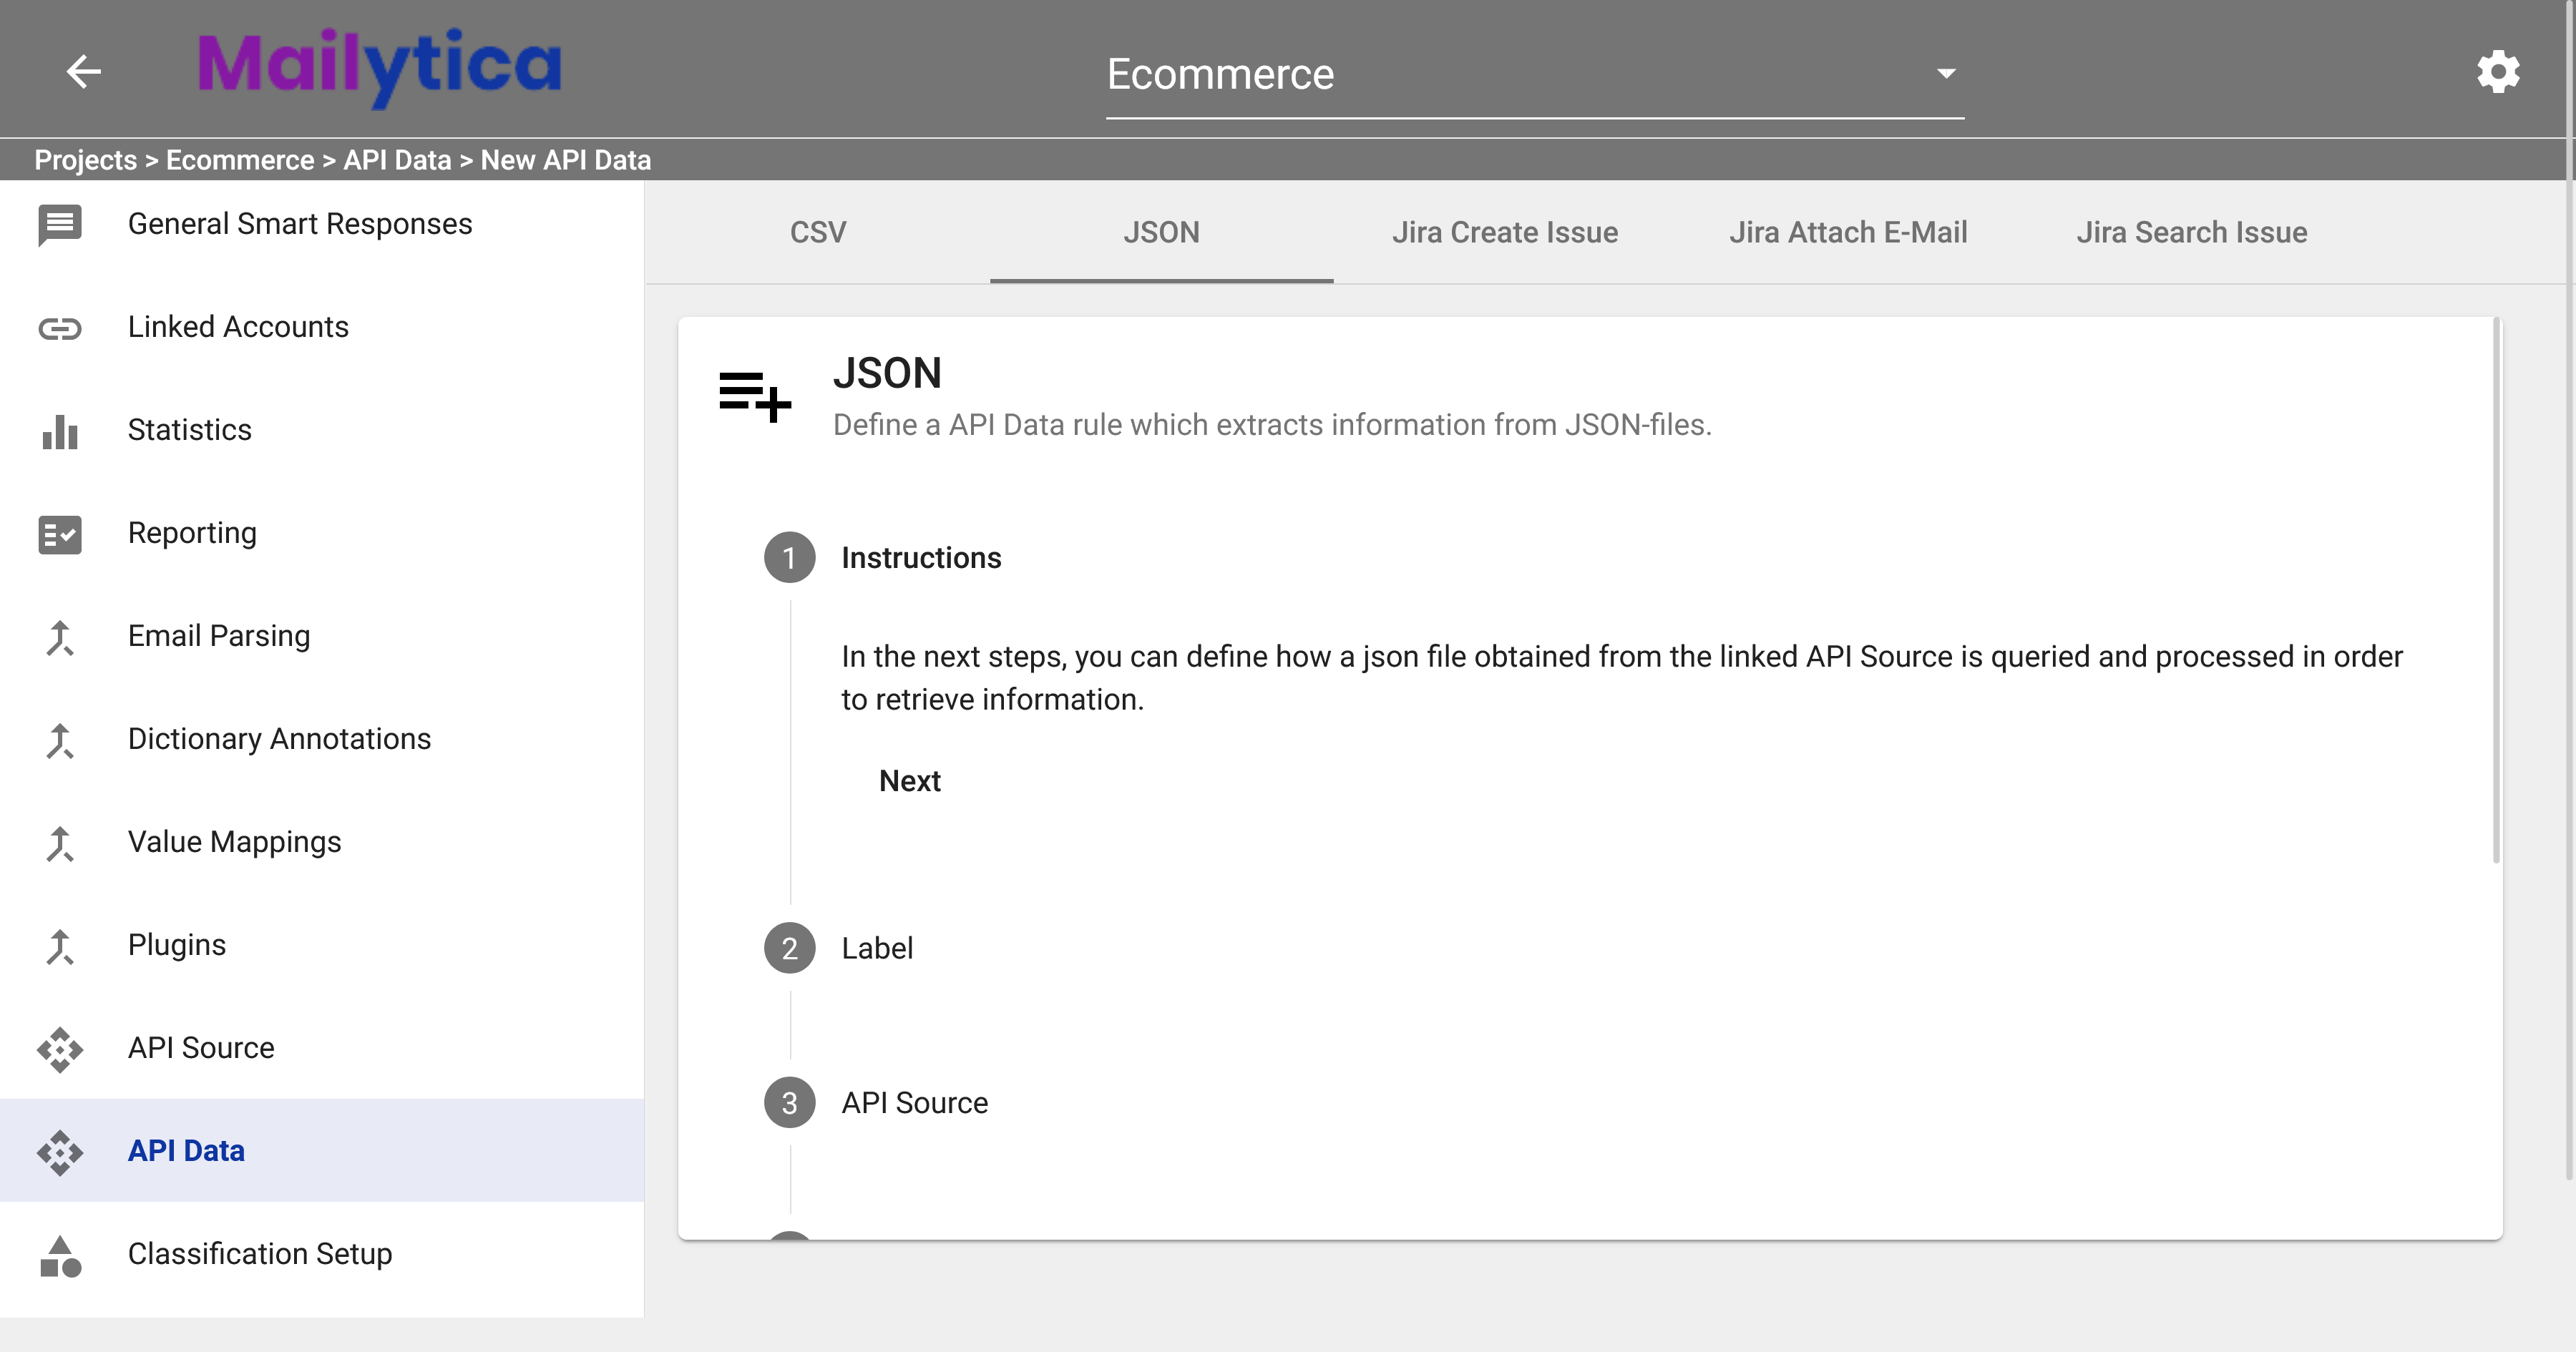
Start by selecting your project and clicking on API Data in the left-side menu, and then selecting Add Enrichment Rule. To access external data for a specific topic only, click the Edit button next to the topic you want to modify, choose API Data from the top tab bar, and then click Add Enrichment Rule.
Choose JSON from the top tab bar. The JSON screen will display instructions for defining an API data rule that extracts information from JSON files.
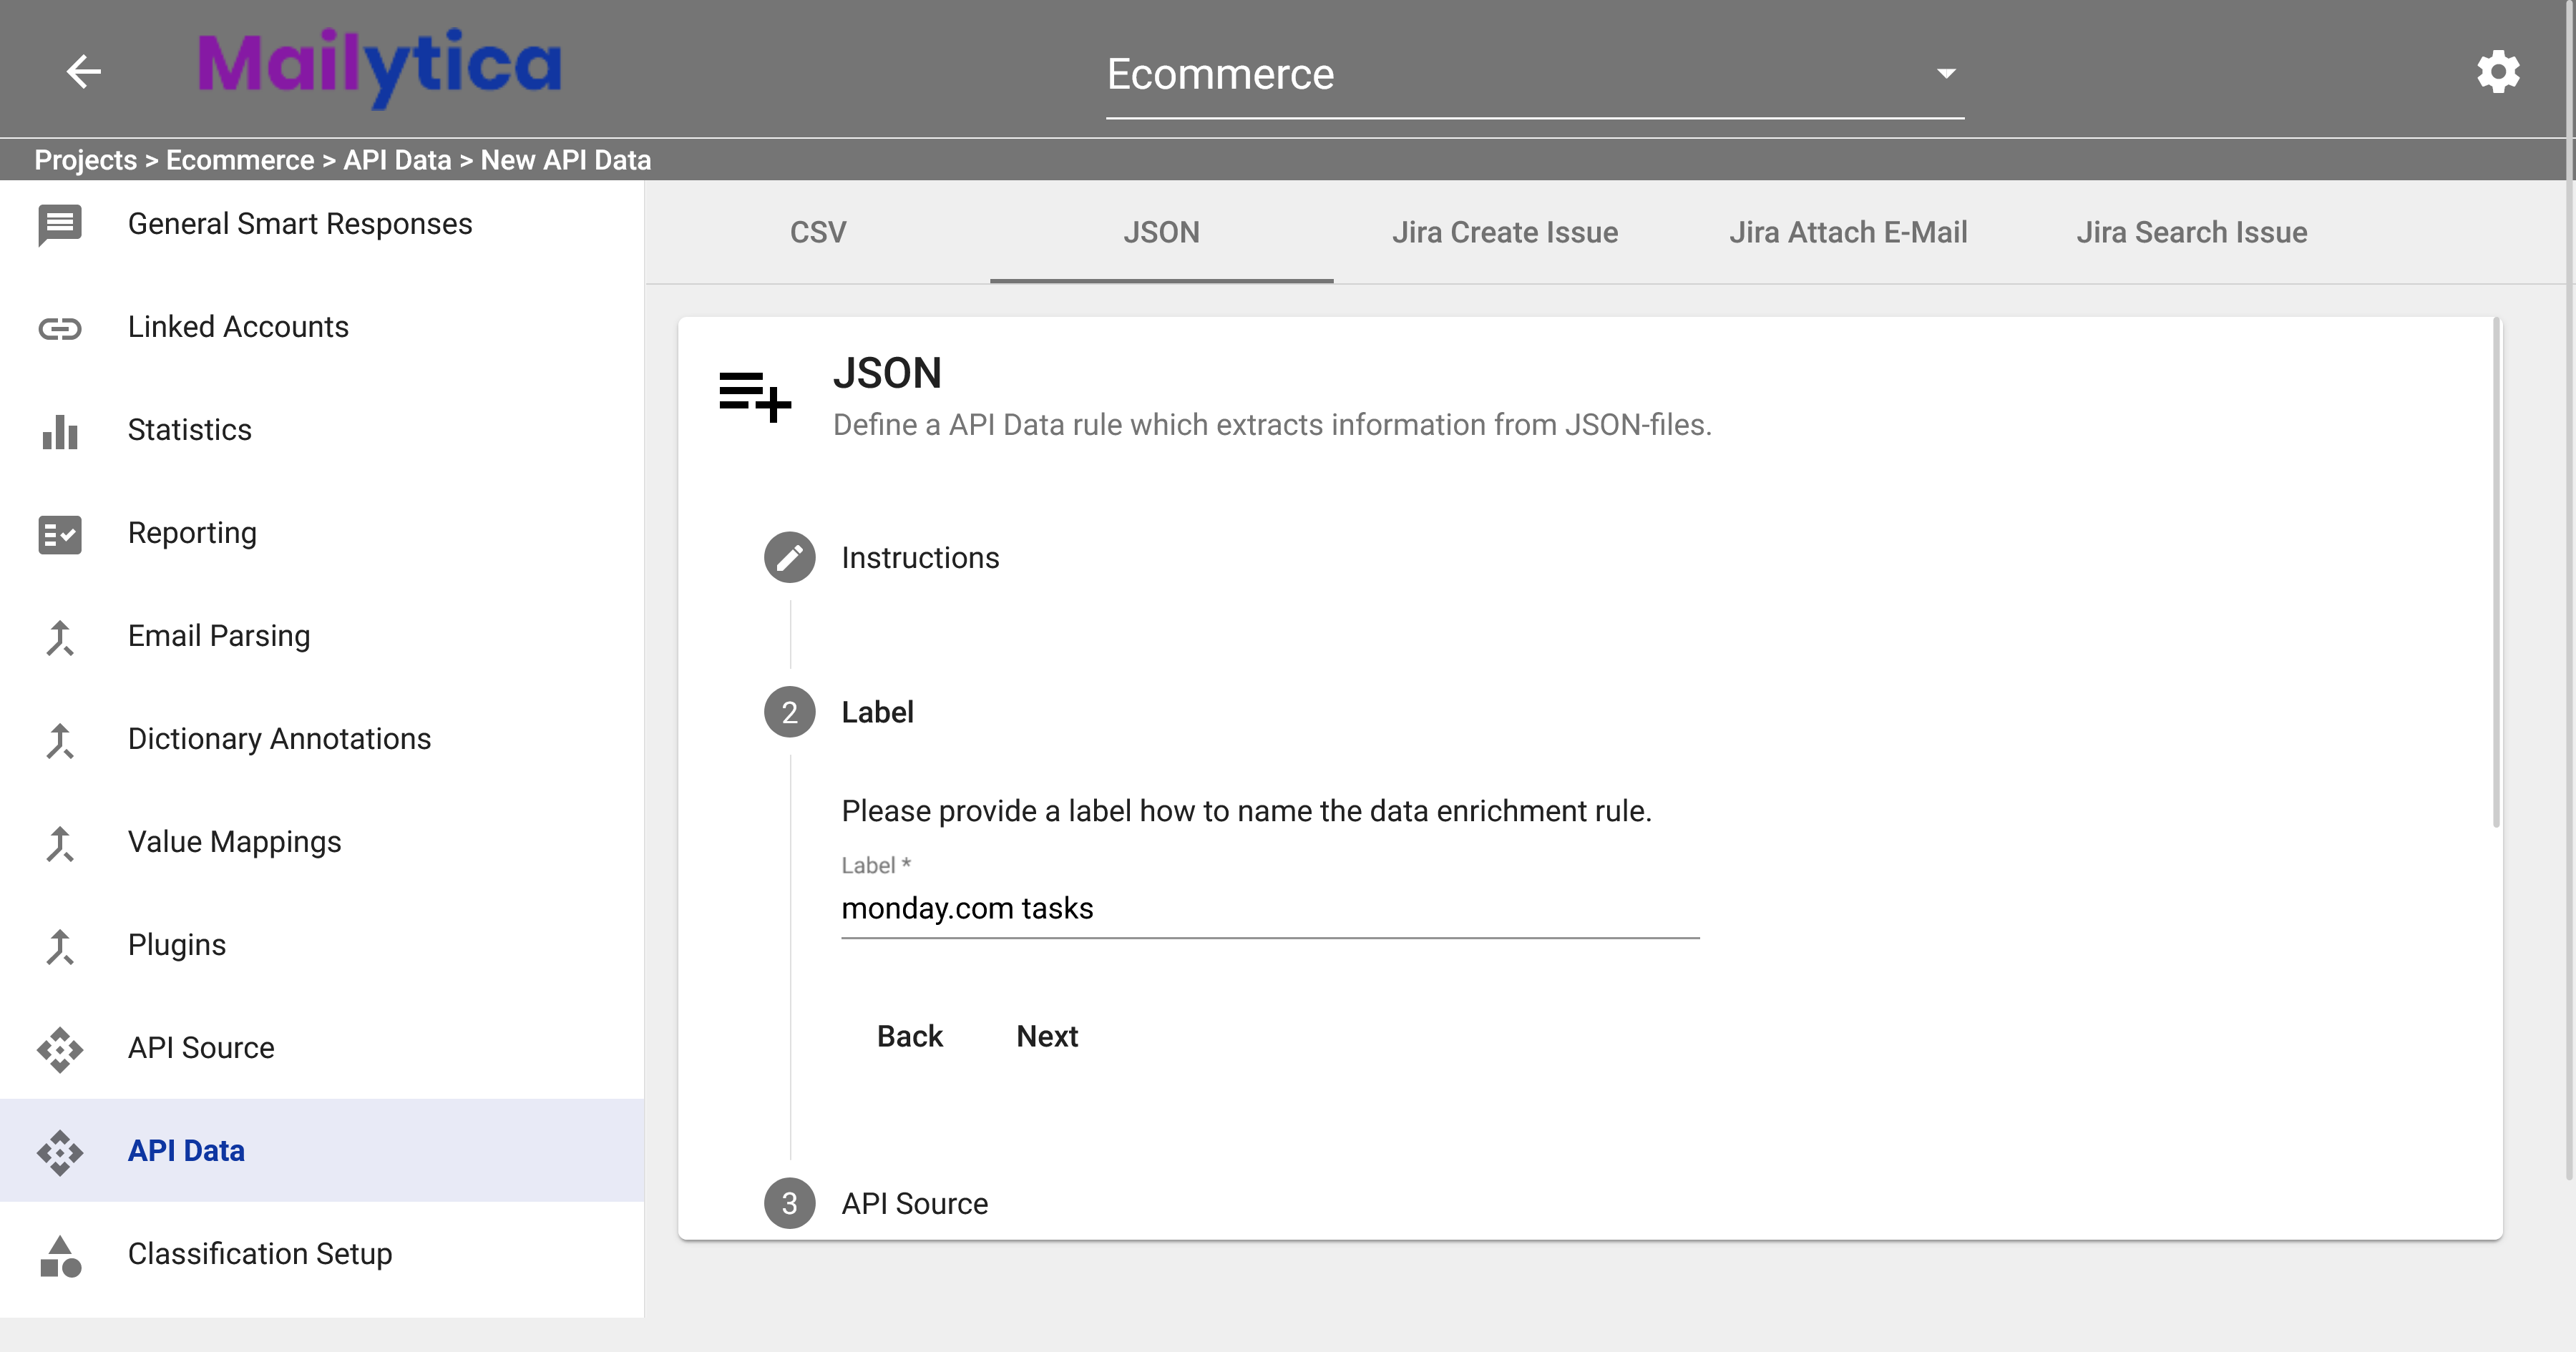
Next, in the Label field, provide a descriptive label for your API Data rule, clearly indicating the type of data you will be working with. For example, if you’re setting up a connection with monday.com’s API to extract tasks assigned to a specific user, you could label this API data rule as monday.com tasks.
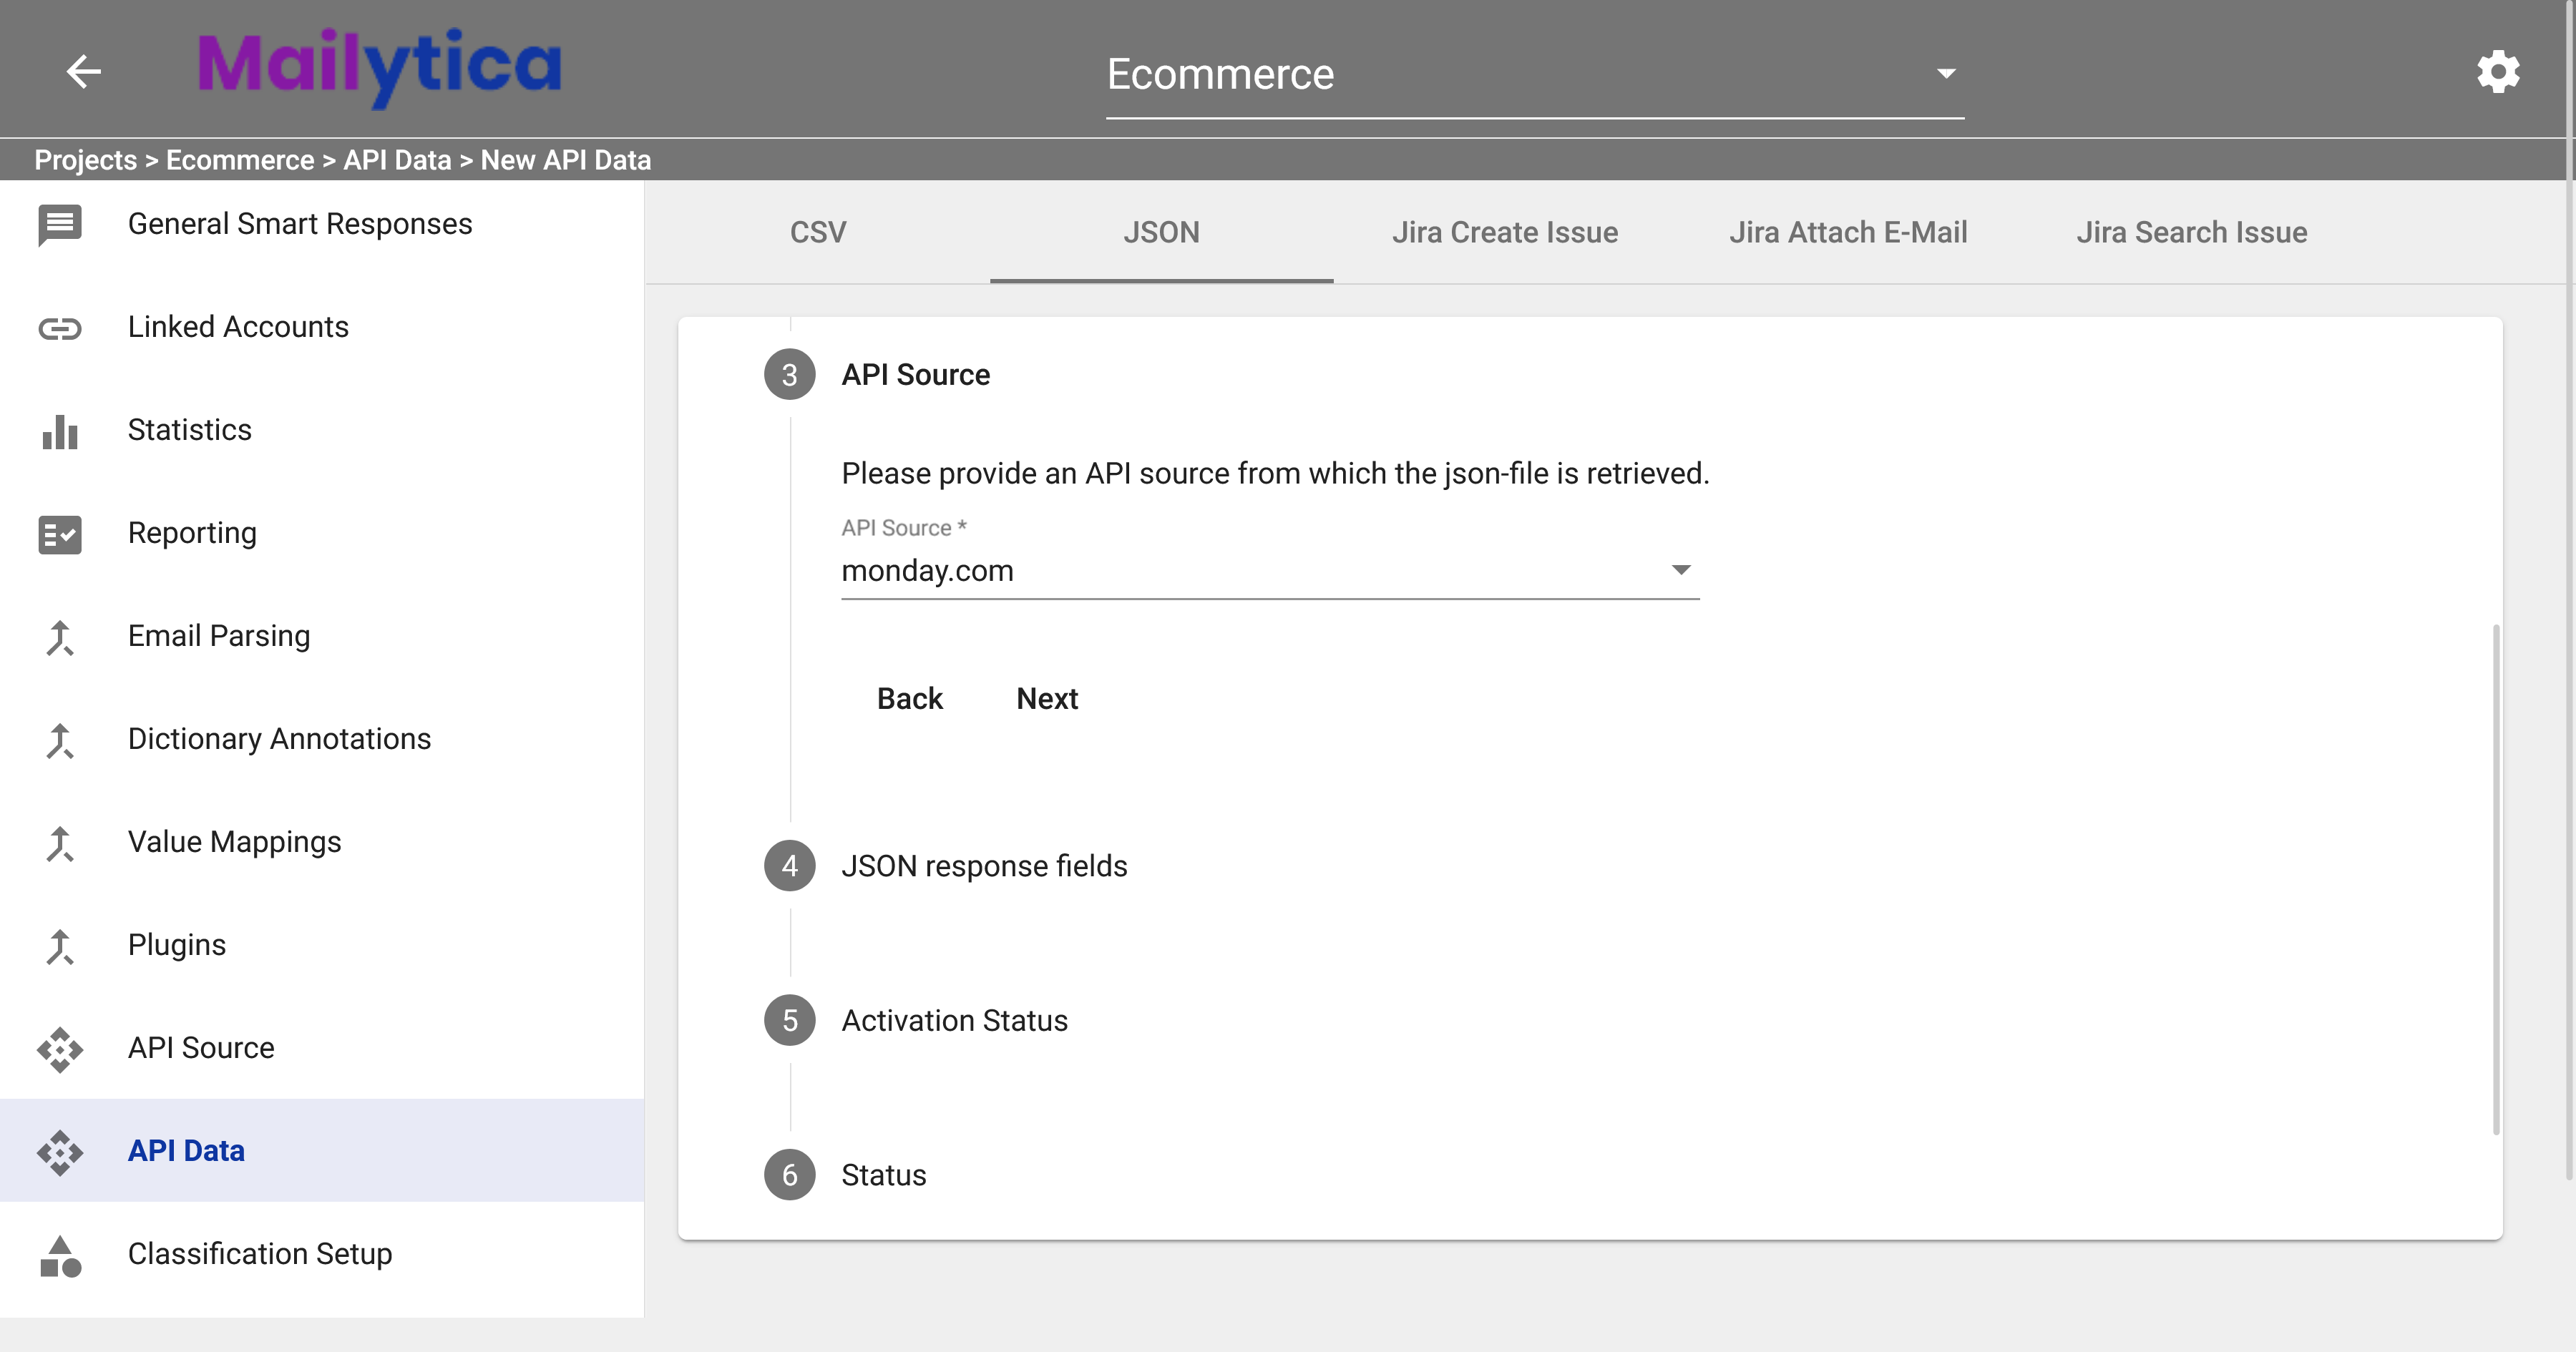
Then, in the API Source field, choose from the dropdown list the API connection that you have previously established, as explained in the API source section.
In JSON Response Fields, define one or more JSON fields containing the data of interest. For example, in the case of monday.com’s API, if you want to extract tasks, we need to use the following JSON response field:
$.data.boards[0].items.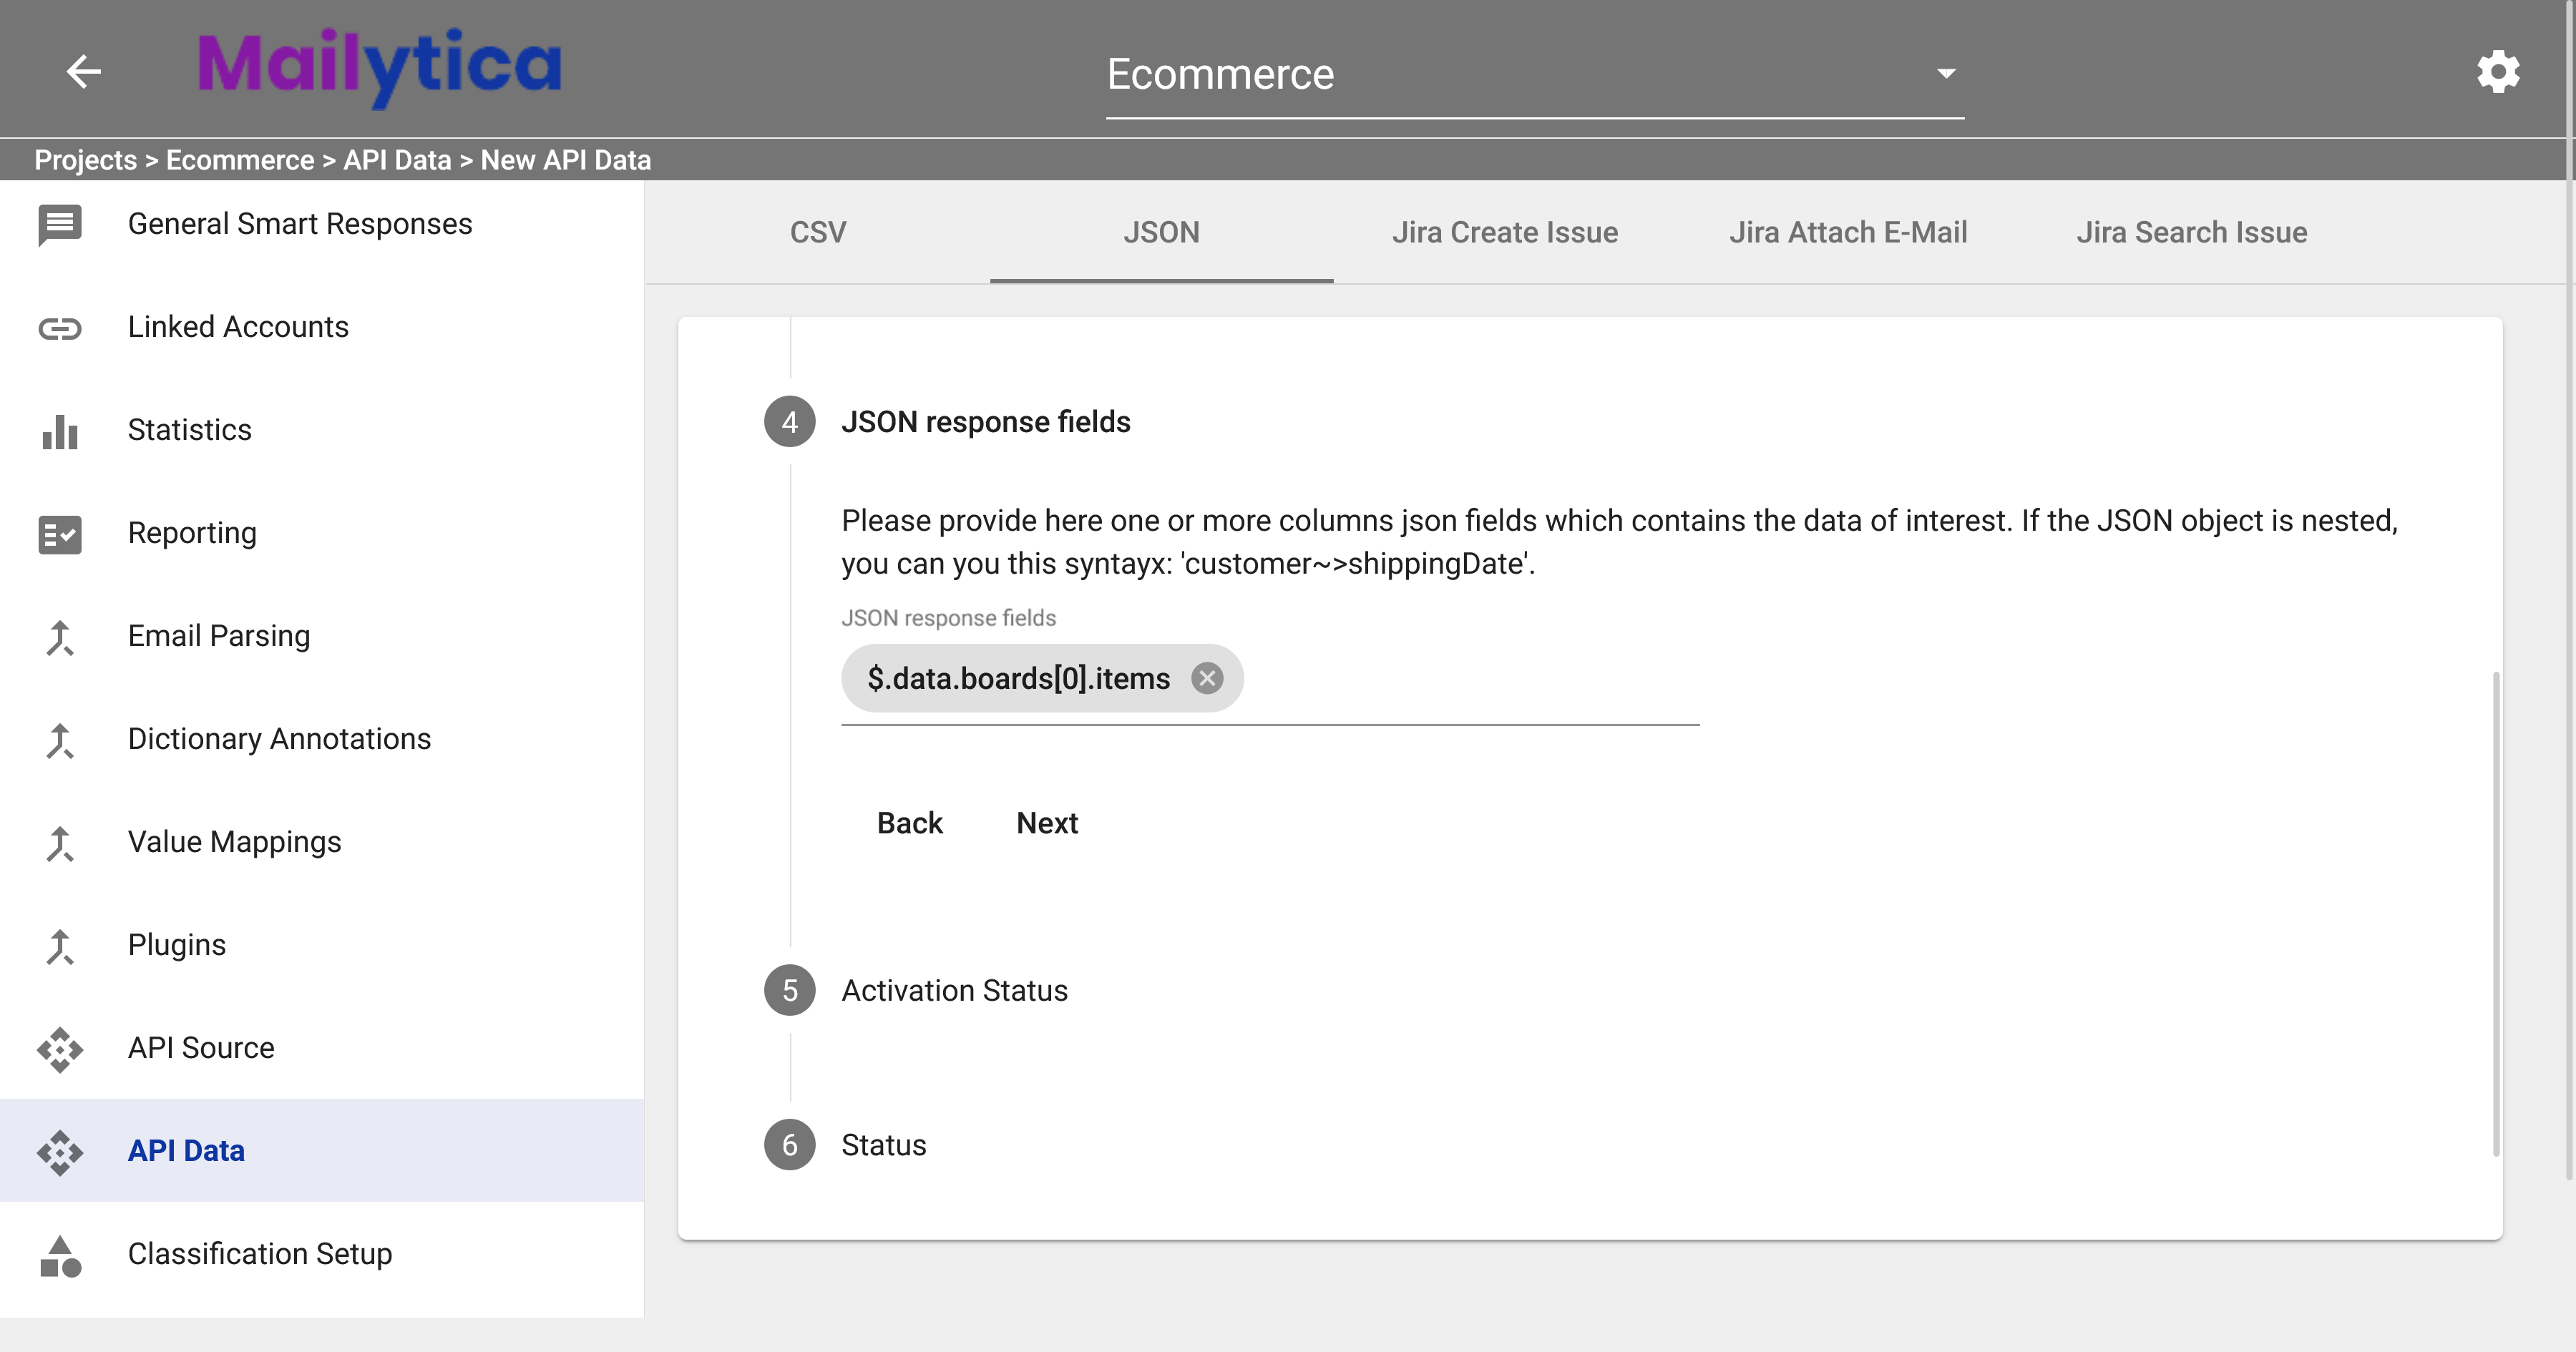
Important
To access JSON columns, Mailytica uses JSONPath expressions. In the case of the
$.data.boards[0].itemsexpression, the dollars sign ($) refers to the root object, followed by each key separated by a dot (.). The square brackets are used to denote the position of the value you want to access. However, if the JSON object is nested, you can use this syntax:data~>boards[0].For example:
JSON data: {“customer”: {“name”: “Anne Jones”, “age”: 30}}
JSONPath expression: $.customer.name
Result: Anne Jones
To learn more, visit: https://www.baeldung.com/guide-to-jayway-jsonpath
Following, in the Activation Status field, you can determine when this API data rule will be executed by choosing one of the following options:
Background Prediction: Select this option if you want the rule to be triggered when Mailytica classified an email with the current topic. For example, if you have a rule that fetches task data from a project management API, this option will execute the rule automatically when an email is classified under the relevant topic.
User Action: Choose this option if you want the rule to be triggered when the user clicks the corresponding button in their email client. For instance, if you have a rule that retrieves customer information from a CRM API, this option will execute the rule only when the user clicks a specific button in Mailytica’s Outlook Integration.
Predecessor: Select this option if you want the rule to be triggered when a specific predecessor rule has been executed, such as a previous classification or API call.
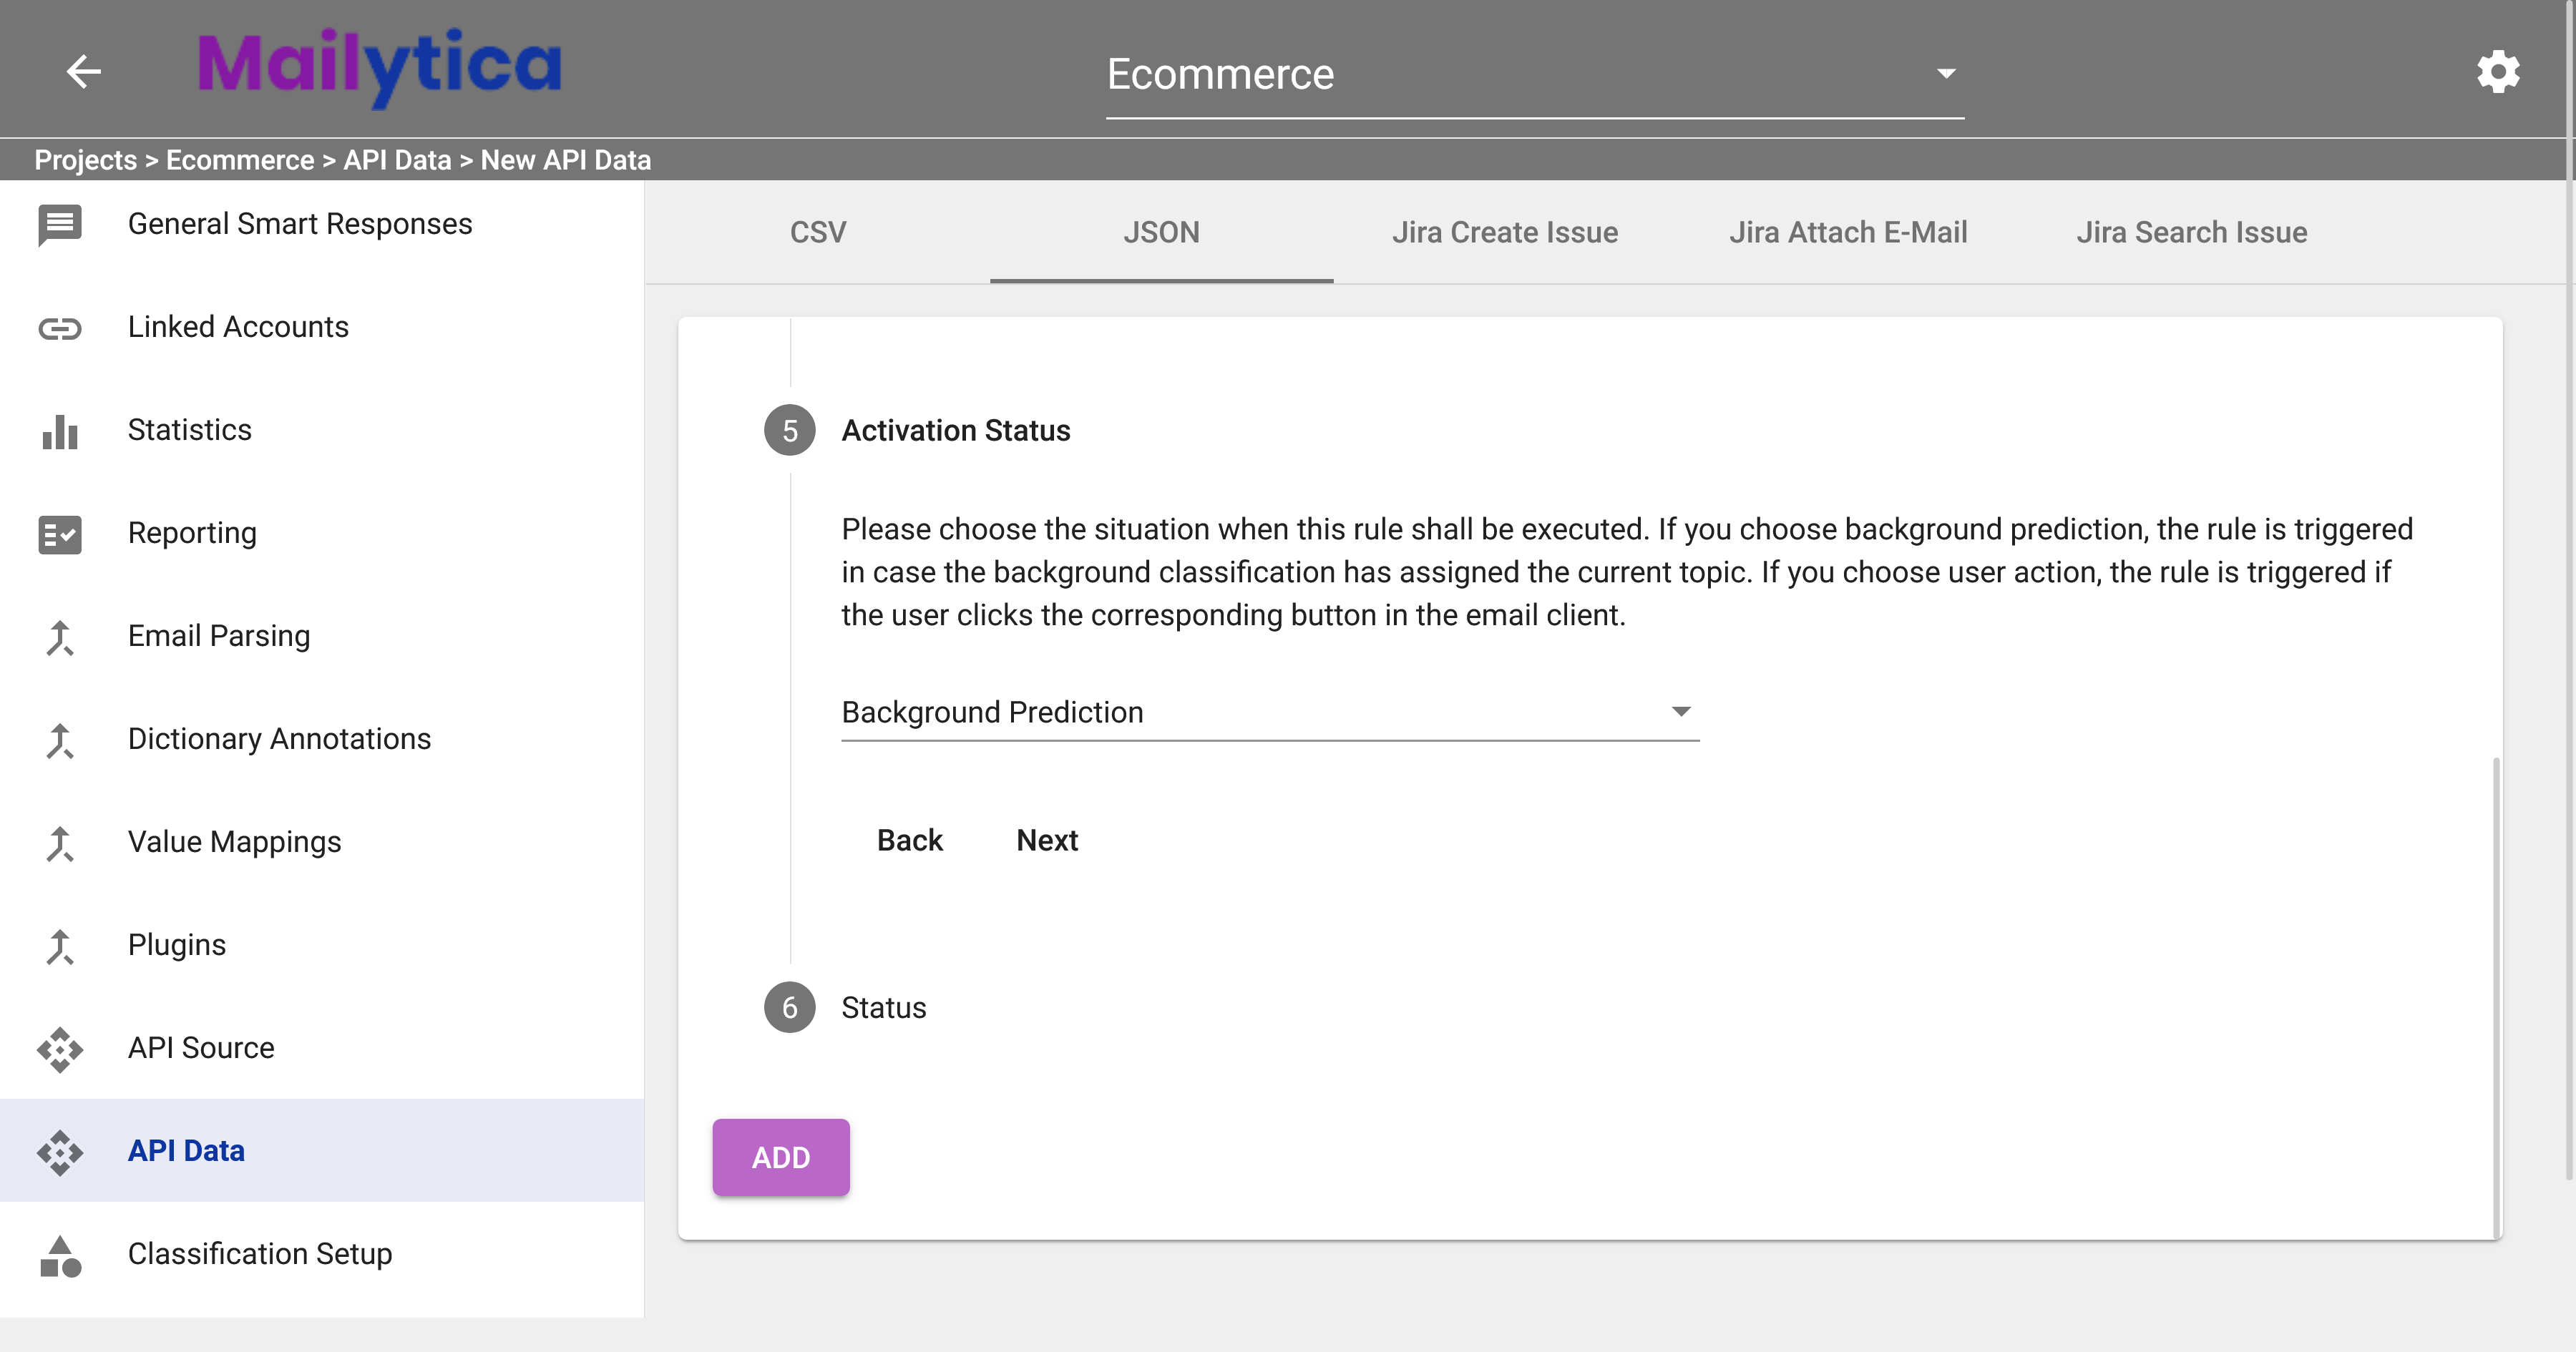
Finally, toggle the Active button in the Status section to activate your API data rule.
Click the Add button to add your new API Data Enrichment Rule to Mailytica.
Important
Remember to refer to the API documentation of the external service you’re connecting to for specific details and examples on how to extract the required data.
Tip
In addition, you can also import and export API enrichment rules between Mailytica accounts.
Export: To export an API enrichment rule, navigate to your enrichment rule list. Expand the title box of the enrichment rule you want to export, then click on the Export button. The enrichment rule data will be immediately downloaded to your local computer as a .zip file.
Import: When you want to import the previously exported enrichment rule, return to your list and click on the button at the top of the page next to Add Enrichment Rule. Locate and select the .zip file you exported earlier. The Mailytica enrichment rule, along with all its contents, will be imported into your new account. This feature makes it easy to transfer enrichment rules between accounts and collaborate with team members.
Using API Data in Mailytica’s Workflow#
Once you’ve connected an external API source and extracted the data that you wish to use inside Mailytica, it’s necessary to establish which features will be used for integrating your API data.
For instance, API data can be integrated into various Mailytica features, such as:
Smart Responses: Dynamically add personalized information to email responses using API data as variables.
Email Forwarding: Forward messages to specific employees or departments based on the extracted API data.
Folder Destinations: Create rules to organize your inbox into folders and subcategories using API data.
Let’s take a closer look at how we might use API data with Mailytica:
Example
Consider this scenario:
A manager sends an email to another department requesting an update on a specific task. With monday.com’s API data, you can conveniently view the current task status directly within your email client. Alternatively, Mailytica can forward the email to the person responsible for the task, ensuring timely communication and updates.
First, establish an API connection, as explained in the API source section. For example, we can connect to monday.com’s API to extract task details such as the task description, deadline, and department responsible. In this case, we’ll use the API to extract information about the task and store that data in variables named task_owner_name and task_description.
Then, simply create a new Email Forwarding Rule called Task Updates. Include the task_owner_name variable in the email field and personalize the email text to better address each recipient.
To use your API variables, simply enclose their names in curly brackets
{}as shown in the image below.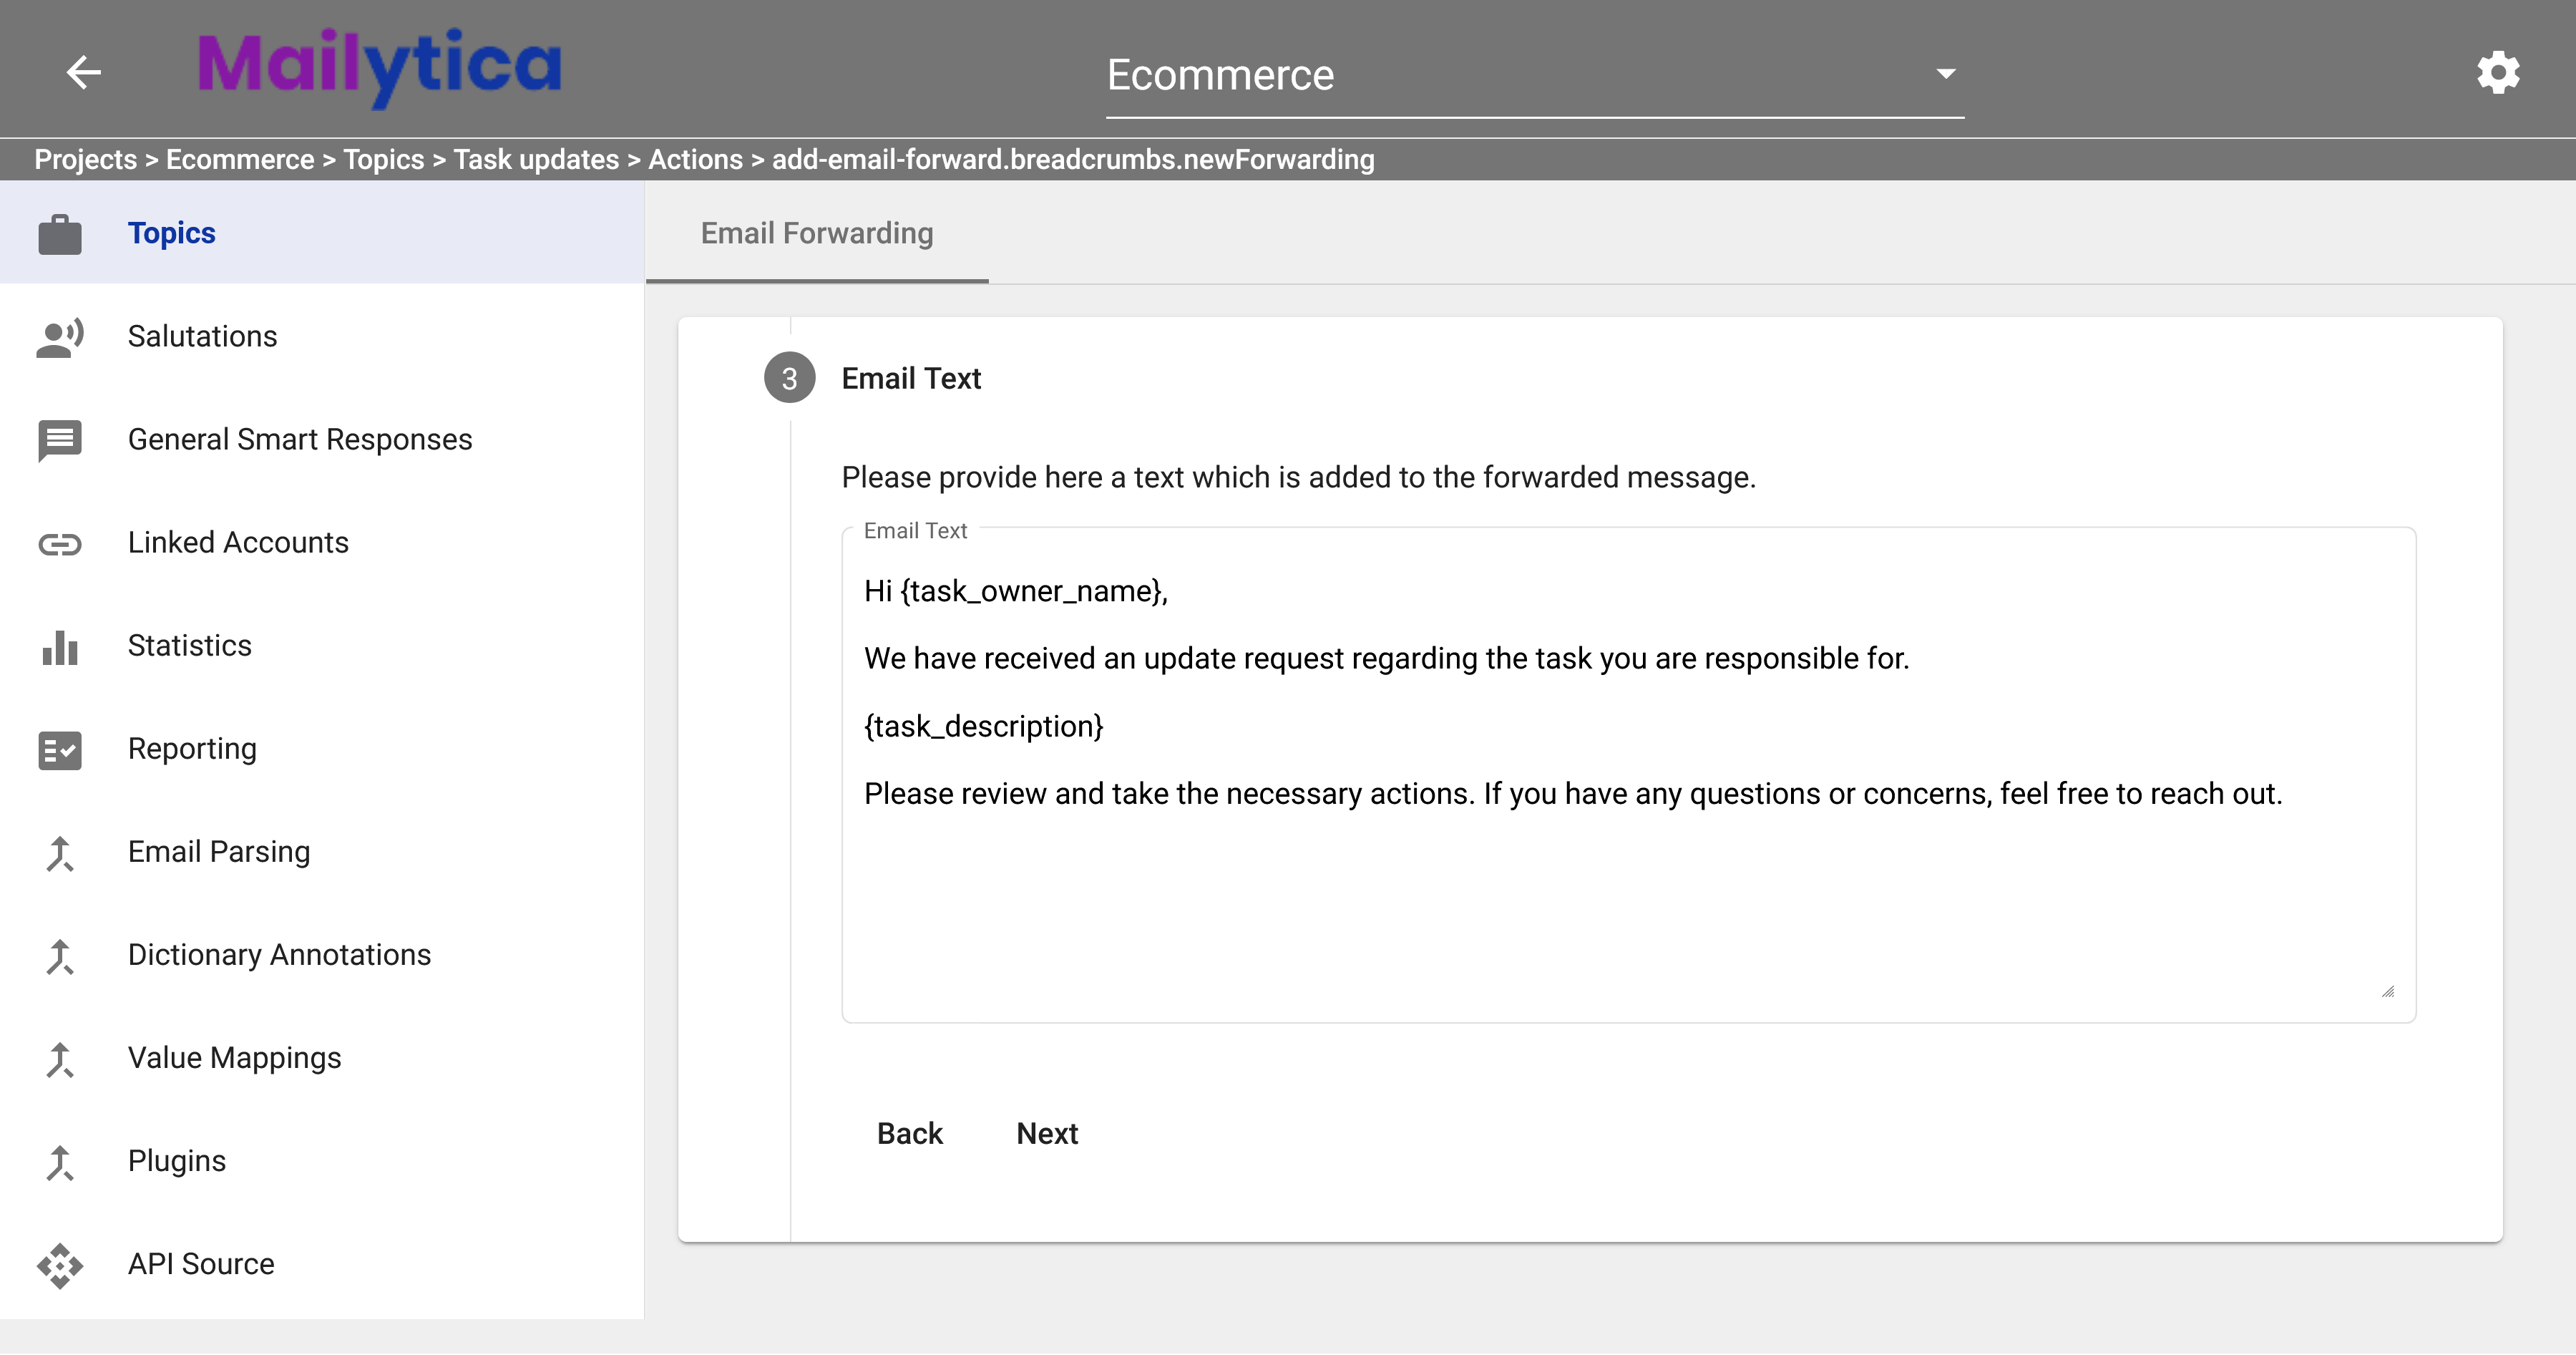
Then, you will be able to use your external API data directly into your email client of choice, providing a better email experience for your customers and team members.
JSON Path#
JSONPath is a query language used to access data within a JSON document. Mailytica uses JSONPath expressions to locate and extract information from JSON columns when working with third-party APIs.
JSONPath Fundamentals#
JSONPath allows you to navigate and access specific data in a JSON document, using a standardized set of operators and symbols:
$represents the root of the JSON document..or[]are used to access a child element or sub-element (e.g.,.childor['child']).Array indices are specified within brackets (e.g.,
[0],[1], etc.).[*]can be used to access all elements in an array.The colon
:allows indexing a range of elements in an array (e.g.,[0:2])Filter expressions
[?()]use brackets and the?operator to specify conditions (e.g.,[?(condition)])@within a filter represents each individual element in the array.Conditions can be tested using comparison operators (
==,>,<,>=,<=). String values should be enclosed in single quotes'', while numeric values are not. For example,$.items[?(@.color=='red')].
Learn more
For more information about JSONPath expressions, please visit this website: Guide to JSONPath
Using JSONPath in Mailytica#
When Mailytica receives data from an API, the desired information can be extracted using JSONPath expressions in this process:
Examine the API response and identify the information you wish to access, whether nested within other objects or in arrays.
Create the JSONPath expression by beginning with the root symbol $ and moving through the data structure.
Apply the appropriate operators and symbols to access the elements, array indices, or specify filter conditions.
For instance, consider this JSON document containing employee data:
{
    "teamMembers": [
        {"firstName": "Max", "lastName": "Davis", "role": "Developer"},
        {"firstName": "Anna", "lastName": "Meyer", "role": "Designer"},
        {"firstName": "Julia", "lastName": "Schmidt", "role": "Manager"}
    ]
}
Some JSONPath expressions for this data include:
$.teamMembers[*].firstNameto access all first names.$.teamMembers[1]to access the second team member object.$.teamMembers[1].lastNameto access the last name of the second team member.$.teamMembers[?(@.lastName=='Davis')]to filter team members with the last name Davis.
In the next example, we will extract order data from Shopify’s API using Mailytica. First, we need to set up the REST API Source (GET) connection with our Shopify account. For instructions on how to do this, please refer to the REST API Source (GET) documentation.
After setting up the API connection, follow these steps:
Navigate to API Data, click on Add Enrichment Rule, and select JSON to create a new JSON API data rule, which we will label as Order ID.
From the dropdown, select the API Shopify connection as the API Source.
Then, in the Response Fields section, use JSONPath expressions to extract the desired data. Some examples are:
$.orders[0].fulfillment_status: Get the fulfillment status of the first order.$.orders[0].id: Retrieve the ID of the first order.$.orders[0].fulfillments.length(): Obtain the number of fulfillments for the first order.$.orders[0].fulfillments[*].tracking_numbers[*]: Access all tracking numbers of all fulfillments for the first order.$.orders[?(@.fulfillment_status=='fulfilled')]: Filter orders with a fulfillment status of fulfilled.$.orders[?(@.created_at>='2021-01-01')]: Filter orders created on or after January 1, 2021.$.orders[?(@.total_price>50)]: Filter orders with a total price greater than 50.
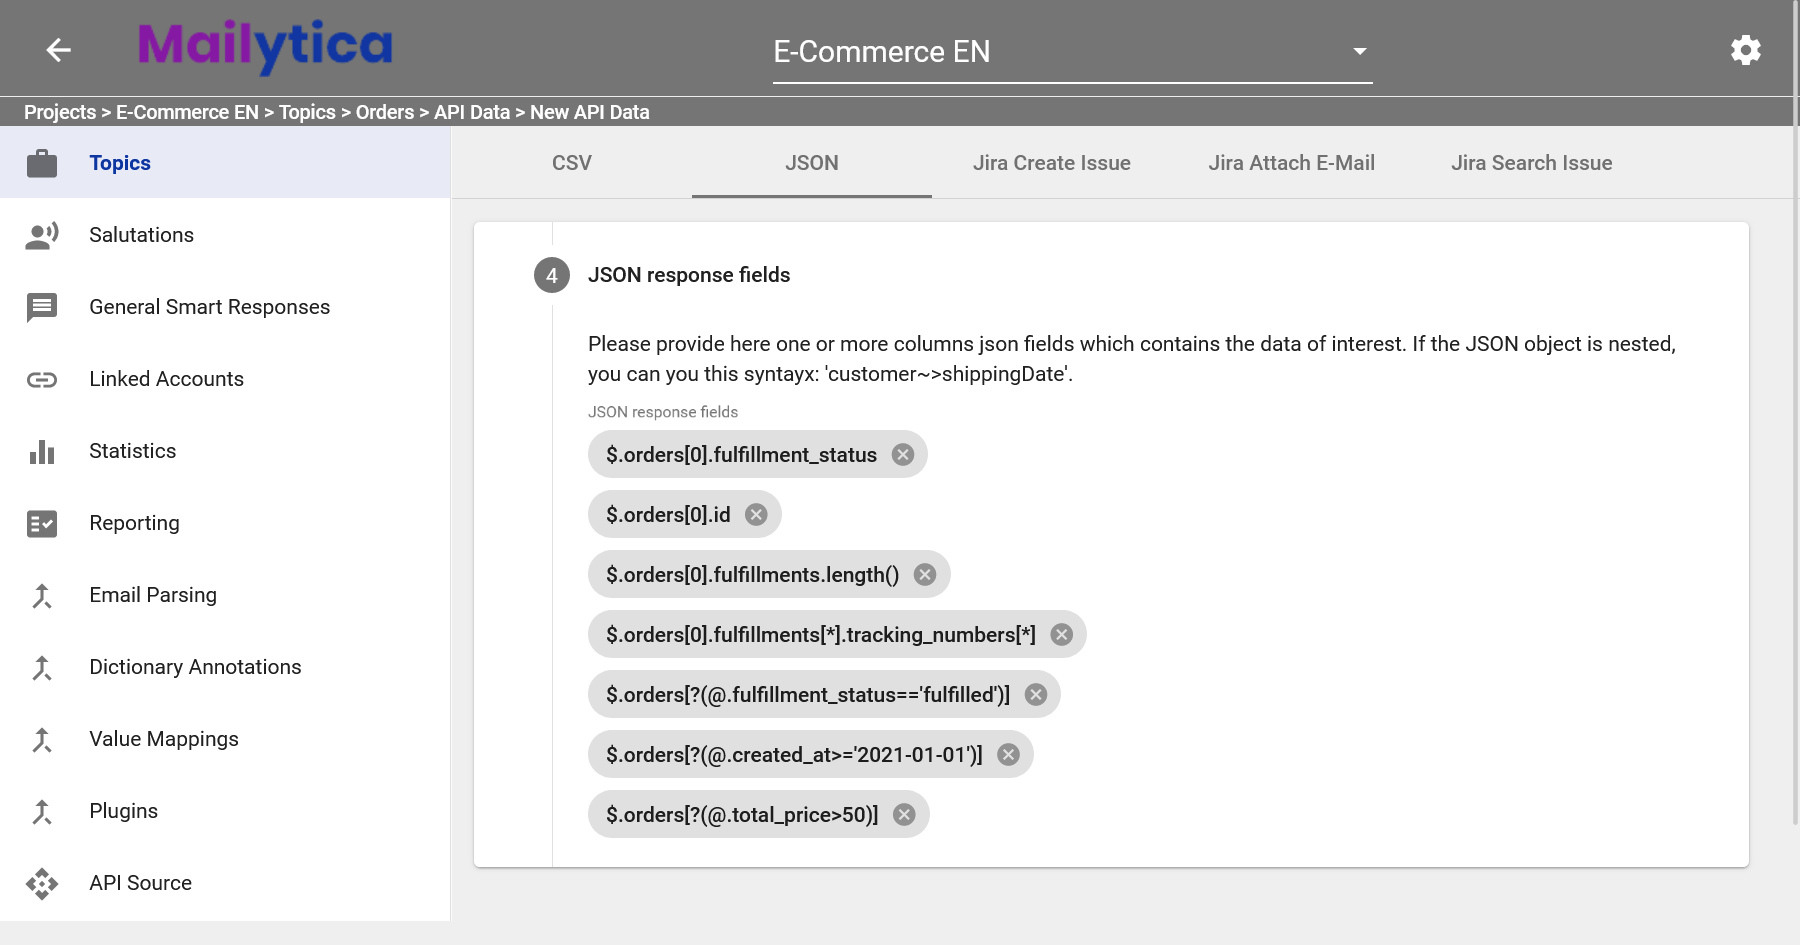
Finally, click Add to set up your parsing rule. This rule allows Mailytica to understand and extract specific order information from Shopify’s API, based on the incoming emails you receive.
Tip
When using JSONPath with Mailytica, it is important to remember:
JSONPath expressions are case-sensitive.
Be attentive to the structure of JSON objects and arrays, and consider how elements are nested.
For assistance with constructing JSONPath expressions, consider using an online JSONPath tester like jsonpath.com.
Troubleshooting API Issues#
If you encounter issues with your API connection in Mailytica, try the following:
Verify your API credentials and ensure they are entered correctly.
Check the external API’s documentation for any specific requirements or restrictions.
Review your API connection settings in Mailytica, especially the webservice URL and http headers.
Test that the data is being extracted using Mailytica’s built-in Test Area or an external API testing tool such as Postman.
Important
If you continue to experience issues, consult Mailytica’s support team for further assistance at support@mailytica.com.
APIs FAQ#
In this section, we will address some frequently asked questions (FAQs) related to using external APIs with Mailytica.
What is an API?#
An API (Application Programming Interface) is a set of rules and protocols that allows different software applications to communicate with each other. In the context of Mailytica, APIs allow you to connect external services and retrieve data to enhance your email communication processes.
How do I connect to an external API using Mailytica?#
To connect to an external API using Mailytica, first obtain the API credentials (API key and access token) from the external service you want to connect to. In Mailytica, navigate to API Source and follow the steps outlined in the API Source section.
Can I use multiple APIs with Mailytica?#
Yes, Mailytica supports connections to multiple APIs. You can create and manage multiple API connections in the API Source section of Mailytica’s Online Portal.
How do I use API data in a Smart Response?#
To use API data in a Smart Response, or with any other of Mailytica’s functionalities, first establish an API connection (see API Source) and extract the necessary data from the API (see API Data). Then, create a new Smart Response and include the variable in the message field by enclosing the variable name in curly brackets {}.
What are the API limitations?#
Mailytica’s API integrations are designed to be flexible and powerful. However, there are some limitations that will depend on the external API’s capabilities, rate limits, and data availability. Always consult the external API’s documentation to understand its specific limitations and requirements.